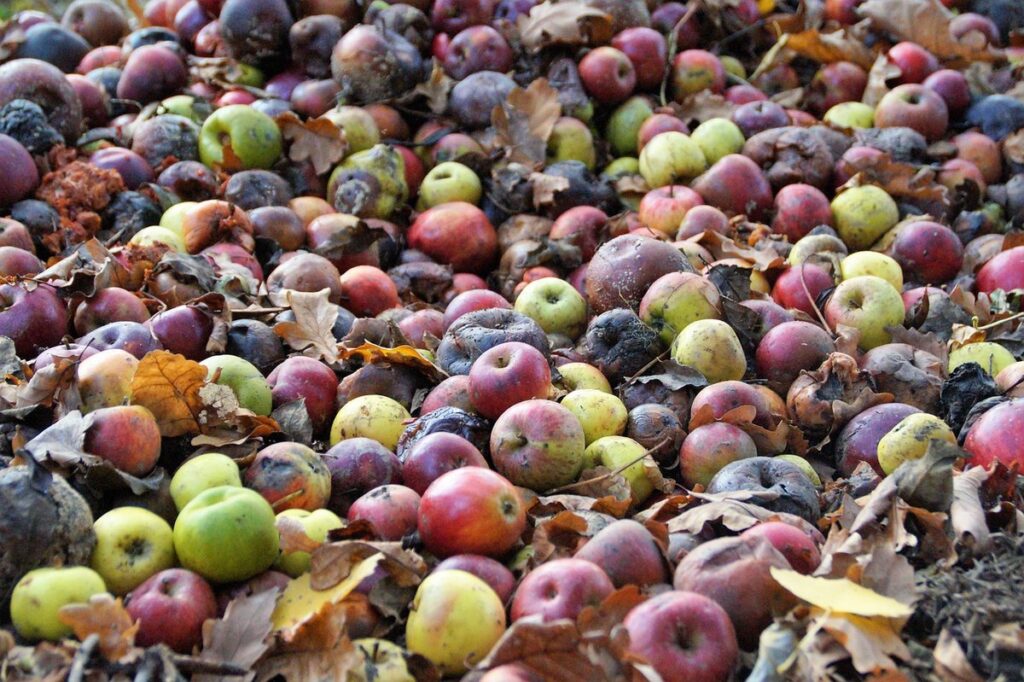
Are you tired of letting your yard’s fallen leaves go to waste? Not only do they take up space in your garden bed, but they can also contribute to an overwhelming amount of yard waste. But did you know that with a little effort, you can turn those discarded leaves into a nutrient-rich compost that will enrich your garden and reduce waste at the same time? Leaf mold compost is a game-changer for gardeners, providing essential nutrients and improving soil structure – all while keeping your yard tidy. In this article, we’ll walk you through the simple steps to create leaf mold compost from scratch, so you can start using it in your garden today.
What is Leaf Mold Compost?
Leaf mold compost is a type of nutrient-rich soil amendment that’s made from decomposed leaves, and it’s a game-changer for gardeners who want to create healthy, thriving soil. Let’s dive into what exactly leaf mold compost is!
Definition and Explanation
Leaf mold compost is a nutrient-rich soil amendment made from decomposed leaves. It’s essentially a slow-cooked blend of fallen foliage, broken down over time to create a dark, crumbly material that’s teeming with beneficial microbes and humic acids. To be considered true leaf mold, the mixture must be at least 90% oak or beech leaves, which provide the necessary acidity for decomposition.
The benefits of using leaf mold compost in your garden are numerous. For one, it improves soil structure and water retention, making it an ideal solution for dry, sandy soils. Leaf mold also serves as a natural fertilizer, releasing essential nutrients like phosphorus, potassium, and magnesium as they’re needed by plants. This slow release mechanism helps prevent over-fertilization, which can harm your garden’s ecosystem.
In terms of composition, leaf mold compost is typically 5-10% dry matter, making it easy to mix into existing soil without creating a clogged or anaerobic environment.
Importance of Leaf Collection and Processing
Collecting leaves and processing them into leaf mold compost is a crucial step in creating a nutrient-rich soil amendment for your garden. Not only does it reduce waste by diverting leaves from landfills, but it also helps to create a valuable resource that can improve soil structure and fertility.
When leaves are left on the ground, they can form thick layers that smother plants and prevent water from penetrating the soil. By collecting them and processing them into leaf mold compost, you can break down their complex organic matter into a fine, crumbly texture that’s easy to mix into your soil. This not only improves drainage but also increases the soil’s ability to retain nutrients and support microbial life.
To get started, simply collect fallen leaves from your yard or neighborhood and add them to your compost pile in a ratio of 2:1 with other carbon-rich materials like straw or shredded newspaper. Over time, microorganisms will break down the leaf material into a rich, earthy-smelling compost that’s perfect for amending your soil and promoting healthy plant growth.
Choosing the Right Leaves for Composting
When it comes to leaf mold composting, selecting the right leaves is crucial. Let’s explore the types of leaves that work best and why they’re ideal for creating nutrient-rich compost.
Types of Leaves Suitable for Composting
When it comes to creating leaf mold compost, not all leaves are created equal. While some types of leaves are perfect for making rich and nutrient-dense compost, others may be too acidic or contain too many seeds to be useful.
Deciduous trees like oak, maple, and elm are ideal for leaf mold composting. These leaves break down quickly and add valuable nutrients to the soil. They also have a high carbon-to-nitrogen ratio, which makes them easy to mix with other materials like grass clippings or kitchen scraps. Other deciduous tree species that work well include beech, birch, and cherry.
Shrubs like lilac, rose, and hydrangea can also be used for leaf mold composting. These plants tend to produce leaves that are more acidic than those from deciduous trees, but they still break down relatively quickly and add valuable nutrients to the soil.
Some other types of leaves worth considering include those from holly, ash, and willow trees. These leaves may take a bit longer to break down, but they’re rich in nutrients and can add depth and complexity to your leaf mold compost.
Leaves to Avoid in Leaf Mold Compost
When creating your leaf mold compost pile, it’s essential to know which leaves to avoid using. Some types of leaves can harbor pests or create unpleasant odors, making them unsuitable for this type of composting.
Avoid using pine needles, as they are highly acidic and can disrupt the pH balance of your compost pile. Cedar and cypress leaves also contain oils that repel insects but can actually attract rodents and other pests to your compost. Walnut leaves contain a chemical called juglone that can inhibit seed germination and plant growth.
Additionally, leaves from trees like oak, beech, and elm tend to be too tough and fibrous for leaf mold composting. They may not break down quickly enough to add value to your finished product. If you have these types of leaves on hand, consider using them in a separate compost pile or repurposing them as mulch instead.
By knowing which leaves to avoid, you can create a healthy and productive leaf mold compost pile that will provide rich nutrients for your garden.
Setting Up a Leaf Mold Composting System
To set up a leaf mold composting system, you’ll need to select a suitable location and gather the necessary materials, including bins and a carbon-rich bedding material. Let’s get started!
Basic Requirements for Leaf Mold Composting
To set up an effective leaf mold composting system, you’ll need to consider three key areas: space, equipment, and maintenance needs. Start by designating a suitable location for your compost bin, ideally in a spot that receives moderate sunlight and has good air circulation. This will help regulate the temperature within the pile, promoting healthy decomposition.
For the bin itself, you can use a purpose-built leaf mold composting unit or repurpose an existing structure, such as a wooden pallet or plastic container. Ensure it’s at least 1-2 meters long and wide to accommodate the volume of leaves you plan to process. You’ll also need some basic equipment, including a shovel or fork for turning the pile and a rake for collecting and distributing materials.
Regular maintenance is crucial to prevent pests and odors from developing in your compost. Set aside time each week to turn the pile, aerate it, and add fresh leaves as needed. Aim to maintain a carbon-to-nitrogen ratio of 20:1 by incorporating alternating layers of leaves and other carbon-rich materials like straw or shredded newspaper.
Creating a Leaf Collection Area
When it comes to creating a leaf collection area for your leaf mold composting system, it’s essential to have a strategic approach. First, identify the best areas around your property where leaves tend to accumulate. This might be under trees, near gardens, or along pathways.
Next, assign a specific location for collecting and storing leaves. Consider a spot that is easily accessible and has good airflow to prevent moisture buildup. You can use a designated area on your lawn or create a separate leaf collection zone using a tarp, bucket, or even a section of the driveway.
To make the most of this space, consider implementing some simple yet effective strategies. For instance, you can rake leaves into neat piles and cover them with wire mesh or chicken wire to keep pests out. Alternatively, use a garden cart or wheelbarrow to transport collected leaves to your designated storage area.
Remember, it’s crucial to store leaves in an area that receives adequate sunlight and air circulation to ensure they dry properly before being added to your compost pile. With these simple strategies in place, you’ll be well on your way to creating a leaf collection area that sets your leaf mold composting system up for success.
The Composting Process: Turning Leaves into Leaf Mold
Now that we’ve covered why leaf mold composting is so beneficial, let’s dive into the process of turning leaves into nutrient-rich leaf mold. This involves breaking down organic matter through microbial activity and oxygenation.
Initial Stage: Breaking Down Large Materials
In the initial stage of leaf mold composting, it’s essential to break down large materials like branches into smaller pieces. This process is often referred to as “chipping” or ” shredding.” The goal is to create uniform material that will decompose more efficiently and evenly.
To do this, you’ll need a chipper or a shredder, either manual or powered, depending on the size of your operation and the type of materials you’re working with. If you have access to a log splitter or a wood chipper, use it to break down larger branches into smaller pieces. Otherwise, you can use a garden shredder or even a lawn mower with a mulching attachment.
Aim for pieces that are around 1-2 inches in length. This size allows for optimal decomposition and will prevent any large chunks from hindering the composting process. Be sure to break down all materials, including twigs, branches, and leaves, into these manageable sizes before moving on to the next stage of leaf mold composting.
Microbial Breakdown and Carbon-Nitrogen Ratio
As you create leaf mold compost, microorganisms play a crucial role in breaking down the carbon-rich materials in leaves. These tiny agents of decay feed on the organic matter, converting it into a nutrient-rich soil amendment. The microbial breakdown process is facilitated by factors like oxygen, moisture, and temperature.
To ensure optimal microbial activity, it’s essential to maintain an ideal carbon-nitrogen (C:N) ratio in your compost pile. A balanced C:N ratio typically ranges from 25:1 to 30:1, with a slight lean towards the higher end for leaf mold composting. This means that for every 25-30 parts of carbon-rich materials like leaves, you’ll need 1 part of nitrogen-rich ingredients like grass clippings or kitchen scraps.
Maintaining this balance is crucial because an overabundance of either carbon or nitrogen can impede microbial growth and activity. A C:N ratio that’s too high in carbon will lead to slow decomposition, while a ratio too skewed towards nitrogen may cause unpleasant odors and attract pests. Regular monitoring and adjustments can help you strike the right balance for optimal leaf mold composting results.
Monitoring Progress and Maintaining Optimal Conditions
Now that you have your leaf mold composting system set up, it’s time to monitor its progress and ensure optimal conditions for decomposition. This involves regular checks on temperature, moisture levels, and carbon-to-nitrogen ratios.
Checking Temperature and Moisture Levels
Monitoring temperature and moisture levels is crucial for efficient decomposition in your leaf mold compost pile. When temperatures are too high, it can lead to overheating, killing off beneficial microorganisms and potentially creating unpleasant odors. Conversely, low temperatures can slow down the decomposition process.
To check temperature, simply insert a compost thermometer into the pile, aiming for an ideal range of 130-140°F (54-60°C). This is where most microorganisms thrive, breaking down organic matter efficiently.
Moisture levels also play a vital role. Aim for a consistency similar to a damp sponge – not soaking wet but not dry either. Too little moisture can cause the compost to become too dense and slow decomposition, while excessive water can lead to anaerobic conditions, creating unpleasant odors.
Regular monitoring of both temperature and moisture will help you adjust your pile as needed to ensure optimal conditions for decomposition. This might involve turning the pile or adding more materials to balance out the mix.
Turning the Compost Pile for Aerobic Conditions
Regular turning of the compost pile is essential to maintain aerobic conditions, which promote healthy microbial activity. When leaves are broken down without sufficient oxygen, they can become anaerobic, leading to a buildup of toxic gases like methane and ammonia. These gases can inhibit microbial growth, causing the composting process to slow down or even stop.
To prevent this, turn your leaf mold compost pile regularly, ideally once every 7-10 days during the active composting phase. This allows oxygen to penetrate deep into the pile, promoting aerobic conditions that favor healthy microbial activity. As you turn the pile, look for signs of adequate aeration, such as:
• A slightly damp texture
• A pleasant earthy smell
• A mix of brown and green materials
If you notice any of these indicators, it’s time to stop turning the pile and let it finish the composting process. Remember, regular turning is crucial to maintaining optimal conditions for leaf mold composting.
Using Leaf Mold Compost: Tips and Tricks
Now that you’ve learned how to make leaf mold compost, let’s dive into using it effectively in your garden. Here are some essential tips for incorporating this nutrient-rich soil amendment into your landscaping plans.
Incorporating Leaf Mold into Your Soil
When incorporating leaf mold compost into your soil, you’ll want to follow a few simple steps to ensure it’s used effectively. Start by tilling the soil to loosen the earth and make it easier for the leaf mold to mix in. Next, sprinkle a 2-3 inch layer of leaf mold over the top of the soil, making sure to cover all areas evenly.
As you work the leaf mold into the soil, be mindful not to compact it too much, which can prevent water from penetrating and hinder root growth. Instead, use a gentle folding motion with your shovel or tiller to incorporate the compost thoroughly. For container gardens or houseplants, simply mix in a small amount of leaf mold with the potting soil to give them an extra boost.
Some key points to keep in mind when using leaf mold compost: it’s best used in moderation – too much can cause nitrogen imbalances – and it should be incorporated into the soil rather than applied as a top dressing. With these simple tips, you’ll be on your way to harnessing the full benefits of leaf mold compost for healthier, more resilient plants.
Benefits for Specific Plants and Soils
Leaf mold compost is an excellent choice for gardeners with acid-loving plants like azaleas, blueberries, and rhododendrons. These plants thrive in slightly acidic to acidic soils, which can be challenging to maintain without the right amendments. Leaf mold compost’s high acidity (pH 3.5-4.5) makes it an ideal addition to their soil mix.
When used as a mulch or incorporated into the soil, leaf mold compost helps to lower the pH and provide essential nutrients for these plants. Blueberries, for example, require a very acidic soil with a pH between 4.0 and 5.5. By mixing in leaf mold compost, you can create an optimal environment for your blueberry bushes to flourish.
If you have azaleas or rhododendrons, use 2-3 inches of leaf mold compost as a mulch around the base of the plants. This will help retain moisture, suppress weeds, and regulate soil temperature. As the compost breaks down, it will also add organic matter to the soil, improving its structure and fertility.
For those with clay soils, leaf mold compost can be particularly beneficial in improving drainage and aeration. By incorporating it into your potting mix or using it as a mulch, you can create a well-draining environment that’s perfect for acid-loving plants.
Troubleshooting Common Issues in Leaf Mold Composting
Don’t let common issues get in the way of creating rich leaf mold compost! This section will help you troubleshoot and resolve problems that can arise during the process.
Odors and Pests: Causes and Solutions
One of the most frustrating aspects of leaf mold composting is dealing with unpleasant odors and unwanted pests. These issues can arise due to inadequate carbon-to-nitrogen ratios, insufficient moisture levels, or poor aeration within the compost pile.
Common causes of odors in compost piles include excessive nitrogen content from green materials like grass clippings or food scraps. To mitigate this issue, ensure you maintain a balance between “green” and “brown” materials (e.g., fallen leaves or shredded newspaper). Regularly mixing the pile will also help to speed up decomposition.
As for pests, they can be attracted to sweet-smelling materials and the warmth of the compost pile. To deter them:
• Add a 2-inch layer of wood ash on top of your compost pile to create an inhospitable environment.
• Use diatomaceous earth or pyrethrin-based products to control infestations without harming beneficial insects.
By implementing these solutions, you can minimize odors and pests in your leaf mold composting process.
Temperature Fluctuations and Maintenance Needs
Temperature fluctuations are a common issue in leaf mold composting, often caused by inadequate carbon-to-nitrogen ratios, insufficient aeration, or excessive moisture. To manage these temperature swings, it’s essential to monitor the pile regularly. Check for high temperatures (above 160°F) by inserting a compost thermometer, and if you find excessively hot temperatures, turn the pile gently to aerate it.
To prevent extreme heat buildup, ensure that your leaf mold compost pile has a mix of 2/3 “brown” materials (dried leaves, straw, or shredded newspaper) and 1/3 “green” materials (fresh grass clippings, food scraps, or manure). Also, keep the pile moist but not waterlogged. Aim for a consistency similar to a damp sponge.
Regular turning of the compost pile also helps maintain healthy temperature fluctuations. Turn the pile every 7-10 days during the first few months of decomposition. This process will help speed up the composting process and reduce odors. Additionally, consider adding bulking agents like wood chips or straw to improve airflow and facilitate decomposition.
Frequently Asked Questions
How do I know if my leaf mold compost is ready to use?
Check the color, texture, and consistency of your leaf mold compost. It should be dark brown or black, crumbly, and have an earthy smell. If it’s still too dry or has a strong odor, give it more time.
Can I mix other materials with leaves for faster decomposition?
Yes, you can add other organic materials like grass clippings, vegetable scraps, or coffee grounds to accelerate the composting process. However, maintain a balance of “green” (nitrogen-rich) and “brown” (carbon-rich) materials to avoid attracting pests or creating odors.
How often should I turn my leaf mold compost pile?
Regular turning is essential for maintaining aerobic conditions and preventing matting. Aim to turn your compost pile every 7-10 days, especially during the initial stages of decomposition. This will help speed up the process and ensure a healthy balance of microbes.
What if I notice odors or pests in my leaf mold compost?
If you encounter unpleasant odors or pests, it’s likely due to an imbalance of “green” and “brown” materials or inadequate turning. Add more carbon-rich materials like leaves or straw, and maintain good airflow by turning the pile regularly. If issues persist, consider adjusting your composting system or seeking advice from a gardening expert.
Can I use leaf mold compost in containers or indoor plants?
Yes, leaf mold compost can be used to improve the soil structure and fertility of container gardens and indoor plants. Mix it into potting mixes or use it as a top dressing to provide essential nutrients and promote healthy growth.