Are you tired of constantly checking on your garden’s watering schedule, or worried that you’ll forget to turn off the sprinklers? A garden irrigation timer can be a game-changer for busy gardeners like yourself. Not only does it save time and effort, but it also helps prevent overwatering – a common mistake that can harm your plants. But setting up an irrigation timer can seem daunting if you’re not sure where to start. In this article, we’ll walk you through the process of choosing the right timer for your garden, installing it correctly, creating a customized watering schedule, and performing regular maintenance to ensure your timer runs smoothly. By following our step-by-step guide, you’ll be able to enjoy a healthy and thriving garden with minimal hassle.
Choosing the Right Timer
Now that you’ve selected a timer, it’s time to choose the right one for your specific irrigation needs and garden type. This will ensure seamless integration with your setup.
Type of Timers Available
When it comes to choosing the right irrigation timer for your garden, there are several types available. Each type offers unique features and benefits that cater to different needs and preferences.
Smart controllers are a popular choice among gardeners who want to optimize their watering schedules. These timers can be controlled remotely using smartphones or tablets and often come with built-in weather forecasts and soil moisture sensors. They can also learn your garden’s specific needs over time, adjusting the watering schedule accordingly. For example, the Rachio Smart Sprinkler Controller uses real-time weather data and local weather forecasts to optimize watering schedules.
Manual timers are a more traditional option that requires setting the timer for each zone or area of the garden. These timers are often less expensive than smart controllers but may not be as flexible or efficient. Solar-powered timers, on the other hand, use renewable energy from the sun to power their functions, making them an eco-friendly choice.
When deciding which type of timer is right for you, consider your budget, the size and complexity of your garden, and your desired level of control over the watering schedule. By choosing a timer that meets your specific needs, you can ensure your plants receive the optimal amount of water to thrive.
Factors to Consider When Selecting a Timer
When selecting an irrigation timer for your garden, there are several key factors to consider. First and foremost, think about water usage. If you live in a region with low rainfall or high evaporation rates, you’ll want a timer that allows for more frequent watering sessions. Conversely, if you’re in an area with ample rainfall, a more conservative approach may be necessary.
Next, consider the type of soil you have. Sandy soils drain quickly, requiring more frequent watering, while clay soils retain moisture longer and can tolerate less frequent watering. If your garden features a mix of plants with varying watering needs, look for a timer that allows for customizable settings or separate zones.
Budget constraints are also an essential consideration. Basic timers can cost as little as $20, but more advanced models with Wi-Fi connectivity or smartphone app control may exceed $100. Set a realistic budget and balance it against your specific irrigation needs to ensure you choose the right timer for your garden.
Popular Brands and Models for Beginners
When setting up a garden irrigation timer for the first time, it’s essential to choose a user-friendly brand and model that suits your needs. For beginners or those with small gardens, here are some popular brands and models worth considering:
One of the most well-known brands for garden irrigation timers is Rachio. Their 3rd Generation Smart Sprinkler Controller (Rachio 3) is an excellent choice for beginners. It’s Wi-Fi enabled, allowing you to control your watering schedule from a smartphone app, and can be set up in just a few steps. The Rachio 3 also learns your garden’s watering needs over time and provides real-time weather forecasts to optimize watering.
Another popular option is the Orbit BHyve Smart Watering Controller. This compact timer is easy to install and comes with a free mobile app that allows you to monitor and control your watering schedule remotely. It’s also rain sensor-enabled, which means it will automatically skip watering sessions during rainy days.
These timers are perfect for those new to garden irrigation systems or have small gardens, as they offer ease of use and flexibility in scheduling watering sessions. When choosing a timer, be sure to consider factors such as the size of your garden, local climate conditions, and water usage regulations.
Installing the Timer
Now that you’ve prepared your irrigation system, it’s time to install the timer. This section will walk you through connecting and setting up the timer for a hassle-free watering experience.
Preparing the Irrigation System
Before setting up the timer, it’s crucial to inspect and prepare your irrigation system. Start by checking the pipes for any damage, kinks, or leaks. Look for signs of wear and tear, such as cracks, cuts, or rust spots. If you notice any issues, address them promptly before proceeding with the setup.
Next, examine the valves that control water flow to each zone. Ensure they’re fully open and functioning properly. Check for mineral buildup or debris accumulation, which can affect valve performance. You may need to clean or replace them if necessary.
Also, inspect your sprinklers for any blockages or damage. Remove any weeds or debris that might be obstructing the sprinkler’s spray pattern. Make sure the sprinklers are securely attached to their risers and won’t topple over in strong winds. By doing this preliminary check, you’ll save yourself from costly repairs down the line and ensure your irrigation system operates efficiently with your new timer.
Connecting the Timer to the Water Source
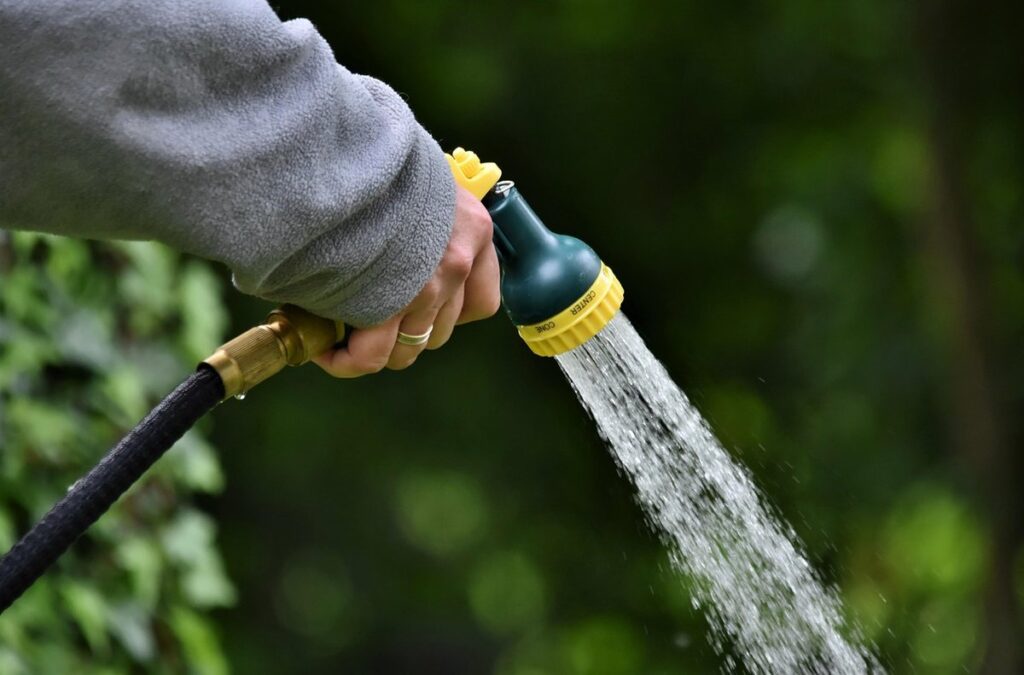
To ensure a secure and reliable connection between your timer and water source, it’s essential to select the right fittings and materials. Begin by identifying the type of water source you’re working with – a hose, pipe, or valve – as this will determine the necessary connections.
Choose fittings that match the size and material of your water source. For example, if using a standard 3/4″ garden hose, opt for 3/4″ female adapters for both the timer’s outlet and the water source’s inlet. This ensures a snug fit and prevents leaks.
When connecting the timer to the water source, make sure to use Teflon tape or pipe dope to secure the threaded connections. This will prevent water from seeping out between the threads over time. Apply a thin layer of tape or dope to the male threads before assembling the connection, then tighten by hand to avoid overtightening.
Next, check your timer’s manual for specific recommendations on connections and fittings. Some timers may require special adapters or have unique requirements for optimal performance.
Configuring the Timer’s Water Pressure Sensor
Configuring the water pressure sensor is a crucial step in setting up your garden irrigation timer accurately. This feature ensures that the timer takes into account the varying water pressures in your hose and pipes, which can affect how long it takes to deliver water to your plants.
To configure the timer’s water pressure sensor, first locate this component on your timer device. It’s usually a small dial or setting on the back of the unit. Next, turn off the irrigation system and attach a hose to the timer outlet. Fill a 1-gallon bucket with water and submerge it in a sink or large container filled with about 10-15 pounds of water pressure. Measure this pressure using a pressure gauge.
Set the water pressure sensor on your timer to match the reading you obtained from your test. This ensures that the timer understands how much pressure is required for optimal watering times. If you’re unsure about this process, consult your timer’s user manual or contact the manufacturer’s support team for guidance.
Setting Up the Scheduling System
Before you start programming your timer, let’s go over how to set it up for optimal performance. This involves choosing a mode and setting specific days for watering.
Understanding the Different Scheduling Options
When setting up your garden irrigation timer, you’ll notice that most models come with various scheduling options. It’s essential to understand these options to ensure your plants receive the right amount of water at the right time.
Fixed schedules allow you to set a fixed watering cycle for each day of the week. This is suitable for gardens with consistent watering needs. For example, if you have a lawn that requires watering every two days during summer, you can program the timer to water on Tuesdays and Thursdays. However, this schedule may not be ideal for plants with varying watering requirements.
Flexible schedules offer more control over watering cycles, allowing you to set specific start and end times for each day. This option is perfect for gardens with changing weather patterns or those requiring occasional breaks from irrigation. You can also use flexible schedules to adjust the duration and frequency of watering based on soil moisture levels.
Some timers come equipped with smart scheduling features that use weather forecasts to determine optimal watering times. These systems analyze local weather conditions, such as precipitation and temperature, to ensure your plants receive water when needed most. If you opt for a timer with this feature, simply enter your location and let the system do the rest. This option is ideal for gardeners who want hands-off watering management without compromising plant health.
Creating a Customized Watering Schedule
Creating a customized watering schedule is crucial for ensuring your plants receive the right amount of moisture. To start, you’ll need to consider the specific needs of each plant type in your garden. Different plants have unique watering requirements based on factors like soil type and climate.
Begin by noting down the planting locations and the types of plants growing there. Also, take into account the sunlight hours for each area and the temperature fluctuations throughout the year. This information will help you determine how often to water.
Next, research your local climate and weather patterns to understand when rainfall is more likely to occur. You can also use online resources or consult with a gardening expert in your region to gain insights on the best watering practices.
Once you have this information, it’s time to set up your irrigation timer with specific watering schedules for each plant group. Use the data you’ve collected to determine the optimal number of minutes per zone, frequency, and start/end times.
Tips for Fine-Tuning the Scheduling System
As you’ve set up and configured your garden irrigation timer, it’s time to fine-tune the scheduling system for optimal water usage and healthy plant growth. This is where the real magic happens – turning your setup into a well-oiled machine that consistently delivers the right amount of water to each area of your garden.
Start by reviewing your watering schedule and making adjustments as needed. Be mindful of seasonal changes, such as increased rainfall or scorching heat waves, which may impact your plant’s needs. For example, during dry spells, you might need to increase the frequency or duration of watering cycles for sensitive plants like tomatoes or flowers.
Another key consideration is soil type and moisture levels. If your garden has sandy or well-draining soil, you’ll want to water more frequently to prevent over-drying. Conversely, if your soil retains a lot of water, you may need to reduce watering frequency to avoid root rot.
When fine-tuning, don’t be afraid to experiment and make adjustments on the fly. Pay attention to plant responses – if leaves are wilting or turning yellow, it’s likely a sign that your timing needs tweaking. With these expert tips under your belt, you’ll be well on your way to creating an efficient and effective watering schedule that brings out the best in your garden.
Troubleshooting Common Issues
Don’t worry if things don’t go exactly as planned, we’ll walk you through common issues that might arise during setup and how to resolve them quickly. We’ve got your back!
Identifying and Fixing Leaks
Leaks in irrigation systems can be frustrating and wasteful, causing you to overwater your garden. Common causes of leaks include loose connections between pipes and fittings, damaged hoses, and worn-out O-rings. To identify a leak, inspect your system for signs of moisture or water droplets. Check the timer’s display for error messages indicating a faulty sensor or low water pressure.
To fix a leak, first, turn off the irrigation timer and disconnect power to the system. Next, locate the source of the leak and use a wrench to loosen any fittings that may be causing the issue. Inspect the O-rings and replace them if they’re damaged. If the leak persists, check for blockages in the pipes or filters.
A simple DIY fix involves replacing worn-out O-rings with new ones. Make sure to choose the correct size and type of O-ring for your specific irrigation system. Regularly inspecting and maintaining your irrigation system will help prevent leaks from occurring in the first place. By following these steps, you’ll be able to identify and fix common leaks, ensuring a reliable watering schedule for your garden.
Dealing with Water Pressure Issues
Water pressure issues can be frustrating and costly if left unaddressed. They may affect the timer’s performance, leading to uneven watering or even causing damage to plants due to overwatering or underwatering.
To identify water pressure issues, check for signs such as reduced water flow rates, frequent cycling of the timer, or erratic sprinkler behavior. You can also observe your garden during peak watering periods – if you notice any areas receiving significantly less water than others, this could be a sign of low water pressure.
One way to resolve water pressure issues is by installing a pressure regulator near the irrigation system’s source. This device helps stabilize water pressure and prevent fluctuations that may harm plants. For example, a 20-psi pressure reducer can help regulate pressure in areas with high water demand or long piping runs.
To further ensure optimal water pressure, inspect your irrigation pipes for any kinks or blockages that could be restricting flow rates. Regularly clean filters and replace damaged or old pipes to maintain a consistent water supply.
Resolving Timing Errors or Discrepancies
Timing errors or discrepancies can be frustrating and costly for garden irrigation systems. If you’re noticing inconsistent watering patterns or unexpected water usage spikes, it’s likely due to a timing error. Common culprits include incorrect program scheduling, faulty sensor connections, or worn-out timer batteries.
To resolve these issues, first check the programming schedule. Ensure that the correct days of the week and times are selected for each zone. If you’re using a smart controller, verify that the settings match your garden’s needs. Consider the soil type, plant growth stages, and weather forecasts to optimize watering schedules.
For physical timers, inspect the sensor connections and replace any faulty wires. If the issue persists, try replacing the batteries with fresh ones. In some cases, a factory reset may be necessary. Consult your timer’s user manual for instructions on resetting the device. By troubleshooting these common timing errors, you’ll prevent overwatering or underwatering issues and ensure your garden receives just the right amount of moisture.
Maintenance and Upkeep
Now that you’ve set up your garden irrigation timer, it’s essential to regularly maintain and upkeep your system to ensure efficient watering and extend its lifespan. This ensures optimal performance.
Regularly Checking and Cleaning the Timer
Regularly checking and cleaning the timer is a crucial aspect of maintaining its optimal performance and longevity. Over time, dust, debris, and mineral deposits can accumulate on the sensor and mechanical components, affecting the timer’s accuracy and reliability.
To prevent this, set aside some time each week to inspect and clean your irrigation timer. Start by turning off the power supply and removing any covers or screws that give you access to the internal mechanisms. Use a soft-bristled brush or a small vacuum cleaner to gently remove any loose dust particles from the sensor and other components.
Next, mix a solution of equal parts water and white vinegar in a bowl and dip a cotton swab into it. Wipe down all exposed surfaces with the swab, paying particular attention to areas where mineral deposits tend to form. This will help prevent scaling and ensure that your timer continues to function accurately.
Remember to also check for any blockages or obstructions in the sensor’s viewing area, as these can cause issues with watering schedules. By incorporating regular cleaning into your maintenance routine, you’ll enjoy a hassle-free and efficient irrigation system all season long.
Updating Firmware or Software
Updating firmware or software on your garden irrigation timer is essential to ensure it continues to function optimally and take advantage of new features. As technology advances, manufacturers often release updates that improve performance, add new functionality, or fix bugs. To update the firmware or software on your modern timer, follow these steps:
First, check if an update is available by visiting the manufacturer’s website or checking the timer’s user interface. Download the latest version and save it to a secure location. Next, access the timer’s settings menu and look for the “Update” or “Firmware Update” option. Follow the on-screen instructions to upload the new firmware or software.
It’s crucial to update your timer regularly to ensure you’re running the most efficient and reliable version. Not doing so may result in decreased performance, faulty water distribution, or even system failure. Some popular irrigation timers that require updates include Rachio Smart Sprinkler Controller and Skydrop Wi-Fi Watering Controller.
Make sure to follow all manufacturer instructions and take necessary precautions when updating your timer’s firmware or software. This includes backing up your settings and ensuring the update process doesn’t interrupt watering schedules or cause water waste.
Monitoring Water Usage and Adjusting Schedules As Needed
Monitoring water usage and adjusting schedules as needed is crucial to maintaining healthy plants while conserving resources. You’ll want to track your irrigation system’s performance regularly by checking the timer’s statistics and observing the plant’s responses. This will help you identify areas for improvement and make data-driven decisions.
Start by checking the timer’s logs, which should provide information on water usage, scheduling conflicts, and any issues that may have occurred during operation. Pay attention to any irregularities or patterns in your water consumption. You can also use a rain sensor to automatically adjust schedules based on precipitation levels.
Adjusting your schedule as needed is essential for optimizing water efficiency. If you notice plants are not receiving adequate water due to incorrect timing, adjust the schedule accordingly. On the other hand, if your system is overwatering certain areas, consider reducing watering times or frequency. Keep in mind that adjustments may be necessary seasonally or even daily, depending on factors like weather patterns and plant growth stages.
By monitoring and adjusting your irrigation timer setup regularly, you’ll be able to create a more efficient and effective water management plan for your garden.
Conclusion
Now that you’ve successfully set up your garden irrigation timer, it’s time to review what you’ve learned and finalize any remaining steps. Review these key takeaways to ensure a smooth watering experience.
Recap of Key Takeaways
To ensure you’ve successfully set up and are making the most out of your garden irrigation timer, let’s recap the essential steps we covered throughout this guide. Selecting the right timer was our starting point – choosing between smart timers, traditional mechanical timers, or Wi-Fi enabled ones depending on your specific needs.
Next, we dove into installing your chosen timer correctly. This involved connecting it to your water supply, setting up the necessary pipes and fittings, and ensuring a secure mounting for optimal visibility. As you may recall, proper installation is crucial for accurate watering schedules and to prevent potential issues like overwatering or flooding.
Regular maintenance was another vital aspect we discussed. We touched on checking the timer’s battery level, cleaning its sensors and screens, and performing routine checks to verify your irrigation schedule’s accuracy. This ensures your plants receive the right amount of water at the right times – making adjustments as needed based on seasonal changes or unexpected weather patterns.
As you continue to use your garden irrigation timer, remember to keep an eye on local watering restrictions, especially during periods of drought. Staying informed about your specific region’s rules will help you avoid any fines or penalties while still keeping your plants healthy and thriving.
Finally, take this opportunity to familiarize yourself with your timer’s various features and settings – exploring any advanced options or customization possibilities it may offer. By doing so, you’ll be able to fine-tune your irrigation schedule for maximum efficiency and effectiveness.
Frequently Asked Questions
Can I use a garden irrigation timer with an existing drip irrigation system?
Yes, many timers are compatible with various types of irrigation systems, including drip irrigation. Before purchasing a timer, check the manufacturer’s specifications to ensure it can work seamlessly with your current setup.
How often should I review and adjust my customized watering schedule?
Regularly reviewing and adjusting your schedule is crucial to maintaining optimal water usage and ensuring your plants receive the right amount of moisture. We recommend checking and updating your schedule every 2-4 weeks, or after significant changes in weather patterns.
What’s the difference between a smart controller and a traditional irrigation timer?
A smart controller offers advanced features like remote control, built-in sensors for soil moisture and weather forecasts, and sometimes even machine learning capabilities to optimize watering schedules. Traditional timers are more straightforward, providing basic scheduling functions but lacking the advanced features of smart controllers.
Can I program my timer to water multiple zones or stations at different times?
Yes, most modern irrigation timers allow you to create customized schedules for various zones or stations. This feature is particularly useful if you have a large garden with diverse watering needs. Be sure to check your timer’s specifications and configuration options to achieve this.
What’s the recommended maintenance routine for my irrigation timer?
Regularly clean the timer’s sensors, inspect tubing for kinks or damage, and update firmware or software as needed to maintain optimal performance. This will ensure your timer continues to run smoothly and accurately water your garden without wasting resources.