If you’re like many gardeners, you’ve probably noticed that your chive plants have started to form clumps over time. This is completely normal behavior for these hardy herbs! Chives are perennials that reproduce by sending up new shoots from their underground rhizomes, creating a dense cluster of stems and leaves. While it may seem daunting, dividing chives is actually a simple process that can help promote healthy growth, maximize harvests, and even share your favorite variety with friends and family. In this article, we’ll take you through the reasons why chive clumps form in the first place, how to divide them effectively, and provide valuable tips for successful division. Whether you’re looking to rejuvenate a struggling patch or simply want to multiply your chives, keep reading to learn the secrets of dividing chive clumps like a pro!
Understanding Chive Clumping
When it comes to chives, clumps can form quickly, and understanding why they happen is essential for healthy plant growth. Let’s dive into what causes these clumps to form in the first place.
Why Do Chives Form Clumps?
Chives tend to form clumps due to several factors related to their growth habits and environmental conditions. One primary reason is soil quality. Chives prefer well-draining, fertile soil that’s rich in organic matter. However, when the soil lacks these essential nutrients or becomes waterlogged, chives may start to cluster together as a defense mechanism.
Watering habits also play a significant role in chive clumping. Overwatering can lead to root rot and cause the plant to form dense clusters, while underwatering can make it more susceptible to pests and diseases that promote clustering. Temperature fluctuations are another contributing factor – chives prefer cooler temperatures between 60-80°F (15-27°C), but sudden drops or rises in temperature can cause them to clump.
To mitigate clumping, ensure your soil has a pH between 6.0-7.0 and contains sufficient nutrients. Water your chives regularly, but avoid overwatering, and provide them with a consistent temperature environment.
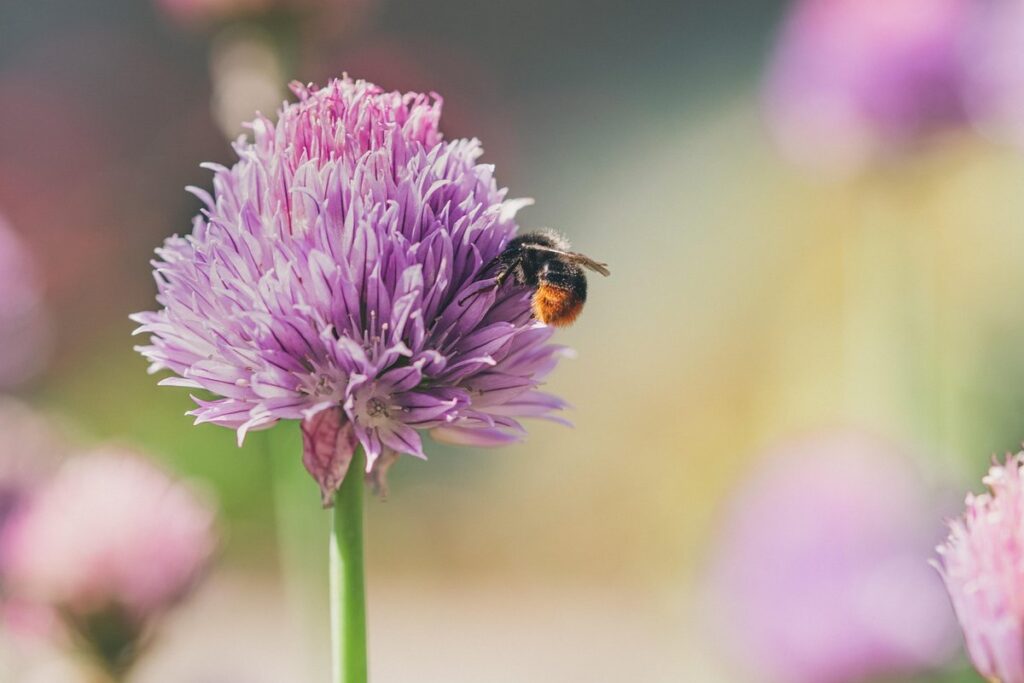
Identifying Healthy Chive Clumps
When examining chive clumps for division, it’s essential to identify healthy ones to ensure successful propagation. A healthy chive clump should have a compact, symmetrical shape with no signs of overgrowth or disease. Look for clumps that are dense and uniform, with new shoots emerging from the center. The leaves should be a vibrant green color and free of any yellowing or browning.
On the other hand, a diseased or pest-infested chive clump will exhibit visible signs such as yellowing leaves, black spots, or white powdery patches. These can be indicative of fungal infections like leaf spot or root rot. Pests like aphids, spider mites, or thrips can also cause damage to the plant’s leaves and stems.
To confirm whether a chive clump is healthy enough for division, gently separate it from neighboring plants to inspect its roots. Healthy roots should be firm, white, and free of any soft spots or decay. If you notice any signs of disease or pests, it’s best to discard the affected clump to prevent the spread of infection to other plants.
By identifying healthy chive clumps for division, you’ll increase your chances of successful propagation and ensure that your new plants grow strong and healthy.
Preparing for Division
Now that you’ve decided it’s time to split your chive clump, let’s get started on preparing for division by understanding what to expect and how to make the process smooth.
Choosing the Right Time for Division
When to divide chives is crucial for their health and productivity. Seasonality plays a significant role, as spring and fall are ideal times for division. During these periods, the chives have finished blooming and are at their most vigorous, making it easier to separate them without causing damage.
Avoid dividing in mid-summer or early winter when temperatures are extreme. High heat can cause the plants to become stressed, while cold temperatures may lead to root damage. Similarly, moisture levels must be considered – divide chives after a period of adequate watering but not during prolonged droughts.
It’s also essential to check for signs that your chive clump needs division, such as the appearance of yellowing leaves or reduced growth rates. By dividing at the right time and considering these factors, you’ll minimize the risk of shock and ensure healthy new growth.
Pre-Division Care: Watering and Fertilizing
Before you begin dividing those chive clumps, it’s essential to give them some TLC. Proper care before division ensures a healthy and thriving plant that will reward you with plenty of fresh herbs for months to come.
When it comes to watering, consistency is key. Chives prefer well-draining soil, but they do need regular moisture, especially during the growing season. Aim to water your chives about 1-2 inches deep once or twice a week, depending on weather conditions. Be cautious not to overwater, as this can lead to root rot and other issues.
Fertilization is also crucial in preparing your chives for division. Feed them with a balanced fertilizer (10-10-10 NPK) during the growing season, following the manufacturer’s instructions. You can also side-dress with a high-phosphorus fertilizer (10-20-10 NPK) to promote healthy root development.
By providing your chives with the right amount of water and nutrients, you’ll be giving them the best possible chance at a successful division. This will result in strong, healthy divisions that are ready to thrive in their new homes.
The Division Process
Now that you’ve prepared your chive clumps for division, let’s dive into the step-by-step process of separating them to create new plants. We’ll cover each stage carefully.
Removing Old or Dead Chives
When dividing chives, it’s essential to remove old or dead stalks from the center of the clump. This process not only promotes new growth but also helps maintain the overall health and appearance of your plant.
Start by gently separating the individual stalks, taking care not to damage any of the healthy ones in the process. Use a pair of clean scissors or pruning shears to snip off dead or wilted stalks at their base, just above where they meet the center stem. Be cautious not to cut too far, as this can cause damage to nearby stalks.
Remove all dead or dying material, including any brown or yellowing leaves, and dispose of them properly. This will help prevent the spread of disease and encourage new growth from the remaining healthy stalks. By removing old or dead chive stalks, you’ll be giving your plant a fresh start and ensuring that it continues to thrive.
Make sure to remove about 1/3 to 1/2 of the old material, leaving enough of the original clump intact to support new growth. This balance is crucial in promoting healthy division and preventing shock to the plant.
Cutting Back the New Growth
As you start to divide your chive clump, it’s essential to cut back the new growth to encourage a bushy shape and prevent the plant from becoming leggy. This is a crucial step that will help your newly divided chives establish a robust root system and promote healthy growth.
To trim back the new growth, use a pair of clean scissors or pruning shears and snip off the longest stems, leaving about an inch of foliage intact. This will allow the plant to focus its energy on developing a strong root system rather than producing long, weak stems. You can also gently tease apart the stems at the base of the clump to encourage new growth from the center.
By cutting back the new growth, you’ll be able to see the individual plants within the clump more clearly and make it easier to separate them for replanting. This simple step will also help your chives thrive in their new location and provide a bountiful harvest of fresh leaves throughout the growing season.
Aftercare for Divided Chives
Now that you’ve successfully divided your chive clumps, it’s time to focus on caring for the newly separated roots. Proper aftercare will help them thrive and grow into healthy new plants.
Repotting and Transplanting
After dividing your chives, it’s essential to repot them correctly to ensure their continued health and productivity. When choosing a pot size for your divided chive clumps, remember that the roots will continue to grow from the base of the plant, so select a container that is slightly larger than the original one. A general rule of thumb is to increase the pot size by about 1-2 inches in diameter.
When it comes to soil mix, look for a well-draining potting medium specifically designed for herbs. Chives prefer a slightly acidic to neutral soil pH (around 6.0-7.0). Avoid using regular garden soil as it may compact and prevent proper drainage. Instead, opt for a mix that contains ingredients like perlite or vermiculite to help with moisture retention and root growth.
Place the repotted chives in a location with bright, indirect light but avoid direct sunlight, which can cause scorching of the leaves. Aim for temperatures between 65-75°F (18-24°C) to promote healthy growth. Water your divided chive clumps regularly, keeping the soil consistently moist but not waterlogged. This will help establish a strong root system and encourage new foliage to emerge.
Watering and Fertilizing Newly Divided Chives
After dividing your chives, it’s essential to provide them with the right care to promote healthy growth. Watering and fertilizing are crucial aspects of post-division care. When it comes to watering, make sure to water your divided chives thoroughly after division and keep the soil consistently moist during the first week or two. This will help them establish a strong root system.
As for fertilization, you can start by using a balanced fertilizer (10-10-10 NPK) once a month. You can also side-dress with a high-phosphorus fertilizer to promote root development and flowering. Keep in mind that over-fertilizing can be detrimental to your chives’ health, so it’s essential to follow the manufacturer’s instructions.
To ensure optimal growth, keep the soil pH between 6.0 and 7.0, as this is the ideal range for chives. Mulching around the base of your plants will also help retain moisture and suppress weeds. By following these simple steps, you’ll be able to give your newly divided chives the best chance at thriving.
Tips for Successful Chive Division
Now that you’ve got a healthy clump of chives, it’s time to learn how to divide them successfully. This section will walk you through essential tips and tricks for achieving even growth.
Common Mistakes to Avoid
When dividing chives, it’s easy to fall into common mistakes that can hinder their growth and productivity. One of the most significant errors is over-watering, which can lead to root rot and kill the entire clump. To avoid this, make sure not to water your chive plants excessively during the division process. Instead, keep the soil consistently moist but not waterlogged.
Under-fertilizing is another mistake to watch out for. Chives are heavy feeders and require regular fertilization to promote healthy growth. Failing to provide enough nutrients can result in weak and spindly stems, which can be difficult to divide successfully. Consider using a balanced fertilizer during the growing season to ensure your chives receive the necessary nutrients.
Lastly, not providing enough sunlight is a common oversight when dividing chives. Chives require at least four hours of direct sunlight per day to thrive. If you’re dividing them indoors, make sure they’re placed near a sunny window or under grow lights. By avoiding these common mistakes, you’ll be well on your way to successfully dividing and replanting your chive clumps.
Encouraging Healthy Growth After Division
After dividing your chives clump, it’s essential to encourage healthy growth. Pruning techniques play a significant role in promoting new growth and preventing the plant from flowering prematurely. When you divide chives, remove about half of the foliage to prevent moisture loss through transpiration. This will also help the newly divided segments focus their energy on developing new roots.
Companion planting can also enhance the growth of your newly divided chives. Planting them alongside other herbs like garlic, rosemary, or thyme creates a symbiotic relationship that benefits all plants involved. These herbs repel pests and attract beneficial insects, reducing the need for pesticides and maintaining soil health.
Another effective technique is to provide adequate light and water. Chives require full sun to partial shade and consistent moisture, especially during their first few weeks after division. Monitor the temperature, ensuring it remains within a range of 65-75°F (18-24°C), as extreme temperatures can stress the plant. By implementing these strategies, you’ll be able to promote healthy growth and encourage your divided chives to thrive.
Conclusion
Now that you’ve mastered the art of chive dividing, it’s time to put your newfound skills into practice. Remember, proper division is key to maintaining healthy and thriving chives. To recap, carefully dig around the clump, making sure to get as much root system as possible, then separate the individual plants. Gently trim any old or damaged roots to encourage new growth. Don’t forget to re-pot your divided chives in a well-draining mix with plenty of room for expansion.
By following these steps and tips, you’ll be enjoying fresh, fragrant chives in no time. With regular division, your chive plants will continue to flourish, providing you with a bountiful harvest of delicious herbs. Happy gardening!
Frequently Asked Questions
How often should I water newly divided chives?
Yes, it’s essential to keep the soil consistently moist during the first few weeks after division. Water gently but thoroughly once a week, gradually reducing frequency as the plants establish themselves.
Can I divide chive clumps in the winter or early spring?
No, it’s recommended to divide chives in late spring or early summer when new growth is actively producing. Dividing in the wrong season can lead to reduced plant performance and higher susceptibility to pests and diseases.
How do I prevent divided chives from becoming too leggy after division?
To promote bushy growth, pinch off the top sets of leaves on newly divided chives for about two weeks after planting. This encourages branching and prevents them from growing too tall or leggy.
What’s the best way to handle leftover chive roots during division?
Remove any old, dead, or damaged roots when dividing chives. This helps prevent the spread of disease and ensures that new divisions have a healthy start.
Can I use divided chive clumps as cuttings for propagation, or should I plant them in soil immediately?
You can propagate chives using small stem sections (cuttings) or divide established clumps. Planting cuttings directly into water or a propagation tray works well, but be sure to harden off the seedlings before transplanting them outside.