As a gardener, you’re probably eager to get your hands on those luscious sage plants after a long winter. But before you start snipping away, when is the perfect time to prune your sages? Spring is the ideal season for pruning these popular herbs, and doing it right can make all the difference in their health, productivity, and resistance to disease.
Pruning at the wrong time or with the wrong techniques can be detrimental to your sage’s growth and yields. In this article, we’ll dive into the perfect timing, tools, and techniques for pruning your sages in spring like a pro. We’ll explore how to identify when it’s time to prune, what equipment you’ll need, and step-by-step guides on how to cut back your sage plants for optimal growth and maximum yields. By following our expert tips, you’ll be able to enjoy healthier, more bountiful sages all season long.
Benefits and Timing of Sage Pruning in Spring
When it comes to pruning your sage plants in spring, timing is everything, and understanding when to do so can make all the difference in their health and productivity.
Why Prune Your Sage in Spring
Spring is an ideal time to prune your sage plants, and for good reason. As temperatures rise, sage enters a state of dormancy during winter, only to burst back into growth once the warmth sets in. Pruning at this stage allows you to harness this new energy, promoting healthy air circulation throughout the plant.
By pruning in spring, you reduce the risk of disease that can thrive in stagnant environments. When old leaves and stems are removed, they’re less likely to harbor pathogens, which can spread quickly among crowded plants. This simple maintenance task helps your sage stay strong and resilient, better equipped to handle whatever challenges come its way.
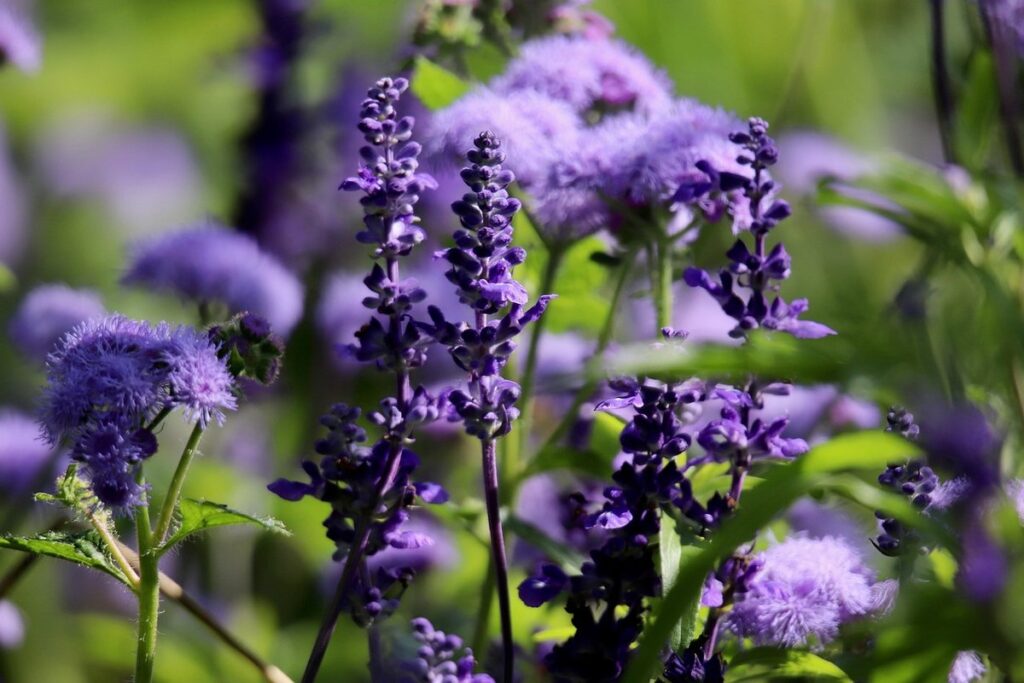
New growth is another significant benefit of spring pruning. By cutting back the plant’s woody stems, you encourage fresh, vigorous shoots to emerge, ensuring a lush, full appearance that’s perfect for cooking or displaying as a beautiful ornamental plant. Take this opportunity to shape your sage into a compact, bushy form that’s easier to care for and more visually appealing.
Understanding the Timing for Different Regions
When it comes to sage pruning in spring, timing is everything, and it’s heavily influenced by climate and region. If you live in a mild winter area with warm temperatures year-round, like California or the Mediterranean coast, you can prune your sage plants in late winter to early spring, around February or March. This allows for new growth to emerge before the hot summer months.
On the other hand, if you reside in an area with harsher winters, such as the Northeast or Midwest, it’s best to wait until the last frost date has passed and the soil can be worked safely, typically late April or early May. Pruning too early can lead to new growth that may not have a chance to harden off before the next winter.
For regions with cool and wet springs, like the Pacific Northwest, prune your sage in mid-to-late spring when the threat of frost has passed and soil conditions are favorable for growth. Remember to observe your plant’s specific needs and adjust pruning schedules accordingly.
Preparing Your Sage Plant for Pruning
Before you begin pruning your sage plant, it’s essential to prepare it for the process. Start by inspecting your plant carefully for any signs of pests or diseases. Check the leaves and stems for any white powdery patches, black spots, or yellowing that could be indicative of issues like powdery mildew or root rot. If you notice anything suspicious, treat the affected areas with a fungicide or insecticidal soap according to the product’s instructions.
Next, remove any dead or damaged leaves from the plant. This will help prevent the spread of disease and encourage healthy growth after pruning. Use scissors or pinch off the dead leaves at the base, making clean cuts just above a node (where a leaf meets the stem). Don’t pull on the leaves, as this can damage the stem and cause more harm than good.
By taking these simple steps, you’ll ensure your sage plant is in optimal condition for pruning, allowing you to enjoy a healthy and thriving specimen throughout the growing season.
Tools and Techniques for Effective Pruning
Now that you know when and how to prune your sage, let’s explore the essential tools and techniques you’ll need to get the job done effectively. From pruning shears to loppers, we’ll cover it all!
Choosing the Right Pruning Tools
When it comes to pruning sage, having the right tools can make all the difference. But using dull, dirty tools is not only ineffective but also risks spreading diseases between plants. This is why investing in sharp, clean tools is essential for a successful spring pruning session.
For smaller sage plants, a pair of good quality bypass pruners or hand shears will do the trick. These should have clean blades and be free from rust to prevent any damage to the plant tissue. Look for pruners with a sharp blade and a comfortable grip that fits your hand well. Some popular options include Felco and Fiskars, which are known for their high-quality pruning tools.
For larger sage plants or those with thicker stems, loppers may be more suitable. These come in different sizes, ranging from 20 to 40 cm, so choose one that suits the size of your plant. Make sure to clean and sharpen your loppers regularly to maintain their effectiveness.
Basic Pruning Techniques for Sage
When it comes to pruning sage in spring, understanding basic techniques is crucial for promoting healthy growth and maintaining its desired shape. To encourage new stem growth, start by cutting back damaged or overgrown stems to about one-third of their original length. This will stimulate the plant to produce fresh shoots from the remaining nodes.
Next, inspect your sage plants for any dead or damaged leaves, which can be removed entirely. Remove any weak or spindly growth, as this can compromise the plant’s overall vigor. To shape your sage, use pruning shears to trim back branches that are growing outside of its desired form. For example, if you’re trying to create a compact bushy shape, cut back the longest stems by about half to encourage branching.
When pruning, always make clean cuts just above a leaf node, and avoid tearing the stem, which can cause damage and lead to disease. By following these basic techniques, you’ll be able to rejuvenate your sage plants for another year of healthy growth and abundant harvests.
Advanced Pruning Techniques for Experienced Gardeners
For experienced gardeners looking to take their sage pruning skills to the next level, several advanced techniques are worth exploring. One key strategy is to focus on encouraging bushy growth by selectively removing certain branches and stems. To achieve this, simply trim back about one-third of the plant’s mature wood, cutting just above a node (where a leaf meets the stem). This will stimulate new growth from below, resulting in a fuller, more compact shrub.
Another technique worth considering is promoting root development through ‘topping’ – the process of cutting back the top third to half of the plant to encourage horizontal growth. This approach can be particularly beneficial for mature sage plants that have become leggy or sprawling over time.
Additionally, reducing transplant shock by gently removing any dead or damaged roots and stems before replanting can help your sage shrub establish itself more quickly in its new environment.
Common Mistakes to Avoid When Pruning Sage
Don’t let over-pruning or cutting at the wrong time harm your sage plant’s health, as these common mistakes can be easily avoided with a little know-how and attention to timing.
Over-Pruning: A Common Pitfall
Over-pruning is one of the most common mistakes gardeners make when pruning their sage plants in the spring. While it may seem like cutting back more of the plant would promote healthy growth and encourage new foliage, nothing could be further from the truth.
When you over-prune your sage plant, you’re essentially putting it under stress. This can weaken its immune system, making it more susceptible to disease and pests. For example, if you prune too much of the woody stems, you may inadvertently remove some of the plant’s natural defenses against fungal infections or aphid infestations.
Additionally, over-pruning can reduce your sage plant’s yields for the season. By cutting back too much foliage, you’re removing the very parts that produce the essential oils and fragrance for which sage is prized. This not only affects the flavor and aroma of your harvest but also diminishes the overall health and vigor of the plant.
To avoid this pitfall, make sure to prune your sage plant judiciously, removing only what’s necessary to maintain its shape and promote healthy growth. This will help ensure a bountiful harvest and a robust, disease-resistant plant that will thrive throughout the growing season.
Under-Pruning: An Overlooked Issue
Under-pruning is often overlooked as a critical issue when it comes to sage pruning. However, neglecting to trim back your sage plants properly can lead to stunted growth and reduced air circulation. As the plant continues to grow, its foliage may become congested, making it more susceptible to disease and pests.
When left unpruned, sage plants can develop a bushy, leggy appearance that is less visually appealing than a well-pruned shrub. This not only affects the aesthetic value of your garden but also impacts the overall health of the plant. Poor pruning habits can lead to reduced yields, as the plant’s energy is focused on producing foliage rather than flowering.
To avoid these issues, it’s essential to prune your sage plants regularly, removing any dead or damaged growth and cutting back overgrown branches. By doing so, you’ll promote healthy growth, improve air circulation, and maintain a compact, bushy shape that adds structure to your garden. Regular pruning will also encourage the plant to produce more flowers and prevent it from becoming leggy and uninviting.
Common Pruning Errors and How to Correct Them
Pruning sage can be an intimidating task, especially when you’re not sure if you’ve gone too far. It’s easy to over-prune, thinking that more is better, but this can actually do more harm than good. If you find yourself with a plant that looks like it’s been hacked back too aggressively, don’t worry – it can be revived.
To bring your over-pruned sage plant back to life, start by providing it with plenty of water and nutrients. This will help the plant focus its energy on growing new leaves rather than trying to recover from pruning shock. You should also prune some of the new growth back to encourage branching and prevent the plant from becoming leggy.
To avoid making this mistake in future seasons, take note of how you’re pruning your sage plants. If you find yourself constantly trimming more and more of the same areas, it may be a sign that you need to adjust your pruning technique. This can include pruning less frequently or focusing on removing only dead or damaged growth.
Tips for Specific Sage Varieties
For those with specific sage varieties, such as Purple Fountain or Burgundy, pruning techniques may need to be adjusted to maintain their unique shape and appearance. We’ll explore these special considerations next.
Pruning Herbs: A Guide for Different Sage Types
When it comes to pruning herbs, different sage types have unique needs and growth habits that require tailored approaches. For instance, creeping sage, a low-growing variety with a spreading habit, benefits from regular pinching to encourage bushy growth and prevent legginess.
On the other hand, pineapple sage, known for its vibrant red flowers and upright growth, requires more extensive pruning to maintain its shape and promote new growth. Cut back the spent flower stalks after blooming, and remove any dead or damaged leaves to maintain its appearance.
Dwarf varieties of sage, popular in container gardens, demand careful pruning to control their size without sacrificing their fragrance and flavor. Prune them back by about one-third after flowering to encourage a bushy growth habit and prevent over-maturity.
When pruning your specific sage type, consider factors like the plant’s intended use – is it for culinary or ornamental purposes? – and its growing conditions. By tailoring your pruning approach to the unique needs of your sage variety, you’ll be rewarded with healthy, thriving plants that thrive throughout the season.
Pruning for Culinary and Medicinal Uses
When it comes to pruning sage for culinary and medicinal uses, timing is everything. Prune your sage plants early in spring, just as new growth begins to emerge. This allows the plant to direct its energy towards producing robust, flavorful foliage perfect for cooking.
For culinary use, focus on maintaining a bushy shape with plenty of leaves. Regular pruning encourages the plant to produce more leaves, which can be used fresh or dried for later use. Harvest individual leaves or stems as needed, leaving about one-third of the plant intact to ensure continued growth. Consider cutting back your sage plants by half in late spring to promote new growth and prevent woody stems.
For medicinal purposes, look for the most fragrant, highest-quality leaves. Prune the tips of the branches to encourage branching and increase leaf density. This will help you harvest larger quantities of high-quality leaves suitable for teas, infusions, and other herbal remedies.
Maintaining Your Sage Plant After Pruning
Now that you’ve pruned your sage plant, it’s essential to provide it with proper care and maintenance to ensure healthy growth and prevent new problems from arising. This section will cover key tasks to perform after pruning.
Post-Pruning Care for Healthy Plants
After pruning your sage plant, it’s essential to provide it with proper care to promote healthy growth and prevent disease. Watering is crucial during this period, as the plant may be more susceptible to root rot if the soil is too wet. Check the soil moisture by sticking your finger into the soil up to the first knuckle; if the soil feels dry, it’s time to water.
Fertilizing after pruning can also stimulate new growth and encourage fruiting. Use a balanced, water-soluble fertilizer (20-20-20) at half the recommended strength to avoid burning the roots. For example, if the instructions recommend 1 tablespoon of fertilizer per gallon of water, start with half that amount.
In addition to watering and fertilizing, provide your sage plant with adequate sunlight and air circulation. Pruning can leave the plant vulnerable to pests and diseases, so ensure good air flow around it. Placing the pot on a tray filled with pebbles and water or using a humidifier nearby can also help maintain optimal humidity levels. Monitor your plant’s response to these care steps and adjust as needed.
Common Problems to Watch Out For After Pruning
After pruning your sage plant, you’ll want to keep an eye out for potential problems that may arise. One common issue is the invitation of pests, such as aphids, whiteflies, and spider mites, which can quickly colonize a newly pruned plant. To prevent this, make sure to inspect your plant regularly, especially during warm weather, and use neem oil or insecticidal soap to control infestations.
Diseases like powdery mildew and root rot can also become more apparent after pruning. These issues often stem from poor air circulation, overwatering, or a lack of sunlight. To mitigate this risk, ensure good air flow around your plant by maintaining an adequate distance between it and nearby objects. Be cautious with watering, as sage prefers well-drained soil and can be susceptible to root rot if the roots are consistently waterlogged.
To address any issues promptly, keep a close eye on your plant’s overall health, watching for signs of pests or diseases such as yellowing leaves, white powdery patches, or actual pest infestations. By taking proactive measures and being attentive to potential problems, you can enjoy a thriving sage plant throughout the growing season.
Conclusion: Mastering Sage Pruning in Spring
Now that you’ve mastered the techniques for pruning your sage in spring, it’s time to put them into practice and enjoy a thriving plant all year round. With these final tips, you’ll be confident in your abilities.
Recap of Key Takeaways
Pruning sage in spring is an art that requires precision, care, and attention to detail. By following the techniques outlined in this comprehensive guide, you’ll be well on your way to mastering the skill. Let’s recap the key takeaways from our journey through the world of spring sage pruning.
First and foremost, timing is everything when it comes to pruning sage in spring. Pruning too early can damage the plant, while waiting until later can lead to missed opportunities for growth. By pruning at the right moment – usually around late winter or early spring – you’ll encourage healthy new growth and prevent any potential setbacks. To determine the perfect pruning time, observe your sage plants for signs of new stem growth. When you notice a few inches of fresh greenery emerging from the base of the plant, it’s likely ready to be pruned.
Another crucial aspect of spring sage pruning is proper technique. We covered the importance of using sharp, clean tools and making precise cuts just above a node (where a leaf meets the stem). This helps prevent damage to the plant and encourages new growth. Don’t forget to remove any dead or damaged leaves or stems, as these can harbor pests or diseases that may harm your plants.
To keep your sage plants thriving throughout the growing season, be sure to provide them with adequate care. This includes regular watering, fertilization, and pest management. With a little practice and patience, you’ll be enjoying fresh, fragrant sage in no time.
By incorporating these key takeaways into your spring pruning routine, you’ll be well on your way to mastering the art of sage pruning. Remember to stay vigilant, observe your plants closely, and make adjustments as needed. Happy pruning!
Frequently Asked Questions
How Do I Know If My Sage Plant Is Ready for Pruning After Winter?
If your sage plant appears leggy, weak, or showing signs of disease after winter, it’s likely ready for pruning. Inspect the plant’s leaves and stems for any damage or decay, and look for new growth emerging from the base of the plant. Prune back any dead or damaged areas to encourage healthy growth.
Can I Prune My Sage Plant If It’s Still Frozen in the Ground?
No, it’s best to wait until the soil has warmed up and the risk of frost has passed before pruning your sage plant. Pruning while the plant is still frozen can cause damage to the stem and increase the risk of disease.
How Often Should I Water My Sage Plant After Pruning?
After pruning, water your sage plant regularly, but make sure not to overwater. The ideal soil moisture should be moist but not waterlogged. Check the soil daily, and adjust your watering schedule as needed based on weather conditions.
What If I Forget to Prune My Sage Plant in Spring? Can I Still Do It Later?
While it’s best to prune your sage plant in spring, you can still do so later in the season if necessary. However, keep in mind that pruning too late may reduce the plant’s productivity and vigor for the rest of the growing season.
How Long Does It Take for a Pruned Sage Plant to Recover and Start Producing Again?
The time it takes for a pruned sage plant to recover and start producing again depends on various factors, including the severity of the pruning, soil quality, temperature, and light exposure. In general, you can expect your pruned sage plant to take around 2-4 weeks to recover and start producing new growth.