The warm weather is finally here, but with it comes unwanted visitors to our gardens – wasps! If you’ve noticed a wasp nest in your yard, you know how daunting the task of removal can be. Not only can wasp stings be painful and even life-threatening for some people, but these nests can also damage plants and structures. In this article, we’ll take you through a comprehensive step-by-step guide on how to identify, prepare for, and safely remove wasp nests from your garden. We’ll cover the essential protective gear, removal techniques, and prevention methods you need to know to keep your outdoor space safe and pest-free. By following our expert advice, you’ll be able to confidently tackle those pesky wasp nests and enjoy your garden all season long.
Understanding Wasp Behavior and Nest Removal
When dealing with wasp nests, it’s essential to understand their behavior and patterns so you can safely remove them from your garden. This knowledge will help prevent future encounters.
Identifying Wasp Species and Their Nests
When it comes to wasp nest removal, it’s essential to identify the type of wasp and their nesting habits before taking action. There are several common wasp species found in gardens, each with unique characteristics.
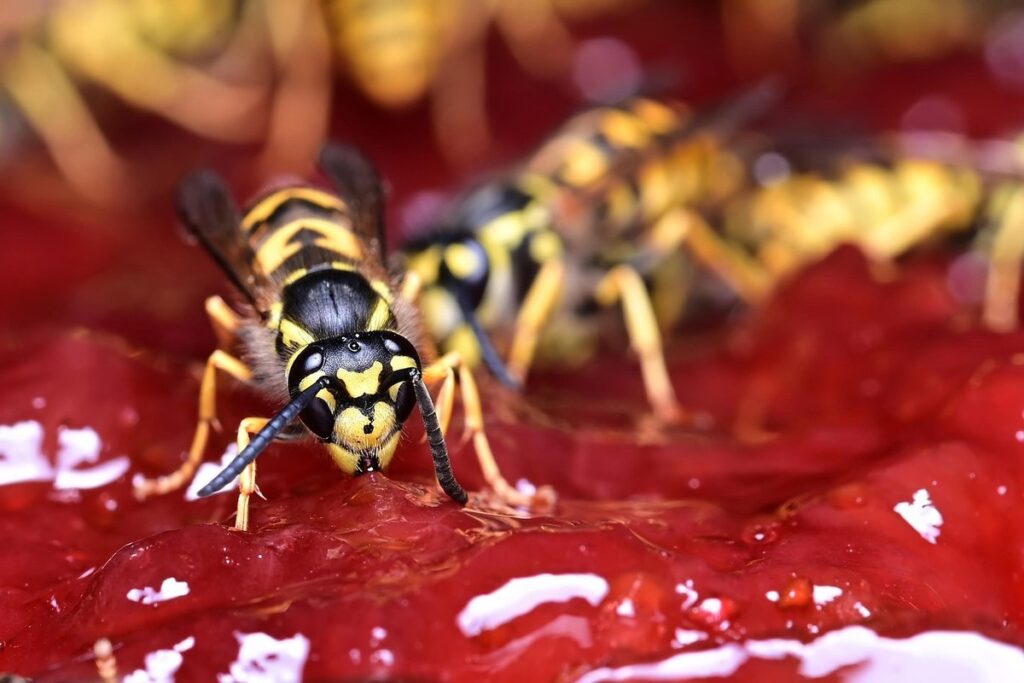
Paper wasps, for example, build umbrella-shaped nests from plant fibers and saliva, often attached to eaves or walls. Yellowjackets, on the other hand, construct exposed nests in protected areas like under decks or in rocks. Asian giant hornets create large, gray papery nests in trees or shrubs.
To identify a wasp nest, look for paper-like materials, such as leaves, twigs, and plant fibers, used to construct the nest. Observe the size and shape of the nest – larger nests typically belong to more aggressive species like Asian giant hornets. Consider the location and proximity to food sources when determining the type of wasp.
If you’re unsure about the type of wasp or their nesting habits, it’s best to consult a professional for safe removal. In some cases, it may be possible to safely coexist with certain wasp species by leaving them undisturbed – research specific guidelines for the types found in your area.
Recognizing Signs of an Active Wasp Nest
When you spot signs that a wasp nest is active, it’s essential to take immediate action. One of the most obvious indicators is an increase in wasp activity around the area where the nest is located. This can manifest as a swarm of wasps flying in and out of the nest or hovering nearby, searching for food.
You may also hear a buzzing noise coming from the nest, which grows louder as more wasps are attracted to the area. Another telltale sign is damage to surrounding plants. Wasps often defend their nests by stinging any potential threats, including animals that might be grazing in the garden or nearby flowers. If you notice leaves torn or chewed on, it could be a warning sign that there’s an active wasp nest nearby.
If you suspect an active wasp nest, avoid approaching the area directly and instead try to observe from a safe distance. Take note of the location of the nest, the number of wasps present, and any patterns in their behavior. This will help you determine the best course of action for removal or treatment.
Preparing for Wasp Nest Removal
Before attempting to remove a wasp nest from your garden, it’s crucial to prepare yourself and your surroundings for a safe removal process. Start by warning family members and pets to stay away from the area until the job is complete.
To begin with, make sure you have the necessary protective gear: a beekeeping suit or a full-face mask, gloves, and safety goggles. You’ll also need a ladder or extension pole if the nest is out of reach. If you’re using insecticidal soap or spray, be sure to read the label carefully and follow the instructions.
Next, consider the timing of your removal. Early morning or evening when wasps are less active is often the best time for removal. Keep in mind that some wasp species may become aggressive during this period, so exercise caution.
It’s also essential to have a plan in place for after the nest is removed. Have a container ready to dispose of the dead wasps and any debris from the nest. Don’t underestimate the importance of proper disposal – you don’t want to attract other pests or create an unsanitary environment.
Safety Precautions and Protective Gear
Before we dive into the removal process, it’s essential to take necessary precautions to avoid getting stung. This section will guide you on how to stay safe while handling wasp nests in your garden.
Choosing the Right Protective Clothing
When it comes to removing wasp nests from your garden, safety should always be your top priority. This is especially true when dealing with aggressive wasps that can sting repeatedly and cause serious harm. Choosing the right protective clothing is essential to minimize the risk of getting stung.
First and foremost, you’ll need a full-body suit or coveralls made of thick, sturdy material such as canvas or denim. This will provide protection against stings and also prevent any wasp venom from entering your skin through cuts or scrapes. Opt for a suit with long sleeves and pants to ensure maximum coverage.
Next, don’t forget about gloves! Wasp stingers can penetrate thin clothing, so it’s crucial to wear thick, heavy-duty gloves that will prevent the stinger from reaching your skin. You’ll also want to protect your eyes from any potential debris or wasp spray. Wear safety glasses or goggles with a wrap-around design to ensure a secure fit.
When selecting protective gear, consider the severity of the infestation and the type of wasps you’re dealing with. Some species are more aggressive than others, so it’s always better to err on the side of caution.
Using Repellents and Deterrents Effectively
When removing wasp nests from your garden, using repellents and deterrents can be an effective way to minimize risk. Before we dive into the removal process, let’s cover some essential tools that’ll help you stay safe.
When it comes to choosing a repellent, consider products containing citronella or lemongrass oil. These natural ingredients are known to repel wasps and other insects. You can spray them directly onto your clothing, skin, and surrounding areas where the nest is located.
Another option is to use smoke bombs or pyrethrin sprays as a deterrent. These products release a strong smell that will keep wasps away from the area for a short period. Just remember to follow the manufacturer’s instructions carefully to avoid any adverse effects on your plants or pets.
To further minimize risk, try wearing protective gear such as beekeeping suits and gloves when approaching the nest. This will prevent any accidental stings while you’re working. By combining repellents with proper protective gear, you’ll be well-equipped to tackle even the largest of wasp nests in your garden.
Removing Small Wasp Nests (Less Than 10 Inches in Diameter)
When you’re dealing with small wasp nests, typically less than 10 inches in diameter, you’ll want to follow a slightly different removal process. This section will guide you through that process safely and effectively.
Identifying the Type of Nest and Its Structure
To successfully remove a small wasp nest from your garden, it’s essential to identify the type of nest and its structure. This information will help you determine the best approach for removal and minimize the risk of being stung.
Start by observing the nest’s appearance from a safe distance. There are three main types of wasp nests: paper, mud, and umbrella. Paper nests are made from plant fibers, saliva, and water, and resemble a papery cone or umbrella shape. Mud nests, on the other hand, are built using mud and saliva, often with a distinctive rounded or oval shape.
Umbrella nests are characterized by their unique umbrella-like structure, with a central stem supporting multiple layers of hexagonal cells. Each nest type has its own unique characteristics, so take note of any patterns, shapes, or textures that may indicate the type of nest you’re dealing with.
If you notice a large number of wasps flying in and out of the nest, it’s likely an active nest. Be cautious when approaching, as these nests can be more aggressive than dormant ones. Take your time to observe and identify the nest type before proceeding with removal to ensure a safe and successful outcome.
Using a Vacuum Cleaner with a Hose Attachment
When dealing with small wasp nests that are less than 10 inches in diameter, using a vacuum cleaner with a hose attachment can be an effective and safe way to remove them. This method is particularly useful for nest locations where spraying or using insecticides may not be feasible.
Before attempting to use a vacuum cleaner with a hose attachment, make sure you have the right equipment. Ensure your vacuum has a sturdy hose that can withstand the weight of the nest, as well as a suitable suction power. It’s also essential to wear protective gear, including gloves, a long-sleeved shirt, and safety glasses.
To use the vacuum cleaner with a hose attachment, start by carefully inserting the nozzle into the nest, taking care not to disturb the wasps. Hold the vacuum close to the ground and gently turn on the suction power. Once you’ve sucked up the nest, be sure to dispose of it immediately in an airtight container.
By following these steps, you can safely remove small wasp nests from your garden using a vacuum cleaner with a hose attachment.
Removing Large Wasp Nests (10 Inches or Larger in Diameter)
Removing large wasp nests can be a daunting task, especially when they exceed 10 inches in diameter. In this section, we’ll walk you through the safest and most effective methods to remove these unwanted structures from your garden.
Assessing the Nest’s Size and Complexity
When dealing with large wasp nests, it’s essential to assess their size and complexity before attempting removal. This involves considering the type of nest you’re facing and its location.
For larger nests, typically those 10 inches or more in diameter, you’ll want to evaluate their internal structure. Are they made up of multiple layers or compartments? Do they have a single entrance point or multiple access points? Knowing this will help you understand the potential risks involved in removal.
If the nest is attached to a wall, tree, or other structure, its location may also impact your approach. Be cautious of nests situated near water sources, as the moisture can exacerbate stinging behavior.
Take note of any nearby plants, gardens, or walkways that could be affected by the removal process. Having this information will allow you to plan a safe and effective strategy for tackling the nest.
Using Insecticides or Professional Services
When it comes to removing large wasp nests from your garden, there are situations where using insecticides or seeking professional assistance is necessary. If you’re dealing with a nest that’s particularly aggressive or has a high concentration of wasps, it’s best to exercise caution and seek help.
For instance, if you notice a significant increase in wasp activity around the nest, or if the wasps are becoming increasingly defensive, it may be wise to hire a pest control professional. These experts have the necessary equipment and training to safely remove the nest without putting themselves or others at risk.
Additionally, if you’re unsure about the type of wasp nest you’re dealing with – such as a yellowjacket or hornet’s nest – it’s always better to err on the side of caution and seek professional assistance. These nests can be particularly aggressive and require specialized removal techniques.
In any case, before considering insecticides or professional services, try to observe the nest from a safe distance for 24-48 hours to gauge its activity level. This will help you determine whether it’s necessary to take more drastic measures.
After Removal: Cleaning and Disinfecting the Area
Now that you’ve successfully removed the wasp nest from your garden, it’s essential to thoroughly clean and disinfect the area to prevent future infestations. This process helps eliminate any remaining pheromones and debris.
Removing Dead Wasps and Nest Debris
When you’ve successfully removed the wasp nest from your garden, it’s essential to safely dispose of dead wasps and debris. This not only eliminates potential hazards but also prevents any remaining wasps from returning to rebuild their home.
Start by carefully collecting all visible dead wasps using a dustpan and brush or a disposable container with a sealable lid. If the nest is particularly large, you might need to wear protective gear like gloves and a face mask to avoid any potential stings.
Next, disinfect tools that came into contact with the nest by washing them in soapy water. This includes your ladder, gardening tools, and any other equipment used during removal. You can also use a mixture of equal parts water and white vinegar to help kill bacteria and germs.
When disposing of dead wasps and debris, make sure to seal the container or bag tightly before throwing it away. This prevents any remaining wasps from escaping and re-infesting your garden. Finally, take a few minutes to survey the area and remove any remaining nest fragments or debris to prevent regrowth and further infestation.
Preventing Future Wasp Infestations
To prevent future wasp infestations after removing the nest from your garden, it’s essential to take some crucial steps. When cleaning and disinfecting the area, make sure to remove all debris, including dead insects and nest fragments, as these can attract new wasps.
Seal any entry points or holes in your home, fence, or other structures to prevent wasp re-infestation. Inspect your garden regularly for signs of wasp activity, such as mud tubes on walls or nests in protected areas like eaves or attics.
Use a mixture of water and white vinegar to clean the area where the nest was removed. This natural solution can help eliminate any pheromone trails left behind by the wasps. Don’t forget to wear protective clothing and eyewear when handling cleaning solutions, as they can irritate skin and eyes.
To further discourage wasp activity, consider using a combination of plant-based repellents, such as citronella or lemongrass oil, with natural deterrents like mint plants around the perimeter of your garden. Regularly trimming weeds and keeping your garden tidy will also reduce hiding spots for wasps, making it less likely they’ll return to the area.
Keep in mind that some species of wasps can nest multiple times throughout a summer, so regular monitoring is crucial to prevent future infestations.
Common Mistakes to Avoid When Removing Wasp Nests
When removing wasp nests, it’s easy to overlook crucial details that can lead to a bigger problem. Let’s go over some common mistakes you should avoid when tackling this task.
Underestimating Wasp Aggression or Threats
Underestimating wasp aggression or threats is one of the most significant mistakes you can make when dealing with wasp nests. During peak seasons, usually between June and September, wasps become increasingly aggressive as they defend their colonies from perceived threats. These threats can be as simple as a nearby movement or as drastic as an actual attack on the nest.
If you underestimize this threat, you may find yourself facing severe consequences, including painful stings, allergic reactions, or even more serious health issues like anaphylaxis. According to statistics, approximately 50 people die each year in the United States due to wasp and hornet stings.
It’s essential to remember that when dealing with wasps, it’s not just about removing the nest but also being aware of your surroundings and taking necessary precautions. This includes wearing protective clothing, including a beekeeping suit, gloves, and a veil. If you’re unsure or uncomfortable dealing with wasp nests, consider hiring a professional exterminator to handle the task.
Failing to Use Proper Protective Gear
When removing wasp nests, it’s crucial to take necessary precautions to avoid getting stung. One of the most common mistakes is failing to use proper protective gear. Wasp stings can be severe and may cause an allergic reaction, so it’s essential to wear the right attire to protect yourself.
Before starting, put on a beekeeping suit or a long-sleeved shirt, long pants, and closed-toe shoes. A veil to cover your face is also necessary to prevent wasp stings on your neck and face area. Wear gloves to protect your hands from getting stung while handling the nest or nearby plants.
It’s not just about protecting yourself; wearing protective gear also helps you focus on the task at hand, rather than worrying about potential stings. Imagine trying to remove a wasp nest without proper protection – it can be intimidating and stressful. Don’t risk it! Invest in a good quality beekeeping suit or create your own protective gear.
Remember, prevention is better than cure. Protect yourself from wasp stings by wearing the right gear every time you tackle a wasp nest removal job.
Additional Tips for Wasp Nest Prevention and Control
If you’ve already removed a wasp nest from your garden, these extra tips will help you prevent future invasions and minimize the risk of re-infestation. Follow these simple precautions to keep your outdoor space safe.
Creating a Wasp-Repellent Garden Environment
Creating an environment that discourages wasps from building nests in your garden is a crucial aspect of preventing wasp infestations. By making a few simple changes to your garden’s layout and adding some strategically placed features, you can create a wasp-repellent space that keeps these stinging insects at bay.
One of the primary reasons why wasps are drawn to gardens is the abundance of food sources available. By removing or reducing potential food sources, you can significantly decrease the likelihood of attracting wasps. This includes eliminating sweet-tasting substances such as soda, fruit, and honey from your garden. Regularly clean up any dropped fruits and vegetables, and consider using bird-friendly plants that produce berries instead of sugary treats.
Another crucial step in creating a wasp-repellent environment is to eliminate standing water sources. Wasps need water for drinking and egg-laying purposes, so eliminating these sources can go a long way in discouraging them from building nests on your property. Ensure that all gutters are clean and functioning properly, and consider installing a French drain or a shallow ditch around the perimeter of your garden to prevent water accumulation.
To further discourage wasps from inhabiting your garden, plant some natural repellent plants such as basil, mint, or lemongrass. These herbs contain oils that naturally repel wasps, making them an excellent addition to your garden’s landscape design. Consider grouping these plants together in a “repellent corner” to maximize their effectiveness.
In addition to removing attractants and adding natural repellents, consider the overall layout of your garden. Keep plants with dense foliage, such as shrubs or bushes, away from seating areas or walkways to prevent wasps from nesting nearby. Also, keep your garden free of debris and clutter, which can provide hiding spots for wasp nests.
By implementing these simple strategies, you can create a wasp-repellent environment that reduces the likelihood of wasp infestations in your garden. Remember that prevention is key when it comes to keeping these stinging insects at bay, so take proactive measures to safeguard your outdoor space.
Frequently Asked Questions
Can I use a regular vacuum cleaner to remove small wasp nests, or do I need a specific attachment?
You can try using a regular vacuum cleaner with a hose attachment to remove small wasp nests (less than 10 inches in diameter). However, be cautious not to disturb the nest too much, as this could trigger an attack. For more complex or larger nests, it’s best to use a specialized vacuum cleaner with a dedicated insect removal tool.
What should I do if I’m stung by a wasp while trying to remove the nest?
If you’re stung by a wasp during removal, remain calm and slowly retreat from the area. Wash the affected area with soap and water as soon as possible. If you experience any severe symptoms or allergic reactions (such as difficulty breathing, rapid heartbeat, or swelling), seek medical attention immediately.
How can I prevent future wasp infestations in my garden?
To create a wasp-repellent garden environment, ensure regular maintenance by removing food sources and debris. Trim shrubs and trees to reduce sheltered areas for nests. Plant wasp-deterrent flowers like mint, basil, or chives around the perimeter of your garden.
Can I use insecticides to remove large wasp nests, or is it better to hire a professional?
Using insecticides can be effective in removing large wasp nests (10 inches or larger in diameter), but exercise caution: misusing chemicals can harm yourself and other beneficial insects. If you’re unsure about the nest’s size or your ability to handle the situation safely, consider hiring a pest control professional for assistance.
How long does it take for a newly removed wasp nest to be repopulated?
It depends on various factors like the nest’s age, wasp species, and surrounding environment. Typically, a new wasp nest can become repopulated within 24-72 hours after removal, but this timeframe may vary. Regular monitoring and proactive measures (like using repellents or professional services) are essential for preventing future infestations.