Growing your own ground cherries can be a rewarding experience, but it requires careful planning and attention to detail. If you’re new to growing this unique fruit, selecting the right variety is crucial – some are better suited for cooler climates while others thrive in warmer temperatures. To ensure a successful harvest, you’ll also need to prepare your soil properly, choosing a spot with well-draining soil that’s rich in nutrients. This comprehensive guide will walk you through every step of the process, from planting and watering to pest management tips. By following our expert advice, you’ll be able to enjoy a bountiful harvest of these sweet and tangy fruits. Whether you’re a seasoned gardener or just starting out, this article has everything you need to grow ground cherries like a pro.
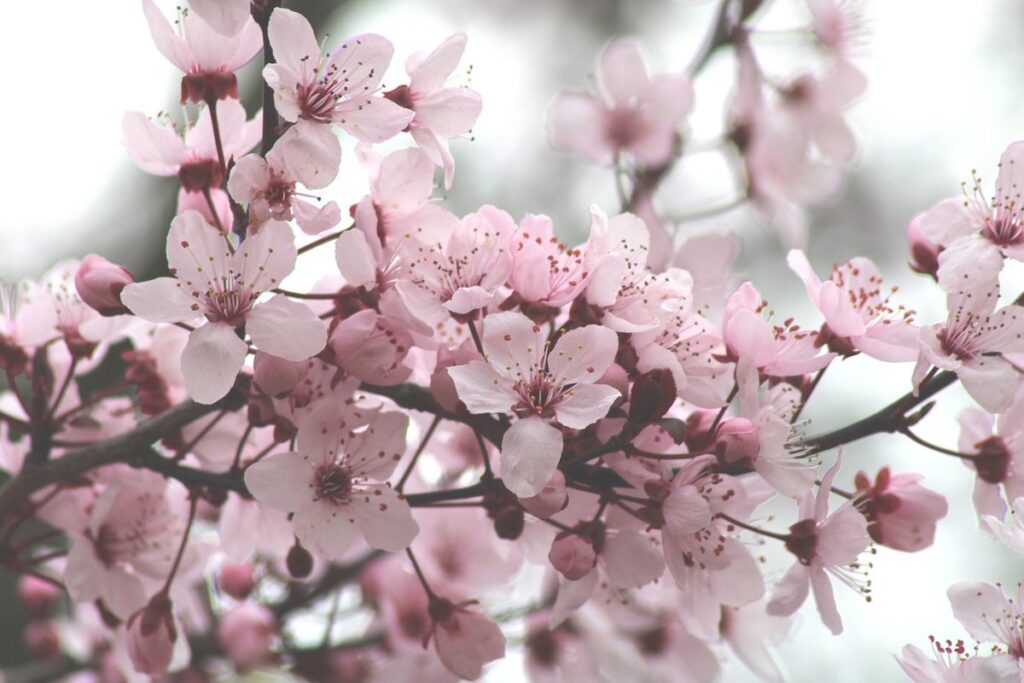
Choosing the Right Variety
When it comes time to plant, selecting a ground cherry variety that thrives in your specific climate and growing conditions is crucial for success. Let’s explore the different options available to you.
Understanding Ground Cherry Types
Ground cherries come in several species, each with its unique characteristics. Physalis pruinosa, also known as purple ground cherry, is a popular variety that thrives in cooler climates. It produces smaller fruit with a sweet-tart taste and is often used for jams and preserves.
On the other hand, Physalis pubescens, or goldenberry, prefers warmer temperatures and produces larger, more orange-yellow fruits. This species is ideal for gardeners who live in regions with mild winters and long growing seasons.
When selecting a ground cherry variety, consider your climate, soil type, and personal preference. If you live in an area with cool summers, opt for Physalis pruinosa. For warmer climates, choose Physalis pubescens. You can also experiment with other species like Physalis philadelphica or Physalis crassifolia.
Remember to research the specific growing requirements of your chosen variety and adjust your gardening techniques accordingly. By selecting the right ground cherry type for your environment, you’ll be well on your way to a bountiful harvest.
Checking Seed or Plant Sources
When it comes to growing ground cherries successfully, the quality of your seeds or seedlings can make all the difference. That’s why it’s essential to check the authenticity and disease-free status of your plant sources. To ensure you’re getting high-quality materials, stick to reputable suppliers.
Online nurseries like Burpee or Seed Savers Exchange are great places to find disease-free ground cherry seedlings or seeds. They often have a wide selection of varieties and provide detailed information about each one’s characteristics and growing requirements. Local gardening stores or farmers’ markets can also be good sources for seedlings, but be sure to ask about the plants’ origin and health status.
When buying seeds or seedlings from online retailers, look for certifications like USDA Organic or NOP (National Organics Program) approved. These ensure that your materials meet strict standards for quality and authenticity. Always read reviews and check the supplier’s return policy in case you encounter any issues with your purchase. By choosing reputable sources, you’ll set yourself up for success in growing delicious and healthy ground cherries.
Preparing the Soil
Before planting, it’s essential to prepare your soil to provide the right environment for ground cherry growth. Let’s dive into the specifics of creating a suitable growing space.
Assessing pH Levels
Testing soil pH levels is an essential step in creating an optimal growing environment for ground cherries. Most varieties prefer slightly acidic conditions, with a pH range of 6.0-7.0 being ideal. To assess the pH level of your soil, you can use a DIY testing kit or send a sample to a lab for analysis.
If your soil test reveals a pH level that’s too high (above 7.0) or too low (below 6.0), it may impact plant growth and productivity. For example, if the soil is too alkaline, nutrient availability will be reduced, leading to weak and spindly plants. On the other hand, if the soil is too acidic, nutrient deficiencies can occur, causing stunted growth.
To adjust your soil pH levels, you can use organic amendments like peat moss or elemental sulfur. For example, adding 1-2 inches of composted peat moss to the soil will help lower the pH and provide essential nutrients. Conversely, applying elemental sulfur at a rate of 10-20 pounds per 100 square feet will raise the pH.
When making adjustments, keep in mind that even small changes can have significant effects on plant growth. It’s better to make gradual adjustments over time rather than trying to correct extreme pH levels abruptly. Regular soil testing and monitoring will help you maintain an optimal growing environment for your ground cherry plants.
Adding Organic Matter
When it comes to growing ground cherries, one of the most critical steps in preparing the soil is adding organic matter. This process not only improves the structure and fertility of the soil but also provides essential nutrients for optimal growth. Incorporating compost, manure, or peat moss into your soil can have a significant impact on the overall health of your ground cherry plants.
Compost, for instance, is rich in nutrients that are readily available to plants, including nitrogen, phosphorus, and potassium. Adding 2-3 inches of compost to the top layer of soil can provide a boost of these essential macronutrients. Peat moss, on the other hand, helps to improve drainage and aeration, making it easier for roots to grow.
To incorporate organic matter into your soil, start by loosening the top 6-8 inches with a fork or tiller. Then, mix in 2-3 inches of compost, manure, or peat moss until it’s evenly distributed throughout the bed. This simple process can make all the difference in the health and productivity of your ground cherry plants. By giving them a nutrient-rich foundation to grow from, you’ll be well on your way to enjoying a bountiful harvest.
Planting Ground Cherries
When planting ground cherries, it’s essential to choose a location that receives full sun and has well-draining soil. Make sure your space is ready for these unique plants!
Sowing Seeds Correctly
When sowing ground cherry seeds, it’s essential to consider their specific spacing requirements. These plants thrive when given about 18-24 inches of space between each other, allowing for adequate sunlight and air circulation. Sow seeds directly into the soil in late spring or early summer, when the threat of frost has passed.
To ensure proper growth, sow seeds about 1/4 inch deep and 2-3 inches apart. As they germinate and grow, thin them out to their final spacing of 18-24 inches. If you’re sowing multiple rows, space each row about 36-48 inches apart. Keep in mind that dense populations can lead to reduced growth rates and an increased risk of disease.
In densely packed seedlings, growth may be stunted due to competition for resources like water, nutrients, and light. This can result in weaker plants that are more susceptible to pests and diseases. By giving each plant enough space to mature, you’ll encourage healthy growth and a bountiful harvest.
Transplanting Seedlings
Transplanting seedlings is an essential step in growing ground cherries. As they outgrow their initial containers, you’ll need to transfer them into larger vessels or directly into the garden bed. Start by gently removing the seedling from its container, taking care not to disturb the roots. If the plant has become pot-bound, use a fork to carefully loosen the soil around the root ball.
When transplanting into a new container, choose one that is at least 6-8 inches deep and has drainage holes to prevent waterlogged soil. Plant the seedling at the same depth as it was in its original container, making sure not to compact the soil. Water thoroughly after transplanting and keep the soil consistently moist during the first few weeks.
When direct sowing into the garden bed, space seedlings 12-18 inches apart and bury them up to their first true leaves. Mulch around the plants to retain moisture and suppress weeds. Water regularly but avoid overwatering, which can lead to root rot and other issues.
Watering and Mulching
Proper watering and mulching are essential for ground cherry plants, so let’s dive into how to give them just the right amount of moisture and protection.
Maintaining Adequate Moisture Levels
Ground cherries are notorious for being finicky when it comes to watering. One of the most common mistakes gardeners make is overwatering their plants. This can lead to root rot and other problems that can be difficult to recover from. On the other hand, underwatering can also cause stress to the plant, leading to reduced yields.
To strike a balance, you need to develop an irrigation schedule tailored to your local climate conditions. Check the soil moisture by inserting your finger into the soil up to the first knuckle. If the soil feels dry, it’s time to water. Aim for about 1 inch of water per week, either from rain or irrigation.
In areas with high temperatures and low humidity, ground cherries may need more frequent watering. In cooler, wetter climates, you can get away with less frequent watering. Be sure to also take into account the age of your plants – seedlings require more water than mature plants. By paying attention to these factors and adjusting your watering schedule accordingly, you’ll be well on your way to growing healthy, productive ground cherries.
The Benefits of Mulching
Mulching is an essential practice when growing ground cherries, and it offers numerous benefits that can significantly impact your harvest. One of the primary advantages of mulching is its ability to retain moisture in the soil, reducing the need for frequent watering. This is especially beneficial during hot summer months when ground cherries require consistent moisture levels.
In addition to retaining moisture, mulch also helps suppress weeds by blocking light and preventing seed germination. This not only saves you time and effort but also prevents competition between your plants and unwanted growth. Mulch also regulates soil temperature, keeping it cooler in the summer and warmer in the winter, which is crucial for ground cherry cultivation.
When choosing a mulch for your ground cherries, consider using organic options like straw or bark chips. These materials are easy to find, inexpensive, and can be easily replenished as needed. Apply a 2-3 inch layer of mulch around your plants, keeping it a few inches away from the stem to prevent moisture buildup and potential disease issues. Regularly replenishing the mulch will help maintain its effectiveness throughout the growing season.
Pest and Disease Management
To keep your ground cherry plants healthy, it’s essential to learn how to prevent common pests and diseases from taking over. We’ll cover the most effective methods for keeping your plants pest- and disease-free.
Identifying Common Pests
When growing ground cherries, it’s essential to be aware of common pests that can damage your crop. One of the most prevalent issues is aphids, tiny insects that feed on plant sap and secrete a sticky substance called honeydew. Aphids reproduce quickly, with some species producing multiple generations in as little as two weeks. To control them, use neem oil or insecticidal soap to coat the leaves and stems.
Another pest affecting ground cherries is whiteflies, which also feed on plant sap. These flying insects can transmit diseases like virus yellows and leaf roll. Integrated Pest Management (IPM) techniques recommend using sticky traps to capture adult whiteflies and introducing natural predators like lacewings or ladybugs to control the population.
Snails are another common pest that can cause significant damage, especially at night when they feed on the fruit. To prevent snail infestations, use copper tape around plant stems or apply a barrier of crushed eggshells around the plants. Regularly inspect your ground cherry patch and remove any snails you find to prevent further damage.
To manage pests effectively, it’s crucial to monitor your crop regularly and take action before populations become severe. Use physical barriers, organic pesticides, or introduce beneficial insects to control pest populations without harming the environment. By being proactive and using IPM techniques, you can enjoy a healthy and productive ground cherry harvest.
Recognizing Diseases and Fungal Infections
As you tend to your ground cherry plants, it’s essential to be aware of potential diseases and fungal infections that can affect their health. One common issue is fusarium wilt, a soil-borne fungus that causes yellowing leaves, wilting, and eventual plant death. Powdery mildew is another disease that can devastate your crop, causing white powdery patches on the leaves and stems.
To prevent these diseases, make sure to maintain good air circulation around your plants by pruning nearby foliage and ensuring adequate spacing between them. Regularly inspect your plants for signs of infection, such as yellowing or browning leaves, and treat promptly if you notice any issues.
For early detection, keep an eye out for unusual growth patterns, such as stunted or distorted leaves. If you suspect fusarium wilt, remove infected plants to prevent the fungus from spreading to other parts of your garden. For powdery mildew, spray a mixture of water and neem oil on the affected areas to help control the outbreak.
Harvesting Ground Cherries
Now that you’ve harvested a bountiful crop of ground cherries, it’s time to learn how to collect and store them properly for maximum flavor and enjoyment. We’ll walk you through the process step by step.
Monitoring Fruit Ripeness
Monitoring fruit ripeness is crucial when harvesting ground cherries to ensure you pick them at the optimal stage. As ground cherries ripen, they undergo a series of changes that indicate their readiness for harvest. One way to assess ripeness is by looking at the color change. Ground cherries typically turn from green to yellow or red, depending on the variety.
Another indicator is texture. Ripe ground cherries will be slightly soft to the touch, especially around the stem end. This softening is a natural process and shouldn’t be mistaken for over-ripeness. In fact, if the fruit becomes too soft, it may have already begun to spoil.
To avoid damaging the fruit or plant, gently grasp the ground cherry at the stem, rather than squeezing it from the sides. Handle the fruit carefully, as they are delicate and can bruise easily.
Preserving Ground Cherry Harvests
When it comes to preserving ground cherry harvests, you’ll be thrilled to know that they’re incredibly versatile and can be stored and prepared in a variety of ways. Not only do they make for a delicious jam or jelly, but their unique flavor profile also lends itself well to freezing, dehydrating, and even pickling.
To start, consider freezing your ground cherries whole or chopped. Simply rinse them thoroughly, pat dry with a paper towel, and store in an airtight container or freezer bag. Frozen ground cherries are perfect for adding to smoothies, baked goods, or using as a topping for yogurt or oatmeal.
For longer-term storage, consider making a batch of homemade jam or jelly. Ground cherries pair beautifully with herbs like mint, basil, and rosemary, so don’t be afraid to experiment with different flavor combinations. Alternatively, you can dry ground cherries using a food dehydrator or by spreading them out on a baking sheet in a low-temperature oven (135°F – 150°F). Dried ground cherries are perfect for snacking, adding to trail mix, or using as a topping for salads.
As you preserve your ground cherry harvests, be sure to take advantage of their impressive nutritional benefits. Ground cherries are high in vitamin C, potassium, and antioxidants, making them an excellent addition to a healthy diet. With a little creativity and some basic equipment, you can enjoy your ground cherries throughout the year, even when they’re out of season.
Frequently Asked Questions
Can I grow ground cherries from seed or is it recommended to purchase seedlings?
Yes, you can grow ground cherries from seed, but be aware that this method may take longer and requires more care. If you choose to start with seeds, make sure to follow proper sowing techniques and provide adequate moisture levels. Purchasing seedlings can give you a head start on the growing season.
How do I handle pests like aphids and whiteflies in my ground cherry patch?
Integrated pest management (IPM) is essential for controlling pests without harming the environment or your plants. Regularly inspect your plants, use physical barriers to prevent infestations, and introduce beneficial insects to control aphid and whitefly populations.
What’s the ideal soil pH range for growing ground cherries?
Ground cherries prefer slightly acidic to neutral soil pH (around 6.0-7.0). If your soil is too alkaline or acidic, amend it with organic matter like compost or well-rotted manure to achieve a balanced pH.
Can I grow multiple varieties of ground cherry in the same patch?
Yes, but be aware that different varieties may have unique growing requirements and space needs. Choose companion plants that complement each other’s growth habits and ensure sufficient spacing to prevent overcrowding and disease transmission.
How do I know when my ground cherries are ripe for harvesting?
Gently lift the papery husks of your ground cherry fruits, and if they come off easily, the fruit is ready to be picked. Regularly inspect your plants and harvest them when the color has deepened, usually within 60-90 days after planting.