Mulching your vegetable beds with straw is one of the simplest yet most effective ways to improve the health and productivity of your garden. Not only does it reduce soil erosion and suppress weeds, but it also helps retain moisture and regulate soil temperature – giving your crops a boost they need to thrive. But that’s not all – mulch can also deter pests and diseases, reducing the need for chemical treatments and other expensive solutions. In this article, we’ll delve into the benefits of straw mulching, explore best practices for its use, and address common issues you may encounter along the way. Whether you’re a seasoned gardener or just starting out, understanding the value of straw mulch can make all the difference in growing a bountiful harvest.
Benefits of Mulching with Straw
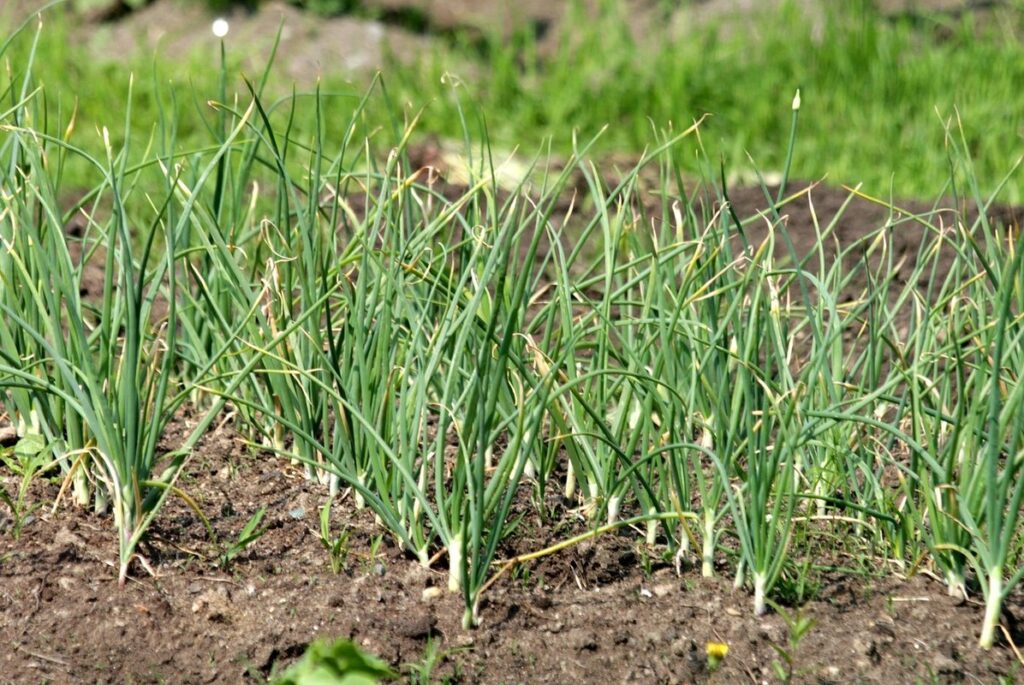
Using straw as a mulch for your vegetable beds has numerous benefits, from reducing soil erosion to preventing weeds and retaining moisture. Let’s explore these advantages in more detail.
Reduces Soil Erosion and Moisture Loss
Straw mulch is an excellent tool for retaining soil moisture, and it plays a crucial role in preventing erosion. When straw is applied to vegetable beds, it acts as a barrier that shields the soil from direct sunlight, wind, and heavy rainfall, which can lead to water evaporation and soil washing away.
This retention of moisture reduces the need for frequent watering, making it an ideal solution for gardeners who want to conserve water and reduce their environmental footprint. By keeping the soil consistently moist, straw mulch also promotes healthy root growth and development in plants.
As a practical example, consider using 2-3 inches of straw mulch on your vegetable beds during dry spells or hot weather. This will help to keep the soil cool, retain moisture, and prevent erosion. It’s essential to replenish the mulch layer as needed to maintain its effectiveness. With regular applications of straw mulch, you can enjoy lush growth, reduced watering needs, and a healthier garden ecosystem.
Suppresses Weeds and Pests
Straw mulch is not only an effective way to retain moisture and regulate soil temperature but also a powerful tool for suppressing weeds and pests that can harm your vegetable plants. By creating a barrier between the soil and the air, straw mulch prevents weed seeds from germinating and makes it difficult for existing weeds to grow.
In addition to controlling weeds, straw mulch also helps to deter pests such as slugs and snails by providing an unappealing surface for them to cross. This reduces the need for pesticides, which can be toxic to beneficial insects and other wildlife. By using straw mulch, you can significantly reduce the amount of chemicals you use in your garden.
Some common weeds that are easily suppressed by straw mulch include bindweed, creeping thistle, and perennial sowthistle. To achieve optimal results, apply a 2-3 inch layer of straw to your vegetable bed and keep it consistently moist but not waterlogged. This will help the straw break down slowly over time, providing ongoing benefits for your garden’s health and productivity.
Improves Soil Temperature and Structure
When you mulch your vegetable beds with straw, one of the most significant benefits is its ability to regulate soil temperature. In the summer, straw acts as a barrier between the scorching sun and the soil, keeping it cooler by up to 10°F (5°C). This is especially crucial for vegetables that are sensitive to high temperatures, such as lettuce, spinach, and beans. On the other hand, in the winter, the straw helps retain heat within the soil, warming it up and allowing plants like broccoli, kale, and carrots to grow.
As the straw breaks down over time, it improves the soil structure by adding organic matter and aeration. This can lead to better drainage, increased water retention, and a reduced need for tilling or digging. To maximize these benefits, aim to apply a 2-3 inch layer of straw in the spring, allowing it to break down over the growing season. You can also add a new layer every few months to maintain optimal soil health and structure.
Choosing the Right Straw for Mulching
When selecting a straw for mulching your vegetable beds, consider factors such as decomposition rate and weed suppression to ensure optimal results. Choose from various types of straw to suit your specific needs.
Types of Straw Suitable for Mulching
When it comes to mulching vegetable beds with straw, the type of straw you choose is crucial. Different types of straw offer varying benefits and drawbacks that can impact the health of your garden.
Wheat straw, for instance, is a popular choice due to its abundance and affordability. It’s also relatively weed-free, which means less competition for your vegetables’ nutrients. However, wheat straw tends to break down quickly, so it may need to be replenished more frequently than other types of straw.
Oat straw, on the other hand, is known for its long-lasting properties. It can remain intact in the garden bed for up to two growing seasons, reducing the need for frequent reapplication. Oat straw also has a slightly sweeter scent and is often used as a natural weed suppressant.
Rye straw offers a balance between wheat and oat straw’s benefits. It breaks down relatively quickly, but its coarse texture helps prevent weeds from sprouting. Keep in mind that rye straw can be more expensive than other types of straw.
When choosing the right type of straw for your garden bed, consider factors like climate, soil type, and the specific needs of your vegetables. This will help you select the most suitable option for optimal mulching results.
Considering Quality and Quantity
When it comes to mulching your vegetable beds with straw, choosing high-quality material is crucial for several reasons. First and foremost, you want to ensure that the straw you use doesn’t introduce any contaminants into your soil. This means avoiding straw that’s been treated with pesticides or other chemicals, as these can harm beneficial microorganisms in the soil.
To select a clean and pest-free straw, look for organic options that have been certified by reputable organizations such as OMRI (Organic Materials Review Institute) or USDA National Organic Program. You should also avoid using straw from areas where you’ve recently sprayed herbicides or pesticides, as these chemicals can persist in the straw even after it’s harvested.
In terms of quantity, a general rule of thumb is to use 2-3 inches of straw for mulching. This amount will help retain moisture, suppress weeds, and regulate soil temperature without overwhelming the plants with too much organic matter.
Applying Straw Mulch Effectively
To apply straw mulch effectively, you’ll need to consider factors such as layer thickness and timing of application to ensure optimal results.
Preparation of Vegetable Beds
Before applying straw mulch to your vegetable beds, it’s essential to prepare the soil properly. Clearing debris and tilling the soil may seem like a tedious task, but it sets the stage for healthy growth and optimal mulching results.
Start by removing any weeds or debris from the bed using a tool like a rake or hoe. Be sure to remove all visible weeds, as their roots can still be active and compete with your desired plants for water and nutrients. Next, till the soil to a depth of about 8-10 inches. This will loosen compacted soil, reduce soil density, and allow for better drainage.
If you’re new to gardening or have heavy clay soils, consider renting a rototiller to make this process easier. For smaller beds or areas with minimal debris, a garden fork or spade will suffice. Remember to till the soil when it’s moist but not waterlogged, as this will help break up any clumps and aerate the soil.
By taking these initial steps, you’ll create an ideal environment for your straw mulch to thrive – and ultimately support healthy plant growth and a bountiful harvest.
Applying the Right Amount of Straw
Applying the right amount of straw mulch is crucial to ensure its effectiveness in retaining moisture and suppressing weeds. The ideal amount depends on various factors including climate, soil type, and plant density.
In hot and dry climates, a thicker layer of 4-6 inches (10-15 cm) can help retain moisture and protect roots from extreme temperatures. In contrast, cooler and more humid climates may require only 2-3 inches (5-7.5 cm) to prevent waterlogging.
Soil type also plays a significant role in determining the right amount of straw mulch. Sandy soils tend to drain quickly, so a deeper layer is necessary to retain moisture. Clay soils, on the other hand, can become waterlogged with excess straw, leading to root rot and other issues.
For densely planted beds, apply a thinner layer to prevent smothering plants. A general rule of thumb is to add 1-2 inches (2.5-5 cm) for each month of growth, taking care not to cover the crown or base of the plant.
Keep in mind that straw mulch can be replenished as needed, and it’s essential to maintain a balance between retaining moisture and preventing waterlogging. Monitor your plants’ response and adjust the amount accordingly to achieve optimal results.
Maintenance and Care of Mulched Vegetable Beds
Now that you’ve mulched your vegetable bed, let’s talk about how to keep it looking its best – from weeding to water management.
Monitoring Moisture Levels
Monitoring moisture levels is crucial when mulching vegetable beds with straw. If the straw gets too dry, it can become a fire hazard, while excessive moisture can lead to mold and rotting plants. Here’s how you can check the moisture level of your straw mulch:
To ensure the straw isn’t too dry, perform the “stick test”: insert a wooden stick or skewer into the mulch up to about 6-8 inches deep. If it feels cool to the touch or slightly damp, that’s perfect. If it’s dry and crumbly, it’s time to water the bed. Conversely, if the stick comes out wet or spongy, you’ve got too much moisture.
Check the mulch every few days during hot weather, as straw can dry quickly in direct sunlight. Avoid overwatering, as this can lead to root rot and other issues. Keep an eye on your plants’ leaves – if they start to wilt or turn yellow, it’s likely due to excessive water or poor drainage.
In general, a well-mulched bed with adequate moisture will have a slightly damp appearance but not be soggy or waterlogged.
Replenishing Straw Mulch as Needed
As you begin to harvest your vegetables, it’s essential to replenish the straw mulch to maintain its benefits and extend its lifespan. A 2-3 inch layer of fresh straw can be applied on top of the existing mulch to cover exposed soil areas and protect them from moisture loss.
You’ll know it’s time to replenish when you notice the original mulch has started to break down, or if you see weeds emerging through the gaps. Check your bed regularly, as this will help prevent weeds from getting a foothold. Apply the new straw evenly, making sure to cover all exposed areas. This will also help to regulate soil temperature and retain moisture.
For example, if you’ve used a thick layer of straw initially (4-6 inches), you can simply top it off with 2-3 inches of fresh material as needed. Remember, the goal is to maintain a consistent depth to prevent moisture from escaping through the mulch. By replenishing your straw mulch on an as-needed basis, you’ll be able to enjoy healthy, weed-free vegetables all season long!
Troubleshooting Common Issues with Straw Mulching
Don’t worry if things don’t go as planned with your straw mulch – we’ve got you covered! This section addresses common problems and offers practical solutions to get your vegetable beds back on track.
Dealing with Pests and Diseases
When growing vegetables in straw mulch, it’s essential to monitor for common pests and diseases that can impact yields. Keep an eye out for signs of infestation, such as holes in leaves, white powdery patches on stems, or small insects on plants.
Slugs and snails are notorious for causing damage to vegetable plants in moist environments like straw mulch. To control them, use copper tape around plant stems or set up beer traps overnight. For diseases like powdery mildew or downy mildew, remove infected leaves and improve air circulation by lightly raking the straw.
Fungal diseases thrive in damp conditions, so ensure good drainage and avoid overwatering. Regularly inspect plants for signs of disease and take swift action to prevent its spread. Common pests like aphids and whiteflies can be controlled using neem oil or insecticidal soap sprays.
For severe infestations or diseases, consider implementing integrated pest management (IPM) strategies that combine physical barriers, cultural controls, and organic pesticides. Keep in mind that some chemicals may not be suitable for use around edible plants, so always check the label and follow instructions carefully.
Managing Weeds and Excessive Moisture
Weeds can quickly overgrow and choke out your vegetables, while excessive moisture can lead to rot and disease. To prevent these issues, it’s essential to manage weeds and moisture effectively. Here are some practical tips to help you maintain a healthy and thriving mulched vegetable bed.
Firstly, spread a thick layer of straw (at least 4-6 inches) over the entire bed, including any pathways. This will suppress weed growth by blocking light and preventing seeds from germinating. However, be aware that weeds can still grow up through the mulch, especially if it’s not deep enough.
To prevent this, you can use a combination of physical and cultural methods to control weeds. Remove any visible weeds by hand or with a tool before applying the straw mulch. You can also use a pre-emergent herbicide to prevent new weed growth.
For excessive moisture, ensure good air circulation around your plants by maintaining sufficient space between them. Also, water wisely – aim for about 1-2 inches of water per week, either from rain or irrigation. Avoid overwatering, which can lead to rot and disease. Instead, use a drip irrigation system or soaker hose to deliver water directly to the roots, reducing evaporation and runoff. By implementing these strategies, you’ll be able to enjoy a healthy, weed-free, and productive vegetable bed all season long.
Tips for Extending the Life of Straw Mulch
To get the most out of your straw mulch, it’s essential to take steps to prevent moisture buildup and decay, which can reduce its effectiveness over time. Regular maintenance is key!
Adding Organic Matter
Adding organic matter to straw mulch can give it an extra boost of fertility and help extend its lifespan. This is because compost or manure not only provides essential nutrients but also improves the soil’s structure, allowing for better water retention and aeration.
One way to incorporate organic matter into your straw mulch is by mixing in 10-20% compost or well-rotted manure. You can add this to the top layer of the mulch as you’re laying it down, or work it in when you’re reapplying the mulch after a season.
Compost adds beneficial microbes that help break down organic matter and release nutrients slowly, while manure provides a concentrated dose of nitrogen, phosphorus, and potassium. By combining straw with compost or manure, you’ll create a more balanced and sustainable ecosystem for your vegetable bed.
For example, if you’re using 2-3 inches of straw as your mulch layer, adding 1/4 to 1/2 inch of compost would be sufficient. This will provide an extra nutrient-rich boost without overpowering the soil’s natural balance.
Avoiding Over-Tillage
When it comes to extending the life of straw mulch, there’s one crucial mistake to avoid: over-tilling. Tilling is a necessary step in vegetable bed preparation, but excessive tilling can cause more harm than good.
Repeatedly digging and loosening the soil can compact the straw mulch, causing it to break down faster. This not only reduces its benefits but also creates an environment conducive to weed growth. When you over-till, the straw’s organic matter is released into the soil too quickly, depleting its nutrient-rich properties.
To maintain a healthy straw mulch, limit your tilling to once or twice during the growing season. Instead of tilling deeply, try using shallow cultivation techniques like hand-weeding or shallow hoeing. This will help control weeds without disturbing the straw. Remember that straw mulch is meant to be a long-term solution, not a short-term fix. By minimizing tillage and allowing the straw to break down naturally, you’ll preserve its beneficial properties and extend its lifespan in your vegetable beds.
Conclusion: The Value of Straw Mulching for Vegetable Beds
Now that you’ve learned how to mulch your vegetable beds, let’s summarize the key benefits and value of incorporating straw into your garden care routine. By doing so, you’ll see significant improvements in soil health and crop yields.
Recap of Key Benefits
When you’ve finished mulching your vegetable beds with straw, it’s essential to remember the many benefits this simple technique provides. By now, you’re probably already enjoying the fruits of your labor – literally! But let’s take a moment to recap just how much straw mulch can improve your garden.
Straw mulching helps prevent soil erosion, which is especially crucial for vegetable beds that are frequently watered or exposed to heavy rainfall. By covering the soil surface with a layer of straw, you’re shielding it from the erosive forces of water and wind. This not only saves you time and effort but also reduces the risk of soil-borne diseases and pests.
Straw mulch also plays a significant role in regulating soil temperature and structure. It helps retain moisture, suppress weeds, and regulate the growth of your vegetables. A 2-3 inch layer of straw is ideal for most vegetable beds – it’s not too thick to prevent water from penetrating, yet thick enough to provide adequate protection.
By incorporating straw mulching into your gardening routine, you’ll be creating a more stable and fertile environment for your vegetables to thrive in.
Encouragement to Try Straw Mulching
Now that you’ve learned about the benefits of straw mulching for vegetable beds, it’s time to take action and give it a try. We encourage you to incorporate this simple yet effective technique into your gardening routine.
Straw mulching is surprisingly easy to implement, even if you’re new to gardening. Start by spreading a 2-3 inch layer of straw around the base of your plants, making sure not to cover any stems or leaves. This will help retain moisture, suppress weeds, and regulate soil temperature.
Not only can straw mulching improve yields, but it also reduces maintenance tasks like weeding and watering. By keeping the soil cool and moist, you’ll reduce the risk of pests and diseases that thrive in warm conditions.
If you’re unsure where to start or how much straw to use, begin with a small bed or section of your garden and observe the results. You may be surprised by the difference this simple technique can make. So why not give straw mulching a try? Your plants (and your back) will thank you!
Frequently Asked Questions
Can I use straw mulch on slopes or uneven terrain?
Yes, straw mulch can be an excellent option for gardens with slopes or uneven terrain. However, it’s essential to apply a thicker layer of straw (around 4-6 inches) and secure it with landscape pins or rocks to prevent erosion and soil movement.
How often should I replenish the straw mulch in my vegetable beds?
The frequency of replenishing straw mulch depends on several factors, including climate, weather conditions, and crop type. As a general rule, aim to replace 1-2 inches of straw every 4-6 weeks during active growth periods.
Will using straw mulch attract pests or create an ideal environment for diseases?
No, straw mulch is not conducive to pest habitats or disease development. Its dense structure and lack of moisture prevent most pests from thriving, while its dryness also reduces the risk of fungal diseases.
Can I mix different types of organic matter with straw mulch for enhanced benefits?
Yes, mixing straw mulch with other organic matter like compost, manure, or wood chips can create a rich, nutrient-dense mulching blend. This combination can help improve soil structure, fertility, and overall garden health.
How do I handle situations where weeds continue to grow through the straw mulch?
If you encounter persistent weed growth despite using straw mulch, try applying a pre-emergent herbicide or manually removing weeds before they seed. Additionally, consider incorporating additional weed-suppressing techniques, such as solarizing soil or using landscape fabric.