Are you growing beautiful lavender in your garden or indoor space? One of the most crucial aspects of keeping this lovely plant thriving is getting its watering just right. A customized lavender watering schedule is essential to ensure your lavender receives the perfect amount of moisture, based on factors like climate, soil type, and the specific variety of lavender you’re growing. With the wrong watering routine, your lovely blooms may start to wilt or even worse, succumb to root rot. But don’t worry, we’ve got you covered! In this article, we’ll walk you through creating a tailored watering schedule for your lavender, so it can flourish all year round, regardless of the climate or season.
Understanding Your Lavender Plant’s Needs
To grow a thriving lavender plant, it’s crucial to understand its unique needs and requirements, from sunlight to soil conditions. Let’s dive into the essential factors that will help you create an ideal environment for your lavender plant.
Section Overview: Identifying Factors That Influence Watering Frequency
To create an effective watering schedule for your lavender plant, it’s essential to understand the key factors that influence its water needs. Climate is a significant factor, as plants growing in hot and dry environments require more frequent watering than those in cooler, wetter climates. For example, if you live in a region with high temperatures and low humidity, such as Arizona or Southern California, your lavender plant may need to be watered every 2-3 days during the peak summer months.
Soil type is another crucial factor to consider. Lavender plants prefer well-draining soil that allows excess moisture to escape quickly. If your plant is potted in a heavy clay or dense potting mix, it will require more frequent watering than one growing in a lighter, more porous mix. A good rule of thumb is to water your lavender plant when the top 1-2 inches of soil feels dry to the touch.
The size of the pot also plays a role in determining your plant’s watering needs. Smaller pots tend to dry out faster than larger ones, so if you’re growing your lavender in a small container, be prepared to water it more frequently.
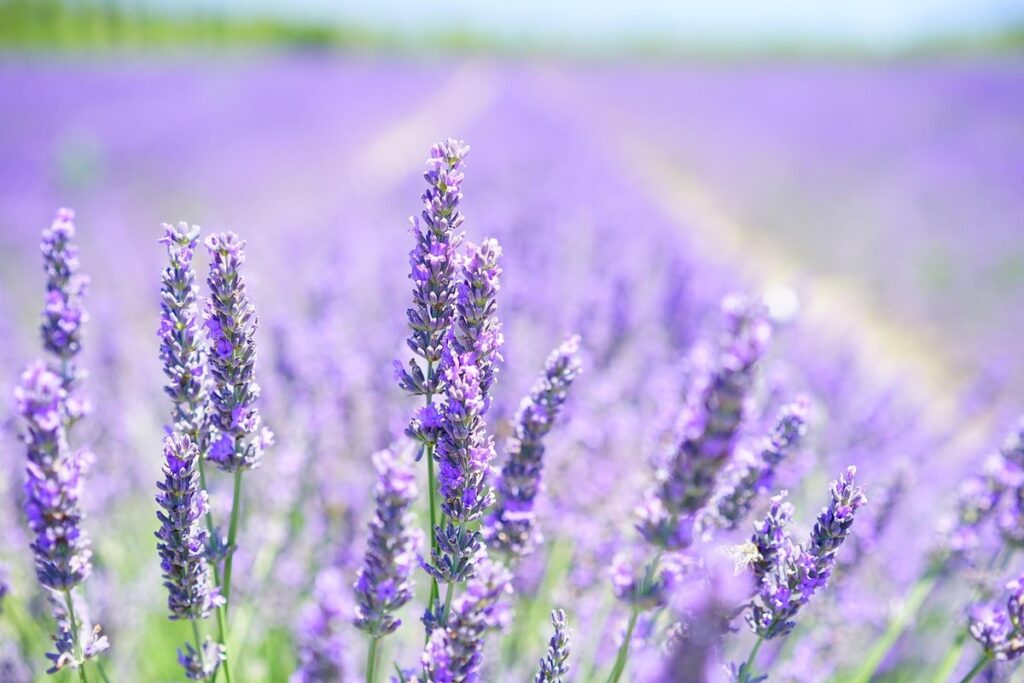
Types of Lavender Plants: Variations in Water Requirements
When it comes to lavender plants, not all varieties require the same amount of water. In fact, their watering needs can vary significantly depending on the type. Let’s take a closer look at three popular types of lavender: English, French, and Spanish.
English Lavender (Lavandula angustifolia) is known for its drought tolerance and relatively low watering needs. It requires about 1-2 inches of water per week, either from rainfall or irrigation. This type of lavender is perfect for dry areas with well-draining soil.
French Lavender (Lavandula stoechas), on the other hand, prefers moist but well-drained soil and full sun to partial shade. It requires about 2-3 inches of water per week, making it more susceptible to overwatering. Be cautious not to let the soil become waterlogged, which can lead to root rot.
Spanish Lavender (Lavandula stoechas subsp. pedunculata) is another low-water requirement variety, requiring about 1-2 inches of water per week. It’s essential to ensure good air circulation around this type of lavender to prevent fungal diseases that thrive in humid environments.
Preparing Your Lavender Plant for the Drying Season
As we head into the drying season, it’s essential to prepare your lavender plant by reducing watering and taking steps to prevent scorching and damage, ensuring a healthy and thriving bloom. Let’s dive into these critical preparations.
Understanding the Importance of Gradual Drought Training
When it comes to preparing your lavender plant for the drying season, understanding the importance of gradual drought training is crucial. This concept involves gradually reducing water intake over time, allowing your lavender plant to develop a strong root system that can withstand dry periods.
Gradual drought training helps lavender plants develop a robust root system by forcing them to search deeper into the soil for moisture. This process simulates natural drought conditions, making your plant more resilient and adaptable to changing weather patterns. By introducing controlled water stress, you’re encouraging your lavender plant to grow deeper roots in search of water, rather than relying on surface-level watering.
To implement gradual drought training, start by reducing watering frequency or amount over a period of weeks or months. Monitor your plant’s response closely, adjusting the schedule as needed. This process may take several months to complete, but the benefits are well worth it. A lavender plant that has undergone gradual drought training will be better equipped to survive dry spells and require less frequent watering during the growing season.
Tips for Successful Pruning and Mulching Before Summer
As we approach the hot summer months, it’s essential to prepare your lavender plant for optimal moisture levels. Pruning and mulching are two crucial techniques that will help your lavender thrive during this period.
Pruning is an excellent way to maintain your lavender’s shape and promote new growth. Cut back any leggy stems to encourage bushy growth, which will also reduce the risk of fungal diseases. Remove dead or damaged foliage, making sure not to damage any remaining healthy shoots. Prune in late winter or early spring, about 6-8 weeks before the last frost.
When it comes to mulching, use a thin layer (about 2-3 inches) of organic material like wood chips, bark, or compost around your lavender plant. This will help retain moisture and suppress weeds, reducing the need for frequent watering. Make sure to keep the mulch a few inches away from the stem to prevent rot.
By pruning and mulching your lavender plant before summer, you’ll be setting it up for success in hot weather conditions. With regular watering (according to our ultimate lavender watering schedule), your lavender will remain healthy, fragrant, and beautiful throughout the season.
Creating an Effective Watering Schedule for Your Lavender Plant
Creating a watering schedule tailored to your lavender plant’s unique needs is crucial to its health and fragrance. Let’s dive into creating a schedule that will keep your lavender happy and thriving!
Determining the Right Amount of Water: Frequency and Quantity
To determine the right amount of water for your lavender plant, you need to consider several factors, including climate, soil type, and plant size. Start by assessing your local climate: is it hot and dry, cool and moist, or somewhere in between? This will help you establish a baseline watering schedule.
Next, think about your soil type: is it sandy, clay-based, or loamy? Different soils absorb water at different rates, so you may need to adjust your watering frequency accordingly. For example, if you have sandy soil, you’ll need to water more frequently, as the water will drain quickly.
Now, consider your lavender plant’s size and growth stage: is it a small, newly planted specimen or a mature, sprawling shrub? Smaller plants require less water, while larger ones may need more frequent watering. A good rule of thumb is to water your lavender when the top 1-2 inches of soil feel dry to the touch. Use this as a guide to calculate the right frequency and quantity for your plant’s specific needs.
Monitoring Soil Moisture Levels with Hygrometers and More
Monitoring soil moisture levels is crucial when it comes to creating an effective watering schedule for your lavender plant. You see, overwatering can be just as detrimental as underwatering, causing root rot and other problems that can harm or even kill your plant.
To accurately monitor soil moisture levels, you’ll want to invest in a hygrometer, which is specifically designed to measure the moisture content of the air and soil. Place the probe of the hygrometer into the soil about an inch deep, making sure it’s not touching any roots. You can also use other tools like a moisture meter or even a simple wooden stick to check the soil’s dryness.
For accurate readings, make sure your hygrometer is calibrated correctly and placed in a spot where it won’t be affected by drafts or extreme temperatures. It’s essential to take multiple readings throughout the day to get an average moisture level reading. This way, you can adjust your watering schedule accordingly, giving your lavender plant just the right amount of water it needs to thrive.
Adjusting Your Watering Schedule Throughout the Seasons
As we dive into the world of seasonal watering, it’s essential to adjust your lavender care routine accordingly. This section will walk you through the necessary tweaks for each season.
Spring: A Time for Renewal and Increased Water Needs
As spring arrives, your lavender plants are eager to burst into new growth. This means it’s time to adjust your watering schedule to meet their increased water needs. During the spring season, plants begin to produce new leaves and stems, which require more moisture to develop properly. As a result, you may need to increase the frequency of watering, but be cautious not to overwater.
To determine if your lavender plant needs more water in the spring, check the soil moisture by inserting your finger into the soil up to the first knuckle. If the soil feels dry, it’s time to water. Water thoroughly, making sure the top 6-8 inches of soil are moist. Aim for about 1 inch of water per week, either from rain or irrigation.
As temperatures rise in spring, evaporation increases, which can quickly dry out the soil if not monitored. Keep an eye on your lavender plants’ leaves and stems; if they begin to wilt or show signs of stress, it’s a sign that they need more water.
Summer: High Temperatures Demand Extra Care
Summer is here, and with it comes soaring temperatures that can be challenging for lavender plants. High heat can cause them to dry out quickly, leading to brown tips and scorched leaves if not properly cared for. To ensure your lovely lavender stays healthy and thriving, you’ll need to adjust its watering schedule accordingly.
For heat-tolerant varieties like ‘Hidcote’ or ‘Munstead’, you may need to water them more frequently during the hottest summer days. However, be cautious not to overwater, as this can lead to root rot and other issues. A good rule of thumb is to check the soil moisture by inserting your finger into it up to the knuckle. If the soil feels dry, it’s time to give your lavender a drink.
In extreme heat, you may need to water your lavender twice a week or even every other day. However, if temperatures dip below 90°F (32°C) during the night, you can scale back watering to once a week. To avoid burning your plants’ roots, make sure to water them early in the morning, allowing the soil to dry slightly between waterings.
When watering in summer, it’s also essential to focus on providing adequate humidity for your lavender. Mist the leaves and flowers regularly with a spray bottle to keep them hydrated and prevent scorching. By following these simple tips, you’ll be able to give your lavender the TLC it needs to thrive during the sweltering summer months.
Watering Considerations for Specific Lavender Growing Conditions
When growing lavender in areas with specific conditions, such as high heat or cold snaps, you’ll want to adjust your watering schedule accordingly. This section will guide you through those critical adjustments.
Container-Grown Lavender Plants: Challenges and Solutions
Container-grown lavender plants present unique challenges when it comes to watering. Since they’re confined to a container, their soil dries out faster than plants grown directly in the ground. This can lead to overwatering if not addressed properly.
To adjust for these needs, start by checking the soil moisture daily during hot summer months. Stick your finger into the soil up to the first knuckle, and if it feels dry, it’s time to water. Water thoroughly until you see water seeping out of the drainage holes, but be cautious not to let the pot sit in water.
Another consideration is the type of container used. Unglazed terracotta pots can evaporate moisture faster than ceramic or plastic ones. Adjust your watering schedule accordingly based on the material and size of your planters. For example, a small, unglazed terracotta pot may need more frequent watering than a large, ceramic one.
By paying attention to these factors, you’ll be able to create an effective watering schedule for your container-grown lavender plants, ensuring they receive just the right amount of hydration to thrive.
Lavender in Full Sun or Shaded Areas: Adapting Your Schedule
When growing lavender in full sun versus shaded areas, it’s essential to adjust your watering schedule accordingly. In full sun conditions, the soil temperature can soar, leading to increased evaporation and a higher risk of dehydration. To combat this, water your lavender more frequently, ideally every 2-3 days during peak summer months. Monitor the soil moisture by inserting your finger into the soil up to the first knuckle; if it feels dry, it’s time for watering.
On the other hand, shaded areas tend to retain moisture and have cooler soil temperatures. As a result, lavender plants grown in these conditions may require less frequent watering. Water every 4-5 days during hot summer months, but be cautious not to overwater, as this can lead to root rot.
Consider factors like humidity levels and local climate when adjusting your schedule. In dry climates, for example, you may need to water more frequently even in shaded areas. Keep an eye on your plant’s response to watering adjustments and make changes accordingly.
Troubleshooting Common Issues Related to Over- or Underwatering
Don’t worry if you’re not sure what’s going wrong with your lavender’s watering schedule – we’ve got a rundown of common issues and simple fixes right here. Let’s tackle those pesky over- or underwatering problems together!
Signs of Overwatering and How to Fix It
Overwatering can be a silent killer for lavender plants. One of the most common signs is yellowing leaves, which can turn brown and drop off if not addressed promptly. Another indicator is soft, mushy stems that are more prone to breakage.
If you notice these symptoms, it’s essential to act fast to prevent root rot from taking over. Start by stopping watering for a while to allow the soil to dry out slightly between waterings. Check the soil moisture by inserting your finger into the soil up to the first knuckle; if it feels dry, it’s time to water.
Remove any dead or damaged leaves and stems to prevent the spread of disease and encourage new growth. You can also prune back the plant to promote air circulation and prevent fungal diseases from taking hold. To prevent overwatering in the future, make sure to check the weather forecast before watering, as excessive rainfall can cause lavender plants to become waterlogged.
In severe cases of overwatering, you may need to repot your lavender plant with fresh soil and take steps to improve drainage. Regularly inspect your plants for signs of stress and adjust your watering schedule accordingly to prevent damage.
Strategies for Reviving Drought-Stressed Lavender Plants
When you notice your lavender plant is struggling due to drought stress, it’s essential to act quickly to revive it. A gradual rehydration process will help prevent shock and ensure the plant can absorb water effectively.
To start, move the plant to a shaded area or provide some protection from direct sunlight. Next, inspect the roots by gently removing the plant from its pot. If the roots are circling or have developed a brownish tint, it’s best to prune them back slightly to encourage new growth.
Begin rehydrating the plant by soaking its roots in water for about 30 minutes to an hour. Then, gradually increase the watering frequency over the next few days. It’s also crucial to monitor your plant’s soil moisture levels regularly using a moisture meter or simply sticking your finger into the soil up to the knuckle.
During this recovery period, be sure to provide your lavender with adequate air circulation and keep its temperature between 65-75°F (18-24°C). This will help prevent fungal diseases that thrive in warm, humid environments. With proper care and attention, your drought-stressed lavender plant should recover within a few weeks.
Additional Tips for Long-Term Success with Your Lavender Plant
Now that you’ve mastered the perfect lavender watering schedule, let’s dive into some expert advice to ensure your plant thrives and continues to delight for years to come.
Regular Maintenance: Beyond Watering to Optimize Health
Regular maintenance is just as crucial as a well-planned watering schedule when it comes to keeping your lavender plant thriving. Beyond watering, there are several tasks you can perform on a regular basis to ensure the optimal health of your plant.
Fertilization is one such task that’s often overlooked but plays a vital role in promoting healthy growth and blooming. Lavender plants require a balanced fertilizer, rich in nitrogen, phosphorus, and potassium (NPK). You can use a granular or liquid fertilizer suitable for herbs, following the product’s instructions for application rates.
Deadheading is another essential task that involves removing spent flowers from your lavender plant to encourage repeat blooms and maintain its appearance. This process not only stimulates new growth but also prevents seed production, which can divert the plant’s energy away from flowering. Simply pinch off or snip the faded flowers with scissors, making sure not to cut too far into the stem.
Pest control is a critical aspect of lavender care, as these plants are susceptible to pests like aphids, whiteflies, and spider mites. Regularly inspect your plant for signs of infestation and take action promptly if you notice any issues. You can use neem oil or insecticidal soap to control pest populations.
Pruning is another vital aspect of regular maintenance that helps maintain the shape and promote healthy growth in your lavender plant. Prune your plant annually, removing about one-third of its old stems to make way for new growth.
By incorporating these tasks into your routine, you’ll be able to optimize the health of your lavender plant and enjoy a bountiful harvest of fragrant blooms year after year.
Frequently Asked Questions
Can I use the same watering schedule for all types of lavender plants?
Yes, while some general guidelines can be applied to most varieties, it’s essential to consider specific water requirements based on your plant’s unique characteristics and needs. Research the specific variety you’re growing to determine any necessary adjustments.
How often should I check my soil moisture levels, especially during hot summer months?
We recommend checking the soil moisture at least once a week during hot weather, but ideally, after every watering session. This will help you fine-tune your schedule and prevent overwatering or underwatering issues.
What are some signs that my lavender plant needs less water in the winter season?
As temperatures drop and daylight hours decrease, your plant’s water requirements change significantly. Watch for signs such as slower growth, reduced flowering, or a general decline in plant health. Adjust your watering schedule accordingly to ensure your plant receives just enough moisture during this dormant period.
Can I use rainwater for my lavender plants instead of tap water?
Rainwater is an excellent choice for watering lavender plants as it tends to be softer and less alkaline than tap water, which can help prevent mineral buildup in the soil. Collecting rainwater or using a filter on your tap water can also reduce the risk of overwatering issues.
How long does it take to see noticeable improvements in my lavender plant’s health after adjusting its watering schedule?
It may take several weeks or even months for your plant to fully adjust to the new watering routine. Be patient and monitor your plant’s response closely, making adjustments as needed. With consistent effort and observation, you should start seeing positive changes within 1-3 months.