Drying your own pumpkin seeds is an essential step in preserving their viability for planting, and with a little know-how, you can ensure a successful harvest. Whether you’re growing pumpkins for ornamental purposes or looking to save seeds from your favorite varieties, drying them properly is crucial. If not done correctly, the seeds may lose their ability to germinate, resulting in a disappointing yield.
In this article, we’ll walk you through three methods for drying pumpkin seeds: air drying, using desiccants, and freeze-drying. Each method has its pros and cons, and we’ll explore them in detail to help you decide which one works best for you. With our step-by-step guide, you’ll be able to preserve your pumpkin seeds’ viability and enjoy a bountiful harvest next season.
Harvesting and Preparing Pumpkin Seeds
Now that you’ve harvested your pumpkin seeds, let’s dive into how to properly harvest and prepare them for drying and storing. This is a crucial step in ensuring their viability.
Choosing the Right Pumpkin Varieties
When choosing pumpkin varieties, it’s essential to select ones that are suitable for seed saving. Not all pumpkins produce viable seeds, so it’s crucial to pick the right type for successful seed extraction.
Look for heirloom or open-pollinated varieties, as these are more likely to produce consistent results and save true-to-type seeds. Some popular options include ‘Jack Be Little’, ‘Baby Boo’, and ‘Lumina’. These varieties tend to have smaller fruit, which makes them easier to handle and process for seed saving.
When selecting pumpkins, consider their size, shape, and texture. Opt for those with symmetrical shapes and smooth skin, as these are more likely to produce healthy seeds. Avoid pumpkins with soft spots or damaged areas, as this can affect the quality of the seeds.
Inspect the pumpkin’s stem end for any signs of damage or disease. Healthy stems should be firm and free of cracks. By choosing the right pumpkin varieties, you’ll set yourself up for success when it comes to drying and storing your seeds for planting.
Extracting Seeds from Pumpkins
Removing seeds from pumpkins is an essential step before drying and storing them for planting. To do this, you’ll need a few simple tools: a sharp knife or scoop for cutting out the pumpkin pulp, a colander or strainer to separate the seeds from excess fibers, and a bowl of water to rinse the seeds.
To begin, carefully cut open the pumpkin and scoop out as much of the stringy pulp as possible. Be gentle not to damage the seeds, which can be easily bruised. Place the seeds in the colander or strainer and gently separate them from the remaining fibers under running water. This step is crucial to ensure the seeds don’t become tangled or damaged during the drying process.
As you handle the seeds, keep your hands wet to prevent stickiness and make it easier to separate the individual seeds. Be patient – this can be a time-consuming but necessary process. To minimize damage, work in small batches, and avoid overcrowding the colander or strainer.
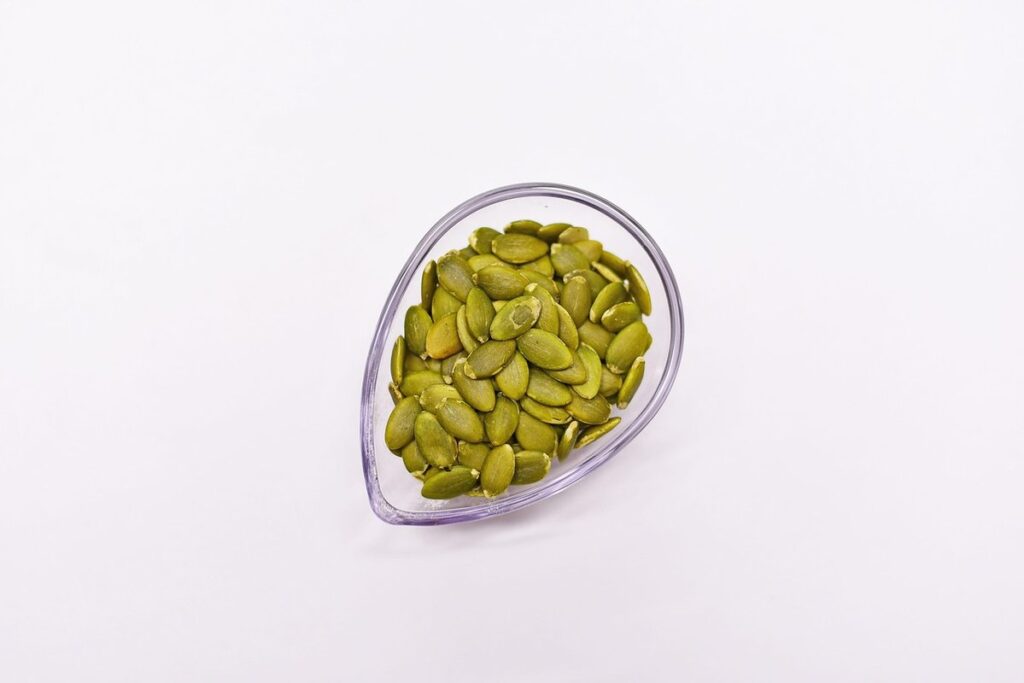
Cleaning and Drying Seeds
Cleaning pumpkin seeds before storing them is crucial to ensure they remain healthy and viable for planting. Dirt, debris, and excess moisture can hinder germination and lead to poor seedling development. To clean the seeds effectively, start by gently rinsing them with water to remove any loose impurities. Next, submerge the seeds in a bowl of water and let them soak for about 30 minutes. The seeds that float to the surface are likely empty or damaged and should be discarded.
To dry the cleaned seeds, you can use one of several methods. Air drying is a simple and inexpensive approach: spread the seeds on a paper towel or cloth, allowing air circulation around each seed. Alternatively, use silica gel packets or other desiccants in an airtight container with the seeds to absorb moisture more quickly. Place the container in a dry location away from direct sunlight. It’s essential to monitor the drying process and remove the seeds once they reach your desired level of dryness – usually when they’re brittle and snap easily in half.
Air Drying Pumpkin Seeds
To dry pumpkin seeds using air drying, you’ll need a well-ventilated area to spread them out, allowing for maximum airflow and moisture evaporation. This process is relatively simple and effective.
Setting Up a Seed Drying Station
When setting up a seed drying station, it’s essential to prioritize ventilation and airflow. This will help prevent moisture buildup and reduce the risk of mold or mildew growth on the seeds. A well-ventilated area can be created by positioning the drying station near a window or using an exhaust fan to circulate air.
Consider investing in a dehumidifier, especially if you live in a humid climate. This will help maintain a stable moisture level and prevent condensation from forming on the seeds. When selecting a location for your seed drying station, look for an area that receives indirect sunlight and is protected from drafts.
For storage solutions, consider using airtight containers or glass jars with tight-fitting lids to keep the seeds fresh. Label each container with the date and type of seed, making it easy to track which seeds you have dried and how long they’ve been stored. This will also help you identify any potential issues with seed viability down the line. Regularly cleaning and maintaining your drying station is crucial to prevent contamination and ensure optimal seed quality.
Monitoring Temperature and Humidity Levels
Monitoring temperature and humidity levels is crucial when drying pumpkin seeds. These conditions can significantly impact the seed’s viability and germination rate. A temperature range between 70°F to 80°F (21°C to 27°C) is ideal for seed drying, as it prevents moisture buildup and reduces the risk of fungal growth.
To monitor temperature and humidity levels, you’ll need a thermometer and hygrometer. You can place them near the drying area or use a single device that measures both temperature and humidity. Some popular options include digital thermometers with built-in hygrometers or separate devices like a hygrometer. Aim for a relative humidity (RH) level between 30% to 50%. This range allows for efficient moisture evaporation, preventing over-drying.
For example, if you’re using an electric food dehydrator, ensure it’s set within the optimal temperature range. If you’re air drying, keep an eye on your thermometer and hygrometer readings, adjusting as needed to maintain a stable environment.
Handling Seeds During Air Drying
When handling seeds during air drying, it’s crucial to take extra precautions to prevent moisture from accumulating on them. One of the most common issues with air-dried seeds is the formation of mold and mildew, which can be detrimental to their viability.
To avoid this, make sure to dry the seeds in a well-ventilated area, away from direct sunlight. You can also cover the drying rack or tray with cheesecloth or a mesh screen to prevent dust and debris from settling on the seeds.
Regularly inspect your seeds for any signs of moisture accumulation, such as white powdery patches or soft spots. If you notice any issues, gently remove the affected seeds and dry them separately.
Additionally, be mindful of pests like insects or rodents that might be attracted to the dried seeds. Store the seeds in airtight containers to prevent infestation, and keep them in a cool, dark place until planting time.
By following these simple tips, you can ensure that your air-dried pumpkin seeds remain healthy and viable for planting.
Using Desiccants for Seed Drying
To achieve optimal dryness, you can use desiccants specifically designed to absorb moisture from seed packets, ensuring your seeds are perfectly dry for storage. These desiccant packets come in various forms and sizes.
Choosing the Right Desiccant Material
When it comes to drying pumpkin seeds, choosing the right desiccant material is crucial for maintaining seed quality and viability. There are several types of desiccants available, each with its own strengths and weaknesses.
Silica gel is a popular choice due to its effectiveness at controlling humidity levels and its ability to absorb up to 40% of its weight in moisture. It’s also relatively inexpensive compared to other options. However, silica gel can become saturated quickly, requiring frequent replenishment during drying cycles.
Calcium chloride is another option that offers high absorption capacity, but it’s more expensive than silica gel and can be hazardous if ingested or handled improperly. Another consideration is activated alumina, which is highly effective at absorbing moisture but may leave behind residues on the seeds.
When selecting a desiccant material for drying pumpkin seeds, consider factors such as your specific climate and humidity levels, the size of your seed crop, and any safety concerns associated with handling the desiccant. A common approach is to start with silica gel and supplement with calcium chloride or activated alumina as needed to achieve optimal moisture control.
Implementing a Desiccant System
Implementing a desiccant system is a straightforward process that requires careful consideration of a few key factors. First and foremost, you’ll need to choose the right type of desiccant for your specific needs. Some popular options include silica gel and activated alumina, both of which are highly effective at absorbing moisture from the air.
Once you’ve selected the correct desiccant, it’s time to set up the system. This typically involves placing the desiccant in a container or bag with a built-in lid, then sealing the container and placing it in an area where the pumpkin seeds will be dried. It’s essential to ensure that the container is well-ventilated to prevent moisture buildup.
To maintain optimal performance, desiccants need regular replenishment or replacement. As a general rule of thumb, silica gel desiccants should be replaced every 2-3 months, while activated alumina can last for up to 6 months. Regularly monitoring the desiccant’s color and texture will help you determine when it’s time to replace it – usually, a change in color from white to pink or blue indicates that the desiccant is saturated and needs replacing.
Monitoring Seed Quality During Desiccation
Monitoring seed quality during desiccation is crucial to ensure that your dried pumpkin seeds remain viable for planting. As you proceed with using desiccants, keep a close eye on the seeds’ appearance and behavior. One of the primary concerns is seed shriveling – when the seeds become excessively dry, they can shrink in size, which may make them difficult to store or sow.
To recognize potential issues, check your seeds regularly for signs of moisture content reduction. Be cautious if you notice mold growth on the seeds or the desiccant itself. This could be a sign that the desiccation process is happening too quickly, causing uneven drying. Monitor the temperature and humidity levels in the area where you’re drying your pumpkin seeds to prevent excessive moisture loss.
If you do encounter issues like seed shriveling or mold growth, consider adjusting your desiccation setup or method. You can also try using a higher-quality desiccant specifically designed for sensitive plant materials like seeds. Regular monitoring will help you catch any potential problems early on and ensure that your pumpkin seeds remain healthy and viable for planting.
Freeze-Drying Pumpkin Seeds
To preserve your pumpkin seeds for planting, you’ll need to dry them quickly and evenly using a freeze dryer. This method helps retain their viability and germination rate.
Understanding the Freeze-Drying Process
Freeze-drying is a popular method for preserving pumpkin seeds due to its ability to retain their nutritional value and flavor. The process involves removing the water content from the seeds through a combination of freezing and vacuum pressure.
Here’s how it works: first, the pumpkin seeds are frozen to a temperature of around -30°C, which prevents the growth of bacteria and other microorganisms that can cause spoilage. Next, the frozen seeds are placed in a vacuum chamber where the water molecules are removed from the seed through sublimation – the process by which ice turns directly into vapor.
The benefits of freeze-drying pumpkin seeds include retention of nutrients, improved shelf life, and ability to store them for extended periods without refrigeration. Freeze-dried seeds can be stored at room temperature for up to 25 years or more, making it an ideal method for long-term seed preservation.
Setting Up a Freeze Dryer
When it comes to freeze-drying pumpkin seeds, having the right equipment is crucial for achieving optimal results. If you’re planning to set up a freeze dryer for drying pumpkin seeds, here are some guidelines to consider.
First and foremost, select a freeze dryer that’s specifically designed for small-scale or household use. These units are often more affordable and easier to maintain than industrial-grade models. Look for a machine with a temperature control range of -30°C to 40°C (-22°F to 104°F) to ensure you can achieve the precise temperatures required for freeze-drying.
Next, carefully read the manufacturer’s instructions for setting up your freeze dryer. This typically involves connecting the unit to a power source, installing the drying chamber, and calibrating the temperature and vacuum controls. It’s also essential to follow proper safety precautions when operating the equipment, such as wearing protective gloves and ensuring good ventilation.
Regular maintenance is vital to extending the lifespan of your freeze dryer. Clean the machine regularly, checking for any blockages or mineral buildup that may affect performance. Additionally, replace worn-out parts promptly to prevent damage to the unit. By following these guidelines, you’ll be well on your way to successfully freeze-drying your pumpkin seeds.
Processing Seeds in a Freeze Dryer
Processing pumpkin seeds in a freeze dryer is a meticulous process that requires attention to detail and careful monitoring. First, ensure your freeze dryer is calibrated for optimal seed processing. Set the temperature between 50°F and 60°F (10°C to 15°C) to prevent damage or over-drying.
Next, adjust the vacuum settings according to the manufacturer’s guidelines for seed processing. A pressure of around 100-150 mTorr is usually suitable for freeze drying seeds. Monitor your seed moisture levels regularly using a hygrometer or moisture meter, aiming for a final moisture content of 5% or lower.
During the process, maintain consistent temperature and vacuum settings to prevent uneven drying and potential damage to the seeds. Regularly check on the seeds’ progress by removing small samples from the freeze dryer and inspecting their moisture levels. This will ensure that your pumpkin seeds are properly dried without compromising their viability for planting.
Storing Dried Pumpkin Seeds
Now that you’ve dried your pumpkin seeds, it’s time to store them properly to keep them viable for planting next season. We’ll cover the best methods for keeping your seeds fresh and ready to go.
Understanding Storage Requirements
When storing dried pumpkin seeds for planting, it’s essential to provide them with an environment that preserves their viability. This involves controlling temperature, humidity, and light exposure. Seeds stored in areas with fluctuating temperatures can become dormant or even germinate prematurely, reducing their quality.
To maintain optimal conditions, store your dried pumpkin seeds in a cool, dry place such as a cupboard or drawer. Aim for temperatures between 40°F to 50°F (4°C to 10°C) and humidity levels below 60%. High humidity can lead to mold growth, while low humidity may cause the seeds to dry out further.
Avoid exposing your dried pumpkin seeds to direct sunlight or artificial light sources. This can stimulate germination, causing the seeds to lose their viability before planting time. Store them in airtight containers, such as glass jars or plastic bags with tight-fitting lids, to keep moisture and pests at bay.
Choosing the Right Containers
When it comes to storing dried pumpkin seeds, choosing the right container is crucial for maintaining their quality and viability. You have several options available, including glass jars, paper bags, and plastic containers. Each material has its pros and cons, so let’s break them down.
Glass jars are an excellent choice because they allow you to see the contents and prevent moisture from entering. Look for airtight lids that create a vacuum seal when closed. This will keep your seeds fresh for longer periods. Paper bags, on the other hand, are inexpensive and can be reused multiple times. They also provide some protection against moisture, but make sure they’re made of high-quality paper to avoid them breaking down quickly.
When selecting a container, consider factors such as durability, ease of use, and compatibility with your storage space. For example, if you plan to store the seeds in a humid environment or subject them to extreme temperatures, choose a more durable option like glass jars.
Labeling and Organizing Seed Storage
Labeling and organizing seed storage containers is crucial to ensure easy identification and retrieval of specific seed varieties. As you collect dried pumpkin seeds from different batches, it can become challenging to keep track of the various types, their characteristics, and when they were harvested.
To avoid confusion, assign a unique label or code to each container, including the seed variety name, year of harvest, and any notable traits such as disease resistance or unique growth patterns. For instance, if you have a ‘Sugar Pie’ pumpkin seed variety from 2022 that exhibits excellent disease resistance, label it accordingly.
Consider using a standardized labeling system across all containers to facilitate quick comparison and selection. This can be as simple as using colored stickers or labels with the following information:
• Variety name
• Year of harvest
• Any notable traits or characteristics
Store these labeled containers in a designated area, such as a seed library or storage bin, making it easy to locate specific seeds when needed for planting.
Frequently Asked Questions
Can I dry pumpkin seeds indoors if I don’t have a dedicated drying station?
Yes, you can still dry your pumpkin seeds indoors using a desiccant or by placing them on a paper towel-lined tray near an open window. However, be cautious of temperature and humidity levels in your home environment to ensure optimal seed quality.
How do I know if my pumpkin seeds are properly dried for storage?
Check the moisture level of your seeds by cutting one open; if it’s dry and crumbly inside, they’re ready for storage. If not, continue drying them for a few more days until you achieve the desired result.
Can I reuse desiccant materials like silica gel or calcium chloride?
Yes, but make sure to thoroughly clean and rinse them after each use to maintain their effectiveness. You can also replace them with new material if needed. It’s essential to note that some desiccants may have limited reuse capabilities.
How long does the freeze-drying process typically take for pumpkin seeds?
The time it takes for freeze-drying can vary depending on the type of equipment used and the amount of seeds being processed. On average, it can take anywhere from 12 hours to several days to complete the drying cycle. Always follow the manufacturer’s guidelines for optimal results.
Can I dry multiple types of seeds together using desiccants or air drying methods?
It’s generally recommended to separate different seed varieties when drying them, as some may have unique requirements or sensitivity to temperature and humidity levels. However, if you’re working with similar varieties, you can still use a single desiccant material or method, but monitor their progress closely for optimal results.