If you’re like many gardeners, you probably don’t think about saving pumpkin seeds until after Halloween has passed. But if you want to ensure that your favorite pumpkin variety continues to thrive in future seasons, it’s worth taking a few minutes to harvest and store those seeds properly. Not only is saving pumpkin seeds a great way to preserve your homegrown harvest, but it also allows you to share your unique varieties with friends and family. In this step-by-step guide, we’ll walk you through the process of harvesting, drying, cleaning, and storing pumpkin seeds for planting next season. From selecting healthy seed heads to preparing them for storage, we’ve got you covered with expert tips and advice on how to save pumpkin seeds like a pro.
Choosing the Right Pumpkin Variety
When selecting seeds for replanting, it’s essential to choose a variety that suits your climate and desired pumpkin type. Some popular options include sugar pie, jack be lion, and baby boo.
Selecting Heirloom or Hybrid Pumpkins
When selecting pumpkin varieties to save seeds from, you’ll likely come across two main types: heirloom and hybrid. Understanding the differences between these varieties will help you make an informed decision about which type is best for your needs.
Heirloom pumpkins are open-pollinated, meaning they can be saved from one season to the next without losing their unique characteristics. They often have a rich history and may be more resistant to certain diseases. One advantage of heirloom pumpkins is that you’ll get consistent results in future harvests because you’re working with seeds that have been proven over time. On the other hand, heirloom varieties can be more challenging to grow and may not perform as well under different conditions.
Hybrid pumpkins, on the hand, are bred for specific traits such as size, color, or disease resistance. While they often produce bigger, more uniform fruits, their seeds won’t retain these characteristics if saved from one season to another. This means you’ll have to purchase new hybrid seeds every year to achieve consistent results. However, hybrids can offer higher yields and better disease resistance.
Consider what matters most to you in a pumpkin variety: adaptability, unique appearance, or pest and disease resistance. If you’re looking for reliable performance with minimal fuss, heirloom varieties might be the way to go. But if you prioritize high yields and specific traits, hybrid seeds could be your best bet.
Factors to Consider When Choosing a Pumpkin Variety
When choosing a pumpkin variety to save seeds from, there are several key factors to consider. These factors will not only ensure that you have healthy and disease-resistant plants, but also provide an abundance of seeds for future planting.
Disease resistance is one of the most crucial considerations when selecting a pumpkin variety. Look for varieties that are resistant to powdery mildew, fusarium wilt, and other common pumpkin diseases. For example, ‘Long Island Cheese’ and ‘Jack Be Little’ are two popular varieties known for their resistance to these diseases.
In addition to disease resistance, consider the growth habits of the variety. Some pumpkins are vining and require a lot of space to spread out, while others are compact and bush-type, making them perfect for small gardens. If you plan on saving seeds from a large crop, a vining variety may be the best choice.
Seed production is also an important consideration. Some varieties produce more seeds than others, so if you’re looking to save a lot of seeds for future planting, choose a variety that is known to produce a high yield of seeds.
Harvesting and Drying Seeds
Now that you’ve identified the best pumpkin seeds for replanting, it’s time to harvest and dry them properly to ensure their viability. Let’s dive into the details of harvesting and drying your precious seeds.
The Best Time to Harvest Pumpkin Seeds
When it’s time to harvest pumpkin seeds for planting next season, you’ll want to make sure you’re collecting them at the optimal stage of maturity. This ensures they’ll germinate well and give your new pumpkins a strong start.
Signs of seed maturity include a hard, dry rind on the fruit, and the stem that connects it to the vine turning brown and drying out. You can also check for readiness by gently twisting the stem; if it comes off easily, the seeds are likely mature. Another indicator is the sound they make when you shake the pumpkin – mature seeds will be loose and rattling inside.
To check for seed maturity, carefully cut open a few of your pumpkins, being careful not to damage the seeds within. If the seeds appear plump and white, with a small white germ at one end, they’re ready to harvest. Be sure to save only mature seeds from healthy, disease-free pumpkins, as these will give you the best chance of success when planting next season.
Drying Methods for Pumpkin Seeds
Drying pumpkin seeds is a crucial step in preserving them for planting. There are several methods to dry pumpkin seeds, each with its own set of advantages and disadvantages. Air-drying is one of the most common methods, where you spread the seeds on a paper bag or a cloth and let them air out in a warm, dry place. This method takes around 7-10 days, but it’s essential to keep an eye on the seeds to ensure they don’t develop mold.
Another popular method is oven-drying, which involves placing the seeds in a single layer on a baking sheet and setting your oven to its lowest temperature (usually around 150°F). This method is faster than air-drying, taking only 1-2 hours. However, be cautious not to overdry the seeds, as this can cause them to become brittle.
Dehydrating is also an effective method, using a dehydrator or your oven’s dehydrate setting. This method preserves the nutrients and flavor of the seeds while ensuring they remain crunchy. Whichever method you choose, make sure to monitor the temperature and humidity levels to ensure optimal drying results.
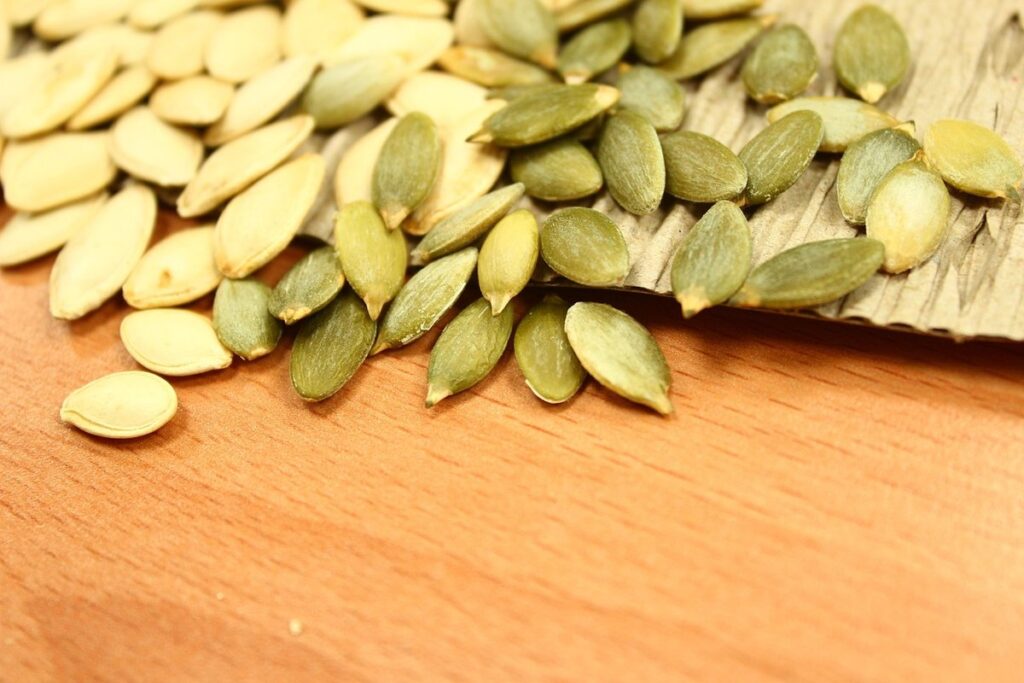
Cleaning and Storing Seeds
Now that you’ve harvested your pumpkin seeds, it’s time to clean and store them properly to ensure they’re healthy and ready for planting in the spring. Here we’ll cover the essential steps for cleaning and storing your saved pumpkin seeds.
Removing Excess Fleshy Material from Seeds
Removing excess fleshy material from pumpkin seeds is an essential step to prevent mold and rot. This process involves carefully removing the stringy pulp that’s attached to each seed, making sure not to damage the delicate embryo inside. To do this, you’ll need a small bowl or container filled with cold water.
Submerge the pumpkin seeds in the water and let them soak for about 30 minutes. The fleshy material will start to break down and become loose, allowing it to be easily removed. Use your fingers or a soft-bristled brush to gently scrub away any remaining pulp from each seed. Rinse the seeds thoroughly with fresh water to remove any remaining debris.
It’s crucial to be gentle during this process to avoid damaging the seeds’ delicate structures. Remove as much excess material as possible, but don’t overdo it – some residual pulp won’t harm your seeds and can even help retain moisture. Repeat the soaking and rinsing process if needed until you’ve successfully removed most of the fleshy material.
Long-Term Storage Options for Pumpkin Seeds
Once you’ve cleaned and dried your pumpkin seeds, it’s essential to store them properly to maintain their viability for planting. When it comes to long-term storage options, you have a few choices that can help keep your seeds fresh for up to 5 years or more.
Airtight containers are an excellent option for storing pumpkin seeds. Look for containers with tight-fitting lids made of materials like plastic or glass. These will prevent moisture and air from entering the container, which can cause seeds to deteriorate quickly. You can store them in a cool, dry place, such as a cupboard or drawer.
Glass jars are also a great option for storing pumpkin seeds. Simply place the seeds in a clean jar and seal it tightly with a lid. This method is perfect if you plan on storing your seeds for an extended period. Be sure to label the jar with the date and contents so you can easily identify the seeds later.
Some gardeners swear by refrigerating or freezing their pumpkin seeds to keep them fresh. You can store them in an airtight container or plastic bag, making sure to remove as much air as possible before sealing it. This method is ideal if you don’t have space for long-term storage at room temperature.
Preparing Seeds for Planting
Now that you’ve harvested and cleaned your pumpkin seeds, it’s time to prepare them for planting. Next, we’ll cover how to remove any remaining pulp and dry them out completely.
Scarification Methods for Hard-Seeded Pumpkins
Scarification is often necessary when dealing with hard-seeded pumpkins, which can be notoriously difficult to germinate. These seeds have a thick, hard coat that prevents water and air from reaching the embryo inside. To break through this barrier, you’ll need to scarify the seeds.
To do this, gently file the surface of each seed using a nail file or sandpaper until you see the white embryo underneath. This process should only take a few minutes per seed, but be careful not to remove too much of the outer layer, as this can damage the delicate inner structures. You can also try soaking your seeds in warm water overnight before scarification for easier penetration.
Some pumpkin varieties are more prone to hard seeding than others, so it’s essential to research the specific variety you’re working with to determine if scarification is necessary. With a little patience and the right tools, you should be able to successfully scarify even the toughest seeds and get them ready for planting.
Seed Stratification for Optimal Germination
When saving pumpkin seeds for planting, it’s essential to consider seed stratification – a process that mimics natural conditions to encourage optimal germination. By doing so, you’ll increase the chances of successfully growing healthy and vigorous pumpkins from your saved seeds.
Seed stratification is particularly crucial for pumpkin seeds because they have a hard outer coating called sclereids, which makes them more resistant to moisture and oxygen. However, this also slows down their natural germination process. By breaking down these sclereids through stratification, you’ll be able to speed up the germination rate.
To implement seed stratification for your pumpkin seeds, start by preparing a moistened paper towel or cloth. Wrap the towel around the seeds and place them in an airtight container, such as a plastic bag or an envelope. Store this container in the refrigerator at a consistent temperature between 32-40°F (0-4°C). Keep it there for 30 to 60 days before transferring the seeds to a warm location with temperatures above 70°F (21°C) for germination.
Planting Seeds and Caring for Seedlings
Now that you have your saved seeds, let’s move on to getting them off to a strong start: planting, caring for seedlings, and giving them the best chance at growing into healthy, thriving pumpkins.
Sowing Seeds in the Right Conditions
When it comes to sowing pumpkin seeds, the conditions you provide will greatly impact their germination and growth. To give your seeds the best chance of success, make sure to sow them in an area with ideal soil temperature.
Pumpkin seeds typically germinate best in soil temperatures between 70°F (21°C) and 85°F (29°C). Sowing too early can lead to poor germination or even rotting of the seed. Wait until the soil has warmed up before planting your saved pumpkin seeds. You can check the soil temperature by using a thermometer.
It’s also essential to ensure that the soil is moist but not waterlogged. Consistent moisture promotes healthy root growth, which will help your pumpkin plants establish themselves quickly. Aim for about 1-2 inches of water per week, either from rainfall or irrigation.
Finally, choose an area with full sun, as pumpkins require at least six hours of direct sunlight each day to thrive. This will provide the necessary energy for your seedlings to grow and produce fruit throughout the season.
Tips for Supporting Healthy Seedling Growth
When you’ve successfully germinated your pumpkin seeds, it’s essential to provide them with the right conditions to grow into healthy seedlings. One of the most critical factors is ensuring they receive adequate nutrients. You can do this by using a balanced fertilizer specifically designed for seedlings, following the instructions on the label carefully.
Another crucial aspect is pruning your seedlings to promote a strong stem and encourage bushy growth. Remove any weak or spindly growth, as well as any lower leaves that are in contact with the soil to prevent disease. This will direct the plant’s energy towards producing a robust root system and a healthy fruiting vine.
Be sure to prune your seedlings when they have two sets of true leaves, usually about 7-10 days after germination. Make clean cuts just above a node using scissors or a sharp knife, taking care not to damage any nearby growth.
It’s also vital to maintain optimal growing conditions, including sufficient light (at least 4-6 hours direct sunlight) and water. Avoid overwatering, which can lead to root rot and other issues.
Frequently Asked Questions
Can I save pumpkin seeds from store-bought pumpkins?
Yes, you can save seeds from store-bought pumpkins, but the results may vary in terms of quality and germination rate. It’s often recommended to save seeds from homegrown pumpkins that have performed well in your climate and soil conditions.
How do I know if my pumpkin seeds are ready for long-term storage?
Check on your stored seeds every 6-12 months to ensure they remain dry and free of mold. If you notice any signs of spoilage, remove the affected seeds or transfer them to a new, airtight container with desiccant packets.
Can I plant pumpkin seeds directly from the freezer without stratification?
No, it’s essential to follow proper seed stratification procedures for optimal germination rates. Freezing alone is not enough; you’ll need to simulate winter conditions or use a cold stratification method before planting your seeds.
How do I prevent cross-pollination when saving pumpkin seeds?
To minimize the risk of cross-pollination, choose pumpkins that are isolated from other varieties and have separate pollinators. If possible, cover your pumpkins with fine-mesh bags to prevent bees from accessing them.