Saving seeds from your green bean harvest is a simple yet essential skill for any gardener. Not only does it allow you to grow more of your favorite varieties, but it also saves you money and ensures that you have a continuous supply of fresh produce. However, saving green bean seeds can be a bit tricky if you don’t know where to start. In this guide, we’ll walk you through the process of selecting the right variety, harvesting healthy seeds, and storing them properly so they remain viable for future planting. We’ll cover everything from the characteristics of good seed quality to tips on how to dry and package your saved seeds, giving you a reliable method for saving green bean seeds that will yield a bountiful harvest year after year.
Choosing the Right Green Beans
When selecting green beans for seed saving, it’s essential to choose varieties that are open-pollinated and suitable for your climate. This ensures healthy seed production and consistent results in future harvests.
Understanding the Importance of Seed Selection
When it comes to saving green bean seeds, selecting the right variety is more than just a preference – it’s crucial. Choosing the wrong variety can lead to disappointment and frustration when trying to save seeds from your harvest. This is because some varieties are bred specifically for commercial production or have characteristics that make them difficult to work with when it comes to seed saving.
For instance, hybrid varieties often produce seeds that don’t grow true-to-type, which means they won’t yield the same results as the parent plant. In contrast, heirloom and open-pollinated varieties tend to be more reliable for seed saving. These types of varieties have been developed over time through selection and adaptation, making them well-suited for home gardeners who want to save their own seeds.
When selecting a variety, consider factors like disease resistance, growth habits, and days to maturity. Some varieties are also bred specifically with the intention of being saved for seeds. These varieties are often labeled as “seed saver” or “open-pollinated.”
Identifying Hereditary Traits in Green Beans
When selecting green beans for seed saving, it’s essential to consider hereditary traits that can impact both seed performance and plant yield. Hereditary traits are characteristics passed down from parent plants to their offspring through genetics. In the context of green bean seeds, these traits can significantly influence factors such as growth rate, disease resistance, and adaptability.
For example, some green bean varieties may be more prone to powdery mildew due to their hereditary susceptibility. If you’re saving seeds from a variety that’s susceptible to this disease, it’s likely your next crop will struggle with the same issue. On the other hand, if you’re working with a resistant variety, your saved seeds should retain this beneficial trait.
To identify and work with hereditary traits in green beans, observe and record the characteristics of your parent plants. Note their growth habits, disease resistance, and adaptability to various growing conditions. This information will help you make informed decisions when selecting seed parents for future crops. By understanding and leveraging hereditary traits, you can improve seed performance and increase crop yields.
Preparing the Garden for Seed Saving
Before you can start saving your green bean seeds, it’s essential to prepare your garden for optimal seed production and ensure a bountiful harvest. Let’s get started!
Selecting a Seed-Producing Variety
When selecting a green bean variety for seed saving, it’s essential to choose one that produces an abundance of seeds. Not all green beans are created equal when it comes to seed production. Look for varieties that have been bred specifically for their high seed set.
Some key characteristics to look for include:
• High yields: Choose varieties known to produce a large number of pods per plant.
• Large, plump seeds: Varieties with larger seeds will give you more usable seed for saving.
• Easy seed dispersal: Opt for varieties where the seeds are easily released from the pod when mature.
Some popular green bean varieties suitable for seed saving include ‘Kentucky Wonder’, ‘Blue Lake’, and ‘Romano’. These varieties have been bred to produce high yields of large, plump seeds that are easy to save. By selecting a variety with these characteristics, you’ll set yourself up for success in your seed-saving endeavors. Remember to consider the specific needs of your climate and growing conditions when choosing a variety.
Understanding the Differences between Bush and Pole Beans
When it comes to growing green beans for seed saving, understanding the differences between bush and pole beans is crucial. These two types of beans have distinct growth habits and seed production characteristics that can significantly impact your seed-saving efforts.
Bush beans are compact, self-supporting varieties that grow to a height of around 2-3 feet (60-90 cm). They produce a higher yield per square foot compared to pole beans, making them ideal for small spaces or containers. Bush beans typically mature in about 50-60 days and produce smaller seeds that can be harvested at the same time as the pods.
Pole beans, on the other hand, are climbing varieties that require support from trellises or poles. They grow much taller than bush beans, reaching heights of up to 10 feet (300 cm) or more. Pole beans take longer to mature, typically around 70-80 days, but produce larger seeds that are often preferred for seed saving. Their taller growth habit allows them to make better use of space and can be a great option for gardeners with limited floor space.
When selecting which type of bean to grow for seed saving, consider your specific needs and resources. If you have limited space or prefer a more compact plant, bush beans might be the way to go. However, if you have ample space and want to produce larger seeds, pole beans are a better choice.
Harvesting Green Bean Seeds
To harvest green bean seeds, you’ll need to allow the beans to fully dry on the plant, then carefully cut and collect them when they’re completely brittle. This is a crucial step in the seed saving process.
Timing is Everything: Knowing When to Harvest
Knowing when to harvest green bean seeds is crucial for successful seed saving. Green beans are ready to be harvested for their seeds when the pods have dried and turned a light brown color. This process usually takes around 90 to 120 days after planting, depending on the variety.
One way to determine if your green beans are mature enough for harvesting is to check the color of the pods. As they dry, they will turn from a bright green to a light tan or brown color. You can also gently twist and pull on one of the pods; if it comes off easily, it’s ready for harvest.
It’s essential to harvest the seeds when they’re fully matured, as this ensures maximum viability. If you wait too long, the seeds may become stale and lose their ability to germinate. On the other hand, harvesting too early can lead to poor seed quality. A good rule of thumb is to wait until about 90% of the pods have dried and turned brown.
To avoid damaging the seeds during harvest, carefully cut off the stalks at the base, leaving a few inches attached to the main plant. This will make it easier to remove the seeds from the pods later on.
Techniques for Hand-Pollinating Green Beans (if necessary)
If you’re working with green bean varieties that aren’t self-pollinating, hand-pollination is necessary to ensure seed set. This process mimics natural pollination and allows for successful seed production.
To begin, observe the flowers closely on a sunny morning when they are at their most receptive. Look for pollen-filled anthers – these are usually yellow or white in color and found at the center of each flower. Gently brush a small paintbrush against the anther to collect its pollen. You can then transfer this pollen to the stigma, which is the long, thin part of the flower that collects pollen.
Pollinate multiple flowers on your plant using the same process, as some green beans will require cross-pollination for seed production. Be careful not to damage the delicate flowers during pollination. After hand-pollinating all available flowers, cover your plant with a paper bag or row covers to prevent any unwanted insects from interfering with seed development.
Monitor your plant closely over the next few weeks and remove any debris that may accumulate around it. This will help prevent fungal growth and ensure healthy seed production.
Collecting and Drying Green Bean Seeds
Once you’ve harvested your green beans, it’s time to focus on collecting and drying their seeds, a crucial step for successful seed saving. This process is surprisingly simple!
Using a Seed Collector or Bagging Individual Pods
One of the most crucial steps in saving green bean seeds is collecting and drying them properly. You have two primary methods to consider: using a seed collector or bagging individual pods. Both approaches have their pros and cons.
Using a seed collector, also known as a pod stripper, can be an efficient way to collect seeds from multiple plants at once. This tool helps separate the seeds from the pods quickly, making it ideal for larger harvests. However, it may not be suitable for smaller or more delicate varieties.
Bagging individual pods is another popular method that allows you to handle each plant with care. Simply place a paper bag over the pod, and when it’s dry, remove the seeds and store them in an airtight container. This approach ensures minimal damage to the seeds but can be time-consuming for large quantities.
Consider your specific needs and choose the method that best suits you. If you’re planning to save seeds from a single plant or a small batch, bagging individual pods might be the better option. For larger harvests, using a seed collector could save you time in the long run.
Curing the Seeds: A Crucial Step in Seed Saving
Curing seeds is an often-overlooked yet crucial step in seed saving. Without proper curing, even the healthiest-looking seeds can fail to germinate, resulting in a low success rate for planting. This process helps to dry out excess moisture within the seeds, allowing them to become dormant and reducing the risk of mold or fungus growth.
To cure green bean seeds properly, spread them out on paper towels or a clean cloth, ensuring they don’t touch each other. Place the seeds in a single layer in an area with good air circulation. It’s essential to keep the seeds away from direct sunlight and heat sources. Aim for a temperature between 60°F to 70°F (15°C to 21°C) and humidity levels around 50-60%.
Allow the seeds to cure for 1-2 weeks, or until they feel dry and brittle when handled. You can check this by breaking open a seed; if it cracks easily, it’s ready to store. Once cured, your green bean seeds are now ready for proper storage in an airtight container, ensuring optimal viability for future plantings.
Processing and Storing Green Bean Seeds
Now that you’ve harvested your green bean seeds, it’s time to process them for storage. Let’s learn how to clean and dry them perfectly for long-term preservation.
Cleaning and Sorting the Seeds
Cleaning and sorting green bean seeds is a crucial step that ensures their optimal storage and usage. To start, remove any excess soil from the seeds by gently rubbing them between your fingers or using a soft-bristled brush. This helps to prevent mold growth and makes the cleaning process more effective.
Next, separate the seeds into different categories based on their size, color, and quality. Sort the seeds into three piles: large, medium, and small. Large seeds are usually the best candidates for storage and planting, while smaller seeds can be set aside for use in smaller planters or as a backup in case some of the larger seeds don’t germinate.
Inspect each seed carefully to identify any damage, such as cracks, bruises, or signs of mold. Discard any damaged seeds to prevent them from affecting the health and vigor of your plants. Once you’ve sorted and cleaned the seeds, dry them thoroughly with a paper towel or cloth to remove excess moisture.
It’s also essential to separate the seeds by color, as different colors can have varying characteristics and growth habits. For example, some green bean varieties may produce more vigorous growth or be more resistant to certain diseases due to their specific coloration. By separating the seeds in this way, you’ll be able to plant the most suitable variety for your needs and climate conditions.
Finally, store the cleaned and sorted seeds in an airtight container, such as a glass jar or envelope, to maintain their viability and prevent moisture from entering. Label each container clearly with the seed variety, date saved, and any relevant notes about the seeds’ characteristics. This will help you keep track of your seed collection and ensure that you use the right seeds for future plantings.
Using Proper Storage Methods to Maintain Viability
When it comes to storing green bean seeds, proper storage methods are crucial to maintain their viability. This means selecting the right container and controlling humidity levels.
For short-term storage, you can use airtight containers like glass jars or plastic containers with tight-fitting lids. Label each container with the seed variety and date stored. Store them in a cool, dark place such as a pantry or cupboard.
For long-term storage, consider using desiccants or silica gel to control moisture levels. You can also store seeds in airtight containers in a refrigerator or freezer. When storing seeds in the refrigerator, ensure they are not near any strong-smelling foods that may transfer odors to the seeds. Freezer storage is best for seeds that won’t be used within six months.
Remember to store seeds away from direct sunlight and heat sources. A temperature range of 40°F to 50°F (4°C to 10°C) is ideal for long-term storage. With proper storage, your green bean seeds can remain viable for up to five years or more.
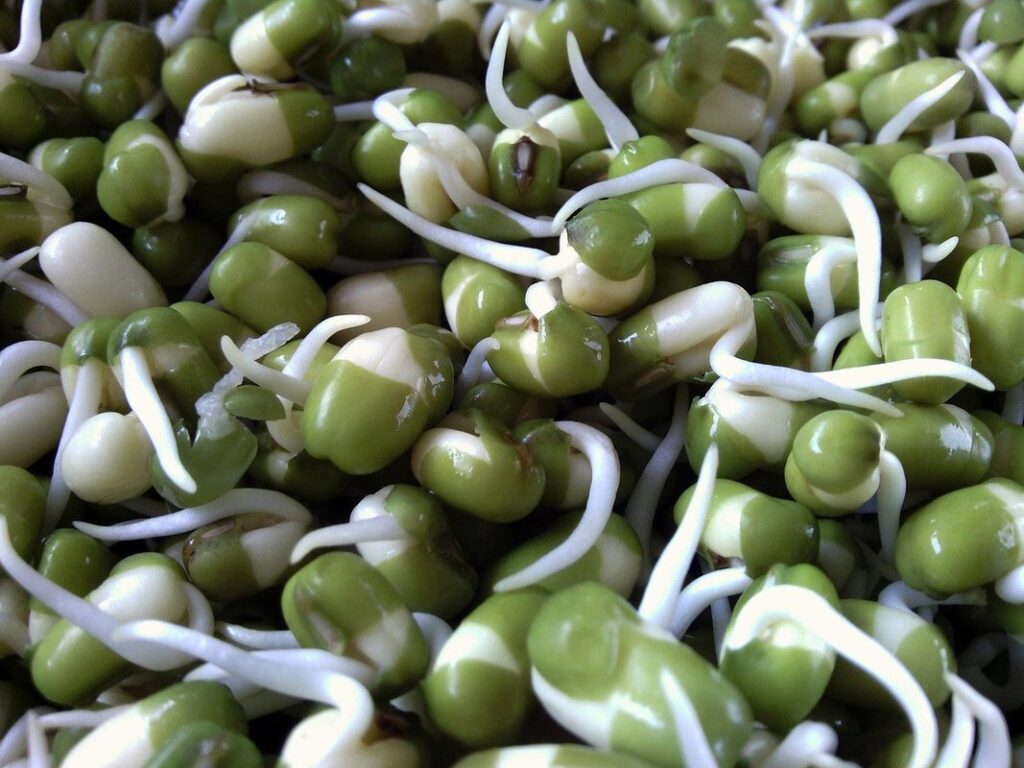
Germinating and Planting Saved Green Bean Seeds
Now that you’ve harvested your saved green bean seeds, it’s time to get them growing. This step-by-step guide will walk you through germination and planting of those precious seeds.
Factors Affecting Seed Germination Success
When it comes to germinating saved green bean seeds, several factors come into play that can significantly impact success. Soil quality and moisture levels are among the most crucial considerations. Poor soil quality can hinder seed germination, so it’s essential to use a well-draining potting mix specifically designed for starting seeds.
Moisture levels also play a critical role in seed germination. Too little water can cause the seeds to dry out and fail to germinate, while too much water can lead to rot and fungal diseases. Aim to maintain a consistent moisture level by watering the soil gently but thoroughly when it feels dry to the touch. A general rule of thumb is to keep the soil consistently moist during the first few weeks after sowing.
Other factors that can affect seed germination include temperature, light exposure, and sowing depth. Ideal temperatures for green bean seed germination typically range between 70°F to 85°F (21°C to 30°C). Sow seeds about 1-2 inches deep and provide them with indirect light or complete darkness until they emerge. By paying attention to these factors, you can increase the chances of successful seed germination and set your plants up for a healthy start.
Sowing the Seeds: Best Practices for Green Beans
When it’s time to sow your saved green bean seeds, make sure you’re giving them the best possible start. Begin by preparing a sunny spot with well-draining soil that’s rich in organic matter. Green beans are a warm-season crop and thrive in temperatures above 60°F (15°C), so wait until the soil has warmed up before planting.
For optimal growth, sow seeds 1-2 inches deep and 2-3 inches apart, depending on the variety. This allows for proper germination and prevents overcrowding. Some gardeners also use a “3-sow” method: sowing three seeds in a spot, then thinning them to one strong seedling after they’ve germinated. This ensures you’ll have at least one healthy plant per spot.
Keep your soil consistently moist during the first few weeks after planting, but avoid overwatering, which can lead to root rot and other issues. With proper care, your saved green bean seeds should sprout within 7-14 days, depending on the variety and growing conditions.
Tips and Variations for Advanced Gardeners
For those who’ve mastered the basics of saving green bean seeds, this next step is all about experimenting with techniques to take your seed-saving game to the next level. Let’s dive into some expert tips and variations!
Experimenting with Cross-Pollination
If you’re an advanced gardener looking to take your green bean seed saving to the next level, experimenting with cross-pollination is a great way to create new and exciting varieties. Cross-pollination involves transferring pollen from one plant to another, allowing for the exchange of genetic material and the creation of unique characteristics.
To start, choose two plants that you’d like to cross-pollinate – ideally, they should have similar growth habits and be within the same family (such as ‘Blue Lake’ and ‘Kentucky Wonder’). Select a male and female plant, with the male producing more pollen than the female. Use a small, clean brush or cotton swab to transfer pollen from the anther of the male plant to the stigma of the female plant.
Keep in mind that cross-pollination can be unpredictable, and results may vary. Some seeds may retain characteristics from both parents, while others may lean more towards one parent or the other. However, with patience and practice, you can create new and interesting varieties that are perfect for your garden’s unique conditions.
Using Seed Savers’ Methods for More Efficient Seed Saving
Experienced seed savers know that there’s more to seed saving than just letting beans dry on the plant. To optimize their efforts and ensure a bountiful harvest next season, they employ various methods to get the most out of their green bean crop. One popular technique is to use isolation bags or breathable containers to dry the pods instead of leaving them exposed to the elements. This helps preserve the delicate seeds and prevents moisture from seeping in.
Another method used by advanced seed savers is to harvest individual beans when they’re fully mature, then carefully remove the seeds and store them in airtight containers. This allows for more precise control over the drying process and ensures that only high-quality seeds are saved. For example, some gardeners use desiccant packets or silica gel to speed up the drying time and maintain optimal humidity levels.
By implementing these strategies, experienced seed savers can increase their chances of successfully saving green bean seeds and enjoy a steady supply of healthy, homegrown seeds for years to come.
Frequently Asked Questions
What if I accidentally harvest seeds from a hybrid variety? Can they still be saved?
Yes, you can still save seeds from hybrid varieties, but the results may vary. Hybrid seeds often have reduced fertility and lower germination rates compared to open-pollinated varieties. To minimize potential issues, start by growing a few open-pollinated green bean varieties alongside your hybrids and use them as parents for seed saving.
How do I know if my saved green bean seeds are suitable for long-term storage?
To ensure stored seeds remain viable, keep them in a cool, dry place with low humidity. Store the seeds in an airtight container or envelope to maintain moisture levels. Check on the seeds periodically and replace any that show signs of spoilage.
Can I save seeds from any type of green bean plant, including those grown from store-bought beans?
Yes, you can try saving seeds from your green bean plants grown from store-bought beans. However, the results may be inconsistent due to factors like seed age, quality, and genetic variability. Consider growing a few open-pollinated varieties alongside store-bought beans to improve your chances of successful seed saving.
How do I prevent cross-pollination when trying to save seeds from a specific variety?
To minimize cross-pollination, plant the green bean variety you want to save seeds from in an isolated area or use physical barriers like fine mesh or row covers to exclude pollinators. Also, consider hand-pollinating the plants or using bees and other beneficial insects specifically for seed production.
What’s the best way to handle germination failures with saved green bean seeds?
When experiencing germination issues, check the seeds’ viability by performing a simple test: soak a few seeds in water overnight, then plant them. If they don’t sprout within 1-2 weeks, try soaking the seeds for an additional day or two before replanting. Also, consider factors like seed quality, storage conditions, and sowing depth when troubleshooting germination issues.