Starting your own vegetable garden can be both exciting and intimidating, especially if you’re new to gardening. One of the most crucial steps in growing a successful harvest is sowing vegetables correctly. But with so many factors to consider, such as climate, soil quality, and maintenance techniques, it’s easy to get overwhelmed.
In this comprehensive guide, we’ll walk you through everything you need to know about selecting the right climate for your vegetables, preparing your soil for optimal growth, planning a thriving garden, and maintaining its health throughout the seasons. By covering these essential topics, you’ll be well on your way to enjoying a bountiful harvest of delicious, homegrown produce. Whether you’re a seasoned gardener or just starting out, this vegetable sowing guide has got you covered with expert tips and techniques to ensure success.
Choosing the Right Vegetables
When it comes to selecting the perfect vegetables for your garden, there are several factors to consider to ensure a successful harvest. Let’s explore how to choose the right ones for you.
Understanding Climate and Seasonality
When it comes to selecting vegetables for your garden, climate and seasonality play crucial roles. The conditions in your area will significantly impact which plants thrive and produce well. For instance, tomatoes are warm-season crops that do best in temperatures above 60°F (15°C), while lettuce is a cool-season crop that prefers cooler temperatures around 40-70°F (4-21°C).
In regions with harsh winters, it’s essential to choose varieties of vegetables that can tolerate frost or can be harvested before the first frost. For example, Brussels sprouts and broccoli are ideal for areas with cold winters as they remain dormant during this period.
Conversely, in areas with extremely hot summers, plants like okra and eggplant perform exceptionally well due to their heat tolerance. Similarly, vegetables like spinach and beans can be grown year-round in regions with mild temperatures.
When selecting vegetables, consider the average temperature, sunlight hours, and precipitation levels in your area to ensure optimal growth and yields. This will help you make informed decisions about which varieties to choose for a successful harvest.
Selecting Varieties for Your Region
Choosing the right vegetable varieties for your region is crucial to ensure their optimal growth and yield. When selecting varieties, consider the local climate and its specific characteristics, such as temperature, humidity, and daylight hours. For instance, if you live in a hot and dry climate like Arizona, choose heat-tolerant and drought-resistant varieties like ‘Texas Star’ okra or ‘Heat Wave’ tomatoes.
In contrast, areas with mild winters and cool summers, like California, can grow a wider range of vegetables year-round. In these regions, focus on selecting varieties that mature quickly, such as ‘Early Girl’ tomatoes or ‘Little Finger’ lettuce, which will be ready to harvest before the heat sets in. Similarly, regions with high humidity, like Florida, may require more resistant varieties like ‘Southern Belle’ cucumbers or ‘Jade’ beans.
When selecting varieties for your region, also consider the average temperature and daylight hours during the growing season. For example, in areas with short summers and cool springs, choose varieties that mature within 50-60 days, such as ‘Radish’ or ‘Lettuce’.
Considering Soil Type and pH
When it comes to growing vegetables, soil type and pH are crucial factors that can make or break your harvest. Different soils have unique characteristics that affect how well nutrients are absorbed by roots, and how water moves through the soil.
For example, clay soils tend to retain moisture but may become waterlogged if not drained properly. They also require more nitrogen, phosphorus, and potassium (NPK) fertilizers to support plant growth. On the other hand, sandy soils drain quickly, which can lead to nutrient deficiencies if they’re not replenished regularly.
Loam soils are often considered ideal for vegetable gardening because of their balanced composition – neither too dry nor too wet. However, it’s essential to check your soil pH level, as most vegetables prefer a slightly acidic to neutral pH (around 6-7). A simple pH test kit will help you determine if adjustments need to be made.
Consider the specific needs of each vegetable variety when planning your garden layout. If you’re unsure about your soil type or pH levels, consider starting with seeds in containers or small plots before scaling up.
Preparing the Soil
Before we start sowing our seeds, it’s essential to prepare the soil to ensure a healthy and thriving vegetable garden. Let’s dive into the crucial steps for preparing your soil.
Testing Your Soil pH and Nutrient Levels
To ensure a healthy and productive vegetable garden, it’s essential to understand the condition of your soil. Testing your soil pH and nutrient levels will help you identify any deficiencies or imbalances that could affect plant growth. You can conduct a DIY soil test using readily available kits from your local nursery or gardening store.
These kits typically involve collecting a soil sample, mixing it with a chemical solution, and then measuring the resulting color change to determine pH levels. However, for more accurate results, consider hiring a professional soil testing service. They will collect a sample, analyze it in their laboratory, and provide detailed reports on nutrient deficiencies, pH levels, and other factors affecting soil health.
Some common DIY methods include the vinegar test (mixing vinegar with soil and observing color change) or using pH paper strips. While these can give you an idea of your soil’s condition, professional testing offers more precise results and personalized recommendations for improvement.
Amending the Soil: Adding Organic Matter and Fertilizers
When it comes to preparing the soil for vegetable sowing, amending the soil with organic matter and fertilizers is a crucial step. This process not only improves the soil’s fertility but also its overall health, setting the stage for optimal growth and development of your vegetables.
Compost, in particular, plays a vital role in enriching the soil. Rich in nutrients and beneficial microorganisms, compost acts as a natural fertilizer, enhancing soil structure and water retention capacity. To integrate compost into your soil amendment routine, start by creating or sourcing a high-quality compost mix. You can make your own using kitchen scraps and yard waste or purchase it from a reputable supplier.
Another effective way to amend the soil is through the use of animal manure. Manures like chicken, cow, or horse dung are rich in nutrients such as nitrogen, phosphorus, and potassium. However, be cautious when using fresh manure as it can burn your plants’ roots if not properly aged. Allow the manure to break down for several months before incorporating it into your soil.
Synthetic fertilizers also have a place in soil amendment, particularly if you’re looking to boost nutrient levels quickly. However, use them judiciously and follow the recommended application rates to avoid over-fertilizing. As with compost and manure, balance is key when it comes to using synthetic fertilizers.
When amending your soil, remember that a balanced approach is essential for optimal results. Combine organic matter and fertilizers in proportions suitable for your specific vegetable crop needs, taking into account factors such as climate, soil type, and nutrient requirements.
Tilling and Raking: Preparing the Bed for Sowing
Tilling and raking are two crucial steps in preparing the soil for sowing. By doing so, you’ll create an ideal environment for seed germination and root growth. When soil is compacted, it can impede water and air from reaching the roots, leading to poor plant performance.
To minimize soil compaction, start by tilling the bed to a depth of 8-10 inches. This breaks up any clods and aerates the soil, allowing for better drainage and root penetration. Next, rake the soil to create a smooth surface, removing any debris or weeds. It’s essential to rake in multiple directions to avoid creating compacted zones.
Raking also helps loosen the top 2-3 inches of soil, making it easier for seeds to germinate. Aim to rake the soil when it’s moist but not waterlogged, as this will help prevent soil erosion and promote seedling establishment. Remember to use a gentle touch with your rake, especially in areas where roots may be present. By following these best practices, you’ll create a fertile foundation for your vegetable seeds to thrive in.
Planning Your Garden Layout
Before you start sowing, it’s essential to plan out your garden layout to ensure maximum space efficiency and easy access to all your plants. Let’s dive into the details of designing a productive garden bed.
Designing a Thriving Vegetable Garden
When designing a thriving vegetable garden, it’s essential to consider three critical principles: sunlight, wind direction, and companion planting. Sunlight is the most critical factor, as vegetables require a specific amount of direct sunlight to photosynthesize efficiently. Choose a location that receives at least six hours of direct sunlight per day. North-facing gardens are ideal for shade-loving plants like lettuce and herbs.
Wind direction also plays a significant role in garden design. If your garden is exposed to harsh winds, consider planting taller crops or windbreaks like trellises or shrubs to protect smaller plants. Companion planting can significantly enhance productivity by promoting growth, repelling pests, and improving soil health. For example, planting marigolds with tomatoes can deter nematodes, while basil improves tomato flavor.
Consider the mature size of each plant when planning your layout. Leave enough space for air circulation between rows (about 2-3 feet) to prevent disease spread. Allocate specific areas for different types of vegetables, such as root crops, climbers, and leafy greens.
Creating a Crop Rotation Plan
When planning your garden layout, it’s essential to consider creating a crop rotation plan. This strategy involves rotating different vegetables and crops through your garden each season to maintain soil health, minimize pests and diseases, and promote biodiversity.
Crop rotation has numerous benefits, including improved soil fertility, reduced weed growth, and increased pest resistance. For example, planting legumes like beans or peas can fix nitrogen in the soil, while following with a crop that absorbs it, such as corn or tomatoes, ensures optimal nutrient use. This balance prevents depleting the soil of essential nutrients.
To implement a successful crop rotation plan, start by mapping your garden’s layout and noting which areas receive full sun or partial shade. Divide your garden into sections based on the type of crops you’ll be growing in each area. Consider grouping vegetables that have similar requirements for light, water, and temperature together. By rotating your crops annually, you can break disease and pest cycles, reducing the need for chemicals and promoting a healthier ecosystem.
When selecting new varieties to add to your rotation plan, choose plants with different growth habits and spacing requirements to optimize space usage and minimize competition between vegetables.
Incorporating Companion Planting
When planning your garden layout, it’s essential to consider the concept of companion planting. This involves pairing vegetables that complement each other in terms of growth, pest resistance, and flavor enhancement. By strategically grouping plants together, you can create a more diverse and resilient garden ecosystem.
For instance, basil and tomatoes are a classic combination that not only improves the flavor of both crops but also repels pests like whiteflies and aphids. Planting marigolds with carrots deters nematodes, while radishes between cucumber rows help to prevent fungal diseases. Another beneficial pairing is planting beans alongside corn and squash, as the beans provide nitrogen fixation for the corn, while the squash spreads its large leaves to shade out weeds.
To incorporate companion planting into your garden design, start by researching specific pairings that work well together. Keep in mind the mature sizes of each plant, ensuring they have enough space to grow without overcrowding. Also, consider the growing requirements and sunlight needs for each variety to ensure harmonious coexistence. By embracing companion planting, you can create a thriving, low-maintenance garden that benefits from the natural synergy between different vegetables.
Sowing Seeds: Techniques and Timing
When it comes to sowing seeds, timing is everything, and understanding the right techniques will make all the difference in getting your vegetables off to a healthy start. Let’s dive into the essential methods for sowing like a pro!
Seed Selection and Preparation
Choosing high-quality seeds is crucial for a successful vegetable harvest. When selecting seeds for your region, consider factors such as climate, soil type, and the specific growing conditions in your area.
Start by checking the seed packet for information on germination rates, days to maturity, and recommended growing conditions. This will help you choose varieties that are well-suited to your local climate. For example, if you live in a region with short summers, look for seeds that mature quickly (around 50-60 days) to ensure you get the best possible yield.
Also, consider the size of the seed itself. Larger seeds tend to produce larger plants and more robust growth, while smaller seeds may require more care and attention. Seed shape can also impact plant performance – for instance, oblong or cylindrical seeds tend to be easier to sow evenly than spherical ones.
When selecting seeds, don’t overlook the treatment they’ve undergone. Pelleted seeds, which are coated with a clay-based substance, can make sowing easier by reducing the need for precise spacing and allowing for more consistent germination rates.
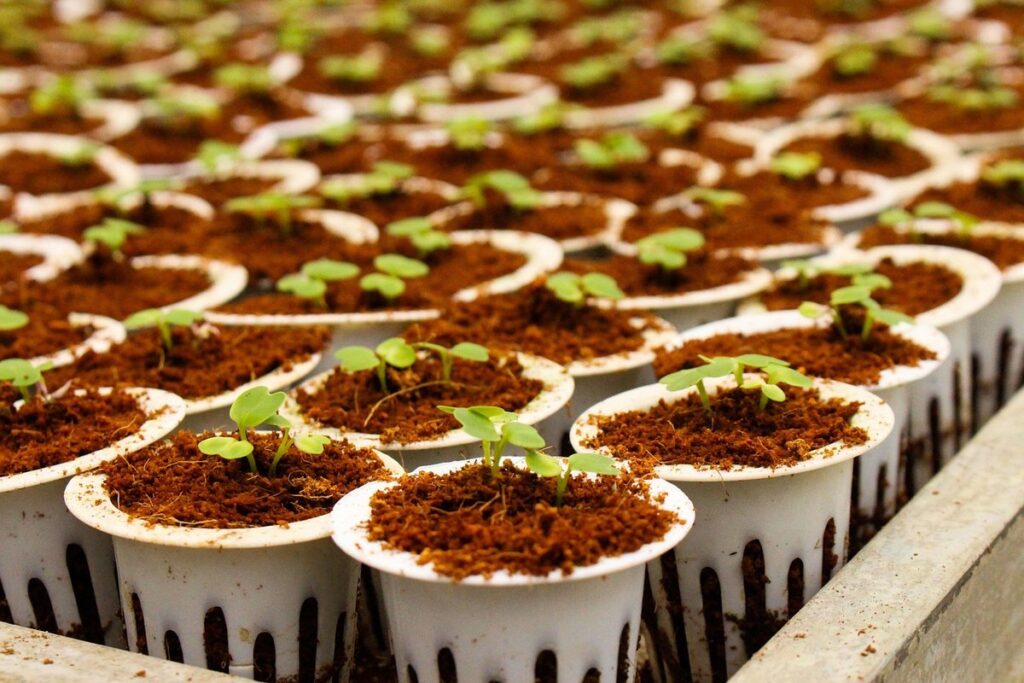
Direct Sowing vs. Transplanting
When it comes to sowing seeds for vegetables, two common methods are direct sowing and transplanting. While both techniques have their advantages, the choice between them depends on various factors such as soil temperature, moisture levels, and root disturbance.
Direct sowing involves sowing seeds directly into the garden bed where they will mature. This method allows the roots to grow in place, without being disturbed during transplanting. Seeds can be sown when the soil has reached an optimal temperature for germination. For example, tomatoes typically require a soil temperature of around 60°F (15°C) before direct sowing.
In contrast, transplanting involves starting seeds indoors or in seed trays and then moving them to the garden bed once they have developed their first set of true leaves. This method allows for more control over soil moisture levels and can help prevent root disturbance. However, it requires additional care and handling of delicate seedlings.
Consider the specific needs of your vegetable crop when deciding between direct sowing and transplanting. Some vegetables, like lettuce and spinach, do well with either method, while others, such as tomatoes and peppers, are best transplanted to avoid root disturbance.
Tips for Successful Seed Germination
To optimize seed germination rates, it’s essential to understand that different seeds have unique requirements. Some seeds, like those of the tomato and pepper, are relatively easy to germinate, while others, such as those of the cabbage and broccoli, require more assistance.
One technique for improving germination is scarification, which involves lightly scratching or cutting the seed coat to allow water to penetrate. This method can be particularly effective for seeds with thick coats, like beans and peas. Another approach is stratification, where seeds are subjected to a period of cold temperatures before planting. This simulates winter conditions and can help seeds that require a prolonged period of dormancy.
Soaking seeds in warm water can also help increase germination rates by softening the seed coat and allowing for easier absorption of water. A good rule of thumb is to soak seeds for 24-48 hours before sowing, but be sure not to over-soak them, as this can lead to rot or mold.
By incorporating these techniques into your sowing routine, you can significantly improve your chances of successful seed germination and give your vegetables a strong start.
Watering and Maintenance
Now that you’ve got your seeds sown, it’s time to focus on keeping them happy and healthy through proper watering and maintenance techniques. This is where patience and attention to detail come into play.
Understanding Your Watering Needs
When it comes to growing vegetables, watering is one of the most critical aspects that can make all the difference between a thriving harvest and a disappointing yield. However, many gardeners struggle with understanding their plants’ specific watering needs. This is where things get tricky – what works for one plant may not work for another.
To begin with, it’s essential to consider the soil type in your garden. Sandy soils dry out quickly, while clay soils retain water excessively. If you’re planting in a raised bed or container, choose a well-draining potting mix that can provide optimal moisture levels. Next, take into account the climate where you live – vegetables grown in hot and dry climates need more frequent watering than those grown in cooler regions.
Different plants have varying watering needs as well. Leafy greens like lettuce and spinach prefer consistent moisture, while root vegetables like carrots and beets require less water. Research your specific plant variety to learn its recommended watering schedule and adjust accordingly.
Mulching: Retaining Moisture and Suppressing Weeds
Mulch plays a crucial role in maintaining a healthy and productive vegetable garden. By retaining moisture, suppressing weeds, and regulating soil temperature, mulch helps to create an ideal environment for your vegetables to thrive.
When it comes to choosing the right material for your mulch, consider using organic options such as straw, bark chips, or even leaves. These materials will break down over time, adding nutrients to the soil and improving its structure. Avoid using pine needles, as they can be acidic and potentially harm your plants.
To effectively retain moisture, apply a 2-3 inch layer of mulch around your vegetable beds. This will help to reduce evaporation and prevent water from being washed away by rainfall or irrigation. Regularly replenishing the mulch as it breaks down is essential to maintain its effectiveness. By incorporating mulch into your gardening routine, you’ll be able to conserve water, reduce weed growth, and enjoy a more efficient and productive vegetable garden.
Monitoring Progress and Troubleshooting Common Issues
Regularly monitoring your garden’s progress is crucial to catch potential problems early on. Start by setting aside time each week to inspect your plants, looking for signs of disease or pests. Check the leaves and stems for any unusual spots, discoloration, or holes, which can indicate fungal diseases like powdery mildew or aphid infestations.
Recognize the warning signs: yellowing or wilted leaves, stunted growth, or a sticky substance on plant surfaces. These symptoms may be caused by factors such as overwatering, nutrient deficiencies, or root damage due to excessive soil moisture.
When you notice these issues, take corrective action immediately. Remove affected plants to prevent spreading disease and dispose of them properly. Treat the remaining plants with organic fungicides or insecticidal soap according to product instructions.
Consider implementing integrated pest management (IPM) strategies, such as introducing beneficial insects like ladybugs or lacewings, which prey on pests without harming your crops. Also, maintain a consistent watering schedule and provide necessary nutrients through fertilizers or compost tea to keep your garden healthy and thriving.
By regularly monitoring your garden’s progress and addressing potential problems promptly, you can prevent damage, reduce losses, and enjoy a bountiful harvest of delicious homegrown vegetables.
Frequently Asked Questions
What if I’m unsure which vegetables will thrive in my specific climate?
Start by researching the average temperature ranges for your region and selecting vegetables that are suitable for those conditions. You can also consult with local nurseries, gardening clubs, or online forums to get a better understanding of what grows well in your area.
Can I grow multiple varieties of vegetables in the same bed?
Yes, it’s possible to grow multiple varieties together, but be mindful of companion planting principles to ensure that the different plants don’t compete for resources or attract pests. Some vegetables, like lettuce and carrots, can even benefit from being grown together.
How often should I test my soil pH and nutrient levels?
It’s recommended to test your soil at least once a year, especially if you’re new to gardening. This will help you identify any imbalances and make adjustments accordingly. You may also want to test after making significant changes to your garden, such as adding fertilizers or compost.
What are some common mistakes to avoid when sowing seeds?
Some common mistakes include overwatering, which can lead to rot and other issues; under-watering, which can cause seeds to dry out; and not providing adequate sunlight for the seedlings. Make sure to follow the specific instructions on your seed packets and monitor your plants closely.
Can I use regular mulch or should I opt for organic matter specifically designed for vegetable gardens?
While regular mulch can help retain moisture and suppress weeds, it’s best to choose an organic matter that is nutrient-rich and won’t compete with your vegetables for resources. Examples include composted manure, peat moss, or well-rotted leaf mold.