Lentils are one of the most versatile and nutritious legumes, packed with protein, fiber, and essential nutrients. But have you ever wondered how these tiny treasures grow from seed to harvest? The process of lentil growth is indeed fascinating, influenced by various factors that impact their development stages. From seed germination to maturity, lentils require optimal crop requirements, including climate, soil conditions, and water management. Unfortunately, pests and diseases can also affect their growth, resulting in reduced yields or lower quality crops. In this article, we’ll delve into the intriguing world of lentil growth, exploring the essential factors that influence their development stages, as well as practical tips on crop requirements, pest management, and more, to help you grow healthier and more productive lentils.
The Life Cycle of Lentil Plants
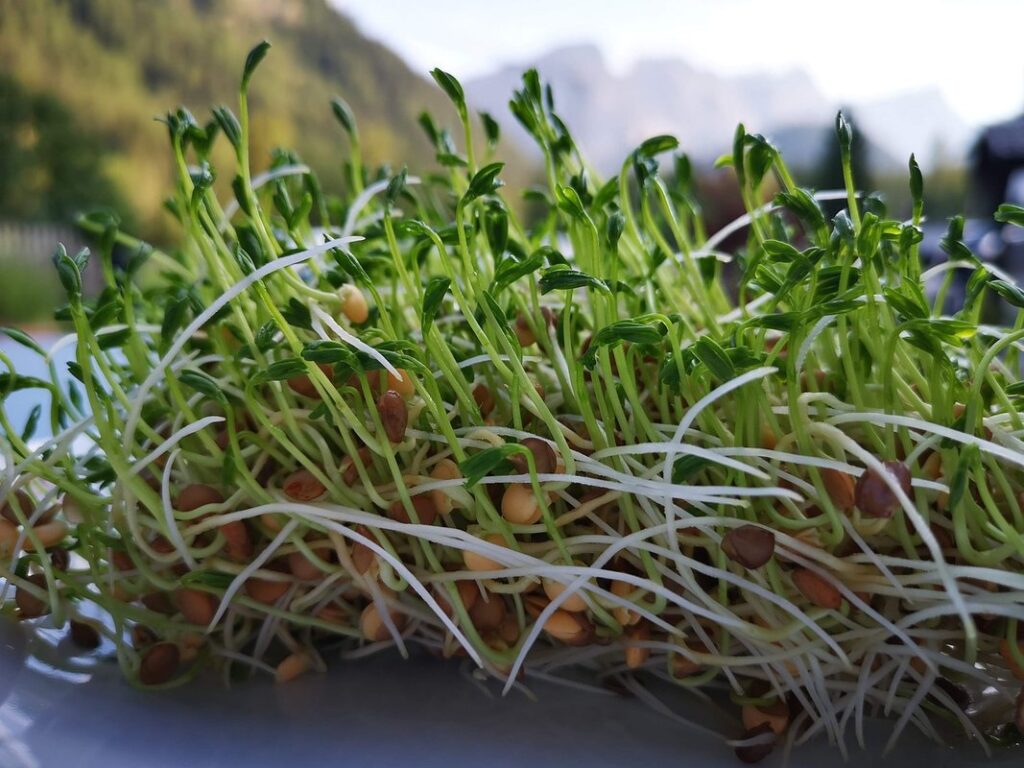
As we explore how lentils grow, it’s essential to understand their life cycle, which begins with planting and progresses through various stages of growth and development. Let’s take a closer look at this journey!
Germination and Seedling Development
When lentil seeds are planted in well-prepared soil with adequate moisture, they begin to germinate. This process typically takes 7-14 days, depending on factors like soil temperature and moisture levels. Soil temperature plays a crucial role, as it affects the rate of germination. Optimal temperatures range from 40°F to 70°F (4°C to 21°C), with ideal being around 60°F (15°C). If the soil is too cold or too hot, it can slow down or even halt germination.
Moisture levels also significantly impact seed germination. Lentil seeds need consistent moisture, especially during the first few weeks after planting. However, overwatering can be detrimental, leading to poor seedling establishment and increased susceptibility to diseases. To promote healthy germination, ensure the soil has adequate moisture but not waterlogged conditions. It’s also essential to maintain a 2-3 inch layer of mulch around the plants to retain moisture and regulate soil temperature.
Root System Development
As lentil plants begin to grow, they start developing their root system. This process is crucial for nutrient uptake and water absorption, as a robust root system allows the plant to anchor itself firmly into the soil while drawing essential resources.
Lentils, like other legumes, have a unique ability to fix atmospheric nitrogen in the soil through symbiotic relationships with Rhizobia bacteria. This process, known as nodulation, enables lentil plants to thrive in poor soil conditions where nutrients are scarce. As the root system expands, it creates an extensive network of fine roots and tubers that absorb water and essential minerals.
A well-developed root system also helps lentils to survive drought conditions by storing moisture for extended periods. This adaptation is particularly beneficial in arid or semi-arid regions where irrigation might not be feasible. By developing a robust root system, lentil farmers can significantly improve crop yields while reducing their reliance on external inputs. To promote healthy root growth, it’s essential to provide lentils with adequate soil moisture and nutrients during the early stages of development.
Emergence and Early Growth
When lentil seeds are planted, they undergo a remarkable transformation from tiny seeds to robust plants. The emergence of lentil seedlings from the soil is a critical stage that sets the tone for their future growth and development.
Light exposure plays a crucial role during this phase, as most lentil varieties require full sun to partial shade to germinate properly. Adequate light encourages healthy root development and helps regulate the plant’s internal clock, ensuring that it grows in sync with seasonal changes. Temperatures between 15°C to 20°C (59°F to 68°F) are ideal for seedling emergence, as they promote optimal growth rates.
Soil quality also significantly impacts early lentil growth stages. Well-draining soil rich in organic matter and essential nutrients enables seedlings to establish a strong root system, while also supporting their overall vigor and resilience. Avoid planting lentils in poorly aerated or waterlogged soils, as these conditions can lead to disease susceptibility and stunted growth.
By providing optimal light exposure, suitable temperatures, and nutrient-rich soil, you’ll be setting your lentil seedlings up for a healthy and thriving early growth stage that will ultimately translate into robust yields.
Lentil Crop Requirements
To grow lentils successfully, it’s essential to understand their crop requirements, including suitable climate and soil conditions, water needs, and ideal sowing periods. We’ll break down each factor in this section.
Soil Conditions and pH
Lentil cultivation thrives in well-drained soil with optimal pH levels. The ideal pH range for lentils is between 6.0 and 7.5, making them more tolerant of slightly acidic conditions compared to other legumes. However, this range may vary depending on the specific variety and climate.
When it comes to nutrient requirements, lentils need a balanced mix of nitrogen, phosphorus, and potassium (NPK) for growth. A soil test can help identify any deficiencies or excesses in these essential nutrients. For instance, if your soil is lacking nitrogen, you may need to incorporate compost or manure to improve its fertility.
In terms of specific nutrient needs, lentils require:
* Nitrogen: 30-40 kg per hectare
* Phosphorus: 10-20 kg per hectare
* Potassium: 20-30 kg per hectare
Maintaining optimal soil conditions is crucial for a healthy lentil crop. By ensuring the right pH and nutrient levels, you can promote better yields and reduce the risk of pests and diseases.
Water and Irrigation Management
Water is essential for lentil growth, and efficient irrigation practices are crucial to minimize waste. Lentils require around 500-600 mm of water throughout their growing season, with the majority needed during seedling establishment and pod formation stages. To optimize water use, farmers can implement techniques such as drip irrigation or sprinkler systems that deliver water directly to the roots, reducing evaporation and runoff.
Crop rotation and mulching can also help retain moisture in the soil. By using cover crops between lentil cycles, you can reduce soil compaction and improve its water-holding capacity. Mulch helps to regulate soil temperature, suppress weeds, and retain moisture. Aim for a 2-3 inch layer of organic mulch around your lentils.
Another approach is to use rainwater harvesting systems, which collect and store rainwater for irrigation purposes. This method can significantly reduce the reliance on groundwater sources and minimize water waste due to evaporation or runoff. By adopting these efficient irrigation practices, you can ensure that your lentil crop receives the right amount of water while also conserving this precious resource.
Climate and Weather Considerations
Lentil growth and development are heavily influenced by climate and weather conditions. Temperature fluctuations can impact the plant’s ability to grow and mature. Lentils typically require temperatures between 65°F (18°C) and 75°F (24°C) for optimal growth, with ideal temperatures ranging from 70°F (21°C) to 72°F (22°C). Temperatures above 85°F (29°C) can cause the plant to bolt, or prematurely go to seed, resulting in lower yields.
Humidity levels also play a crucial role in lentil growth. High humidity can promote fungal diseases and pests, while low humidity can cause water stress. Ideally, lentils require around 60% relative humidity for optimal growth. Weather patterns such as rainfall, droughts, and extreme weather events can also impact the crop’s development. Adequate moisture is essential, especially during the podding stage, but excessive rain can lead to waterlogged soils and root rot. Farmers should monitor weather forecasts closely to ensure timely planting and irrigation management practices are in place to mitigate potential risks.
Lentil Plant Growth Stages
As we explore how lentils grow, let’s take a closer look at the stages of their development from seed to mature plant. Here are the key growth milestones in this process.
Bud Formation and Flowering
As lentil plants continue to mature, they enter the stage of bud formation and flowering. This critical phase is marked by the emergence of small buds on the stem, which eventually develop into delicate flowers. The process of flower formation is influenced by several key factors.
Light exposure plays a crucial role in regulating flowering. Adequate sunlight triggers the production of plant hormones that promote bud growth and flowering. In contrast, insufficient light can delay or even prevent flowering altogether. For instance, studies have shown that lentil plants grown under reduced light conditions produced fewer flowers and lower yields compared to those grown under optimal light levels.
Nutrient availability is another essential factor influencing flowering in lentils. A balanced supply of essential nutrients such as nitrogen, phosphorus, and potassium promotes healthy bud development and flowering. Lentil farmers often apply targeted fertilizers during this stage to ensure their plants receive the necessary nutrients for optimal growth.
In addition to light and nutrient factors, temperature also plays a vital role in regulating flowering. Most lentil varieties require temperatures between 65°F to 75°F (18°C to 24°C) to initiate flowering.
Pod Filling and Maturation
As lentil plants mature, they reach their final growth stage of pod filling and maturation. This critical phase involves the transformation of small, green pods into swollen, seed-filled structures that are ready for harvest. During this period, lentils continue to absorb water and nutrients through their roots, which fuels the rapid expansion of seeds within the pods.
At around 60-70 days after sowing, lentil plants typically enter the pod filling stage. This is when the green, pencil-thin stems begin to swell with developing seeds. It’s essential for farmers to maintain optimal moisture levels, ensuring that water availability matches crop demand. Research suggests that lentils require about 1 inch of water per week during this critical period.
As pods continue to mature, they will gradually change color from pale green to yellow or tan, depending on the lentil variety. Farmers can assess pod maturity by gently squeezing them; mature pods should be firm but not brittle. With proper care and attention, lentils should be ready for harvest within 2-3 weeks after the beginning of pod filling.
Senescence and Harvest Readiness
As lentil plants reach their final growth stage, they begin to prepare for harvest by undergoing a process called senescence. This critical phase is marked by ripening and drying out of the plant’s tissues, allowing it to conserve energy and resources.
During this period, you’ll notice the following signs: the leaves start to turn yellow or brown, and the stems become brittle and dry. The pods on the plants will begin to dehisce, splitting open to release their seeds. This is a natural process that signals the plant’s readiness for harvest.
To determine if your lentil crop is ready for harvesting, gently tug on a stem near the base of the plant. If it comes off easily, with a clean break between the stem and the crown, it’s likely time to bring in the crop. Harvesting at this stage ensures that the lentils are mature and have reached optimal quality and flavor. Avoid delaying harvest, as prolonged exposure to moisture can lead to rot and spoilage.
Pest and Disease Management in Lentil Crops
To grow lentils successfully, it’s crucial to understand how to prevent common pests and diseases that can damage your crop. Let’s dive into managing these threats together.
Common Pests Affecting Lentils
Lentil crops are susceptible to various pests that can significantly impact yields and reduce crop quality. Among the most common pests affecting lentils are aphids, whiteflies, and spider mites. These pests feed on plant sap, causing curled or distorted leaves, stunted growth, and reduced seed production.
Aphid infestations can be particularly devastating, as they transmit viral diseases such as potato virus X (PVX) and yellow spot virus (YSV). Whiteflies, on the other hand, secrete sticky honeydew that attracts ants and promotes fungal growth. Spider mites are tiny but voracious feeders, sucking plant sap and causing bronzing or speckling of leaves.
To control these pests, farmers can employ a combination of cultural, physical, and chemical methods. Crop rotation, sanitation, and timely harvesting can help break pest cycles. Insecticidal soap or neem oil can be used to kill aphids and whiteflies on contact. For more severe infestations, pyrethroid-based pesticides may be necessary, but their use should be carefully managed to avoid environmental harm and pesticide resistance.
Fungal and Bacterial Diseases in Lentils
Lentil plants are susceptible to various fungal and bacterial diseases that can significantly impact yields. One of the most common fungal diseases affecting lentils is powdery mildew, which causes white powder-like growth on leaves and stems. Symptoms also include yellowing of leaves and reduced plant height. To manage powdery mildew, growers can practice crop rotation, improve air circulation, and apply fungicides as a last resort.
Another significant threat to lentil crops is bacterial blight, characterized by small, dark green or reddish-brown spots on leaves that eventually turn yellow or wilted. Bacterial spot disease also affects lentils, resulting in small, water-soaked lesions on stems and leaves that may develop into larger, sunken areas.
Growers can mitigate losses by monitoring for early signs of disease and implementing integrated pest management strategies that combine cultural practices, biological control, and chemical controls as needed. Regularly inspecting fields for signs of disease, removing infected plants, and improving soil health through composting or cover cropping can also reduce the risk of disease outbreaks.
Harvesting and Processing Lentils
Now that we’ve explored how lentil plants grow, it’s time to learn about harvesting and processing these nutritious legumes from seed to plate. We’ll walk you through each step of the process.
Optimal Harvest Timing
When it comes to harvesting lentils, timing is everything. You want to catch them at the peak of perfection, when the moisture content is just right and the weather conditions are favorable. If you harvest too early, the lentils may not be fully mature, leading to lower yields and reduced quality.
On the other hand, waiting too long can result in over-maturity, causing the lentils to become brittle and prone to breakage during processing. Ideally, you want to harvest your lentils when they’re still moist but not waterlogged. A general rule of thumb is to wait until the soil is dry enough for plowing but still retains some moisture.
In terms of specific timing, most lentil varieties are ready to harvest 90-120 days after sowing. However, this can vary depending on factors like climate, soil type, and weather patterns. To determine the optimal harvesting time for your crop, monitor the color and texture of the pods closely. When they turn a light brown or beige color and start to split open, it’s usually a sign that they’re ready.
It’s essential to harvest lentils during a dry spell, as excess moisture can lead to mold and rot. Use a combine harvester or a threshing machine to minimize damage to the pods and ensure even drying. With proper timing and harvesting techniques, you’ll be able to reap a bountiful crop of high-quality lentils.
Post-Harvest Handling and Storage
Proper handling and storage of lentil crops are crucial to maintaining quality and preventing spoilage. Once harvested, lentils must be dried quickly to a moisture level of around 12%. This can be achieved through air drying, using machine dryers, or a combination of both. If not properly dried, lentils are susceptible to mold and rot.
After drying, lentils require thorough cleaning to remove any debris or impurities. This is typically done by passing the lentils over a series of sieves with decreasing mesh sizes. Cleaning is essential for maintaining quality and preventing contamination.
Grading is also an important step in post-harvest handling. Lentil grades are usually based on size, shape, color, and purity. Proper grading helps determine market value and ensures that high-quality lentils reach consumers.
Proper storage of dried lentils is critical to maintaining freshness. They should be stored in a cool, dry place with good airflow to prevent moisture buildup. Moisture can cause spoilage and affect the quality of the lentils.
Conclusion
In conclusion, understanding how lentils grow is essential for anyone interested in cultivating these nutritious legumes. As we’ve explored throughout this guide, lentil growth requires specific conditions and care. From sowing seeds in well-draining soil to providing adequate moisture and temperature, every step of the process is crucial for a successful harvest. By following our comprehensive guide, you’ll be able to grow your own lentils with ease. Remember, patience and attention to detail are key to reaping a bountiful crop. With practice, you’ll be well on your way to becoming a skilled lentil farmer, enjoying the satisfaction of homegrown produce and sharing it with friends and family. By putting these tips into action, you’ll not only grow delicious lentils but also appreciate the process behind them.
Frequently Asked Questions
Can I grow lentils in a cold climate?
Yes, you can still grow lentils in cooler climates, but it’s essential to choose varieties that are resistant to low temperatures. Most lentil varieties require temperatures between 40°F and 70°F (4°C to 21°C) for optimal growth. If your area experiences frost, consider using row covers or other protection methods to extend the growing season.
How often should I water my lentil plants during the critical growth stages?
Water your lentil plants regularly, especially during germination, seedling development, and flowering stages. Aim for about 1 inch of water per week, either from rainfall or irrigation. Monitor soil moisture levels to avoid overwatering, which can lead to fungal diseases.
What are some common pests that affect lentil crops, and how can I manage them?
Common pests affecting lentils include aphids, whiteflies, and spider mites. Use integrated pest management (IPM) techniques to control infestations, such as introducing beneficial insects, practicing crop rotation, and applying targeted pesticides only when necessary.
Can I grow multiple varieties of lentils together in the same field?
Yes, you can grow different lentil varieties together, but be aware that this may increase disease susceptibility. Consider rotating your crops annually to reduce soil-borne diseases and pests. Also, ensure that the chosen varieties have similar growth habits and maturation dates.
How long does it take for lentils to mature after flowering?
After flowering, lentil pods typically fill with seeds within 3-4 weeks. However, total maturity time from sowing to harvest can range from 100 to 150 days, depending on factors like climate, soil quality, and variety selection. Monitor your crop’s progress closely to determine the optimal harvest timing for your specific growing conditions.