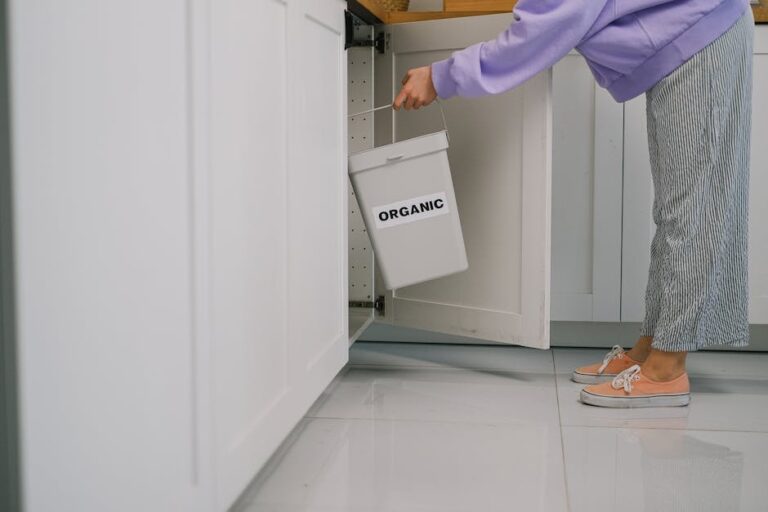
Are you tired of wasting valuable resources by throwing away your chickens’ manure? You’re not alone! Many backyard chicken keepers struggle with what to do with their birds’ waste, but did you know that it can be a goldmine for gardeners and environmentally conscious individuals?
Not only does chicken manure compost bin provide a creative solution to this problem, but it also offers a wealth of benefits. By transforming waste into nutrient-rich soil, you’ll not only reduce your waste output but also create a healthy environment for your plants to thrive in. In this article, we’ll dive into the world of creating a chicken manure compost bin and explore how you can unlock the secrets of turning waste into valuable fertilizer using this simple yet effective method.
Understanding the Importance of Composting
Composting is a vital process that turns waste into nutrient-rich soil for your garden, and when done correctly, it’s also an essential part of managing chicken manure effectively. Let’s explore why composting matters.
Benefits of Using Chicken Manure in Compost
Using chicken manure in compost can have numerous benefits for your garden and ecosystem. Not only is it a nutrient-rich natural fertilizer, but it also helps to improve soil structure and promote healthy plant growth. According to a study by the University of California, Davis, chicken manure contains high levels of nitrogen (8-10%), phosphorus (2-3%), and potassium (1-2%), making it an excellent addition to compost piles.
When incorporated into the composting process, chicken manure helps to balance out the carbon-to-nitrogen ratio, ensuring that your finished compost is teeming with beneficial microorganisms. This can lead to improved soil fertility, increased crop yields, and enhanced plant resilience to disease and pests. For example, using a mix of 1 part chicken manure to 2 parts “green” materials (such as grass clippings or vegetable scraps) can create a rich, earthy compost that will leave your garden looking healthier than ever.
To get the most out of your chicken manure compost bin, be sure to balance it with adequate carbon sources and maintain proper moisture levels throughout the process.
Types of Composting Methods That Utilize Chicken Manure
When it comes to composting chicken manure, there are several methods you can utilize, each with its own advantages and potential drawbacks. One popular method is windrow composting, which involves piling the manure into long rows or “windrows” that are turned periodically to aerate the pile. This method is cost-effective and can handle large volumes of manure, but it requires a significant amount of space and labor.
In-vessel composting, on the other hand, uses a contained vessel or bin to break down the manure. This method is ideal for small-scale operations, as it produces less odor and takes up minimal space. However, it can be more expensive upfront, and the equipment may require regular maintenance.
Vermicomposting, also known as worm composting, involves using red wiggler worms to break down the manure into a nutrient-rich compost. This method is ideal for small-scale operations and produces a high-quality compost, but it requires careful monitoring of temperature and moisture levels to ensure optimal conditions for the worms.
Designing Your Chicken Manure Compost Bin
When building your chicken manure compost bin, it’s essential to consider the design and layout to ensure efficient decomposition and minimal odors. We’ll walk you through the key considerations for a well-designed bin.
Choosing the Right Location for Your Compost Bin
When choosing a location for your chicken manure compost bin, it’s essential to consider the site’s accessibility, sunlight exposure, and proximity to water sources. A well-placed compost bin can significantly impact the efficiency of the composting process.
Ideally, position your compost bin in an area that receives partial shade to full sun. Direct sunlight will help speed up the decomposition process, but be cautious not to overexpose it, as extreme heat can lead to odors and pest issues. Also, ensure the site is easily accessible for regular maintenance and turning of the compost.
Be mindful of water sources, too. A nearby water supply can facilitate the addition of necessary moisture during dry spells, but avoid placing the bin in a low-lying area where water may collect and cause anaerobic conditions that hinder decomposition. Additionally, maintain a safe distance from neighboring buildings to prevent any potential odors or messes from affecting them.
By carefully selecting your compost bin’s location, you’ll be setting it up for success – ensuring a steady supply of nutrient-rich compost for your garden while minimizing potential drawbacks.
Materials Needed for Building the Compost Bin
To build an effective chicken manure compost bin, you’ll need to gather the necessary materials. Start by collecting wooden pallets for the frame and base of the bin. You can usually find these for free or purchase them at a low cost from local suppliers. Aim for 4-6 pallets depending on the size of your bin.
Next, acquire wire mesh (also known as hardware cloth) to cover the sides and bottom of the bin. This will help keep rodents out while allowing air and water to pass through. Use screws or wire to secure the mesh in place.
Other necessary components include a wooden plank for the door, some hinges, a latch, and a few nails or a drill bit for assembly. You’ll also need some soil or finished compost to fill the bin with once it’s built.
Budget-friendly alternatives can be found by scouring local online marketplaces or thrift stores for pallets, or repurposing materials you already have on hand. Estimated costs for these materials will vary depending on location and availability but should total around $50-$100.
Building Your Chicken Manure Compost Bin
Now that you have a solid plan for your chicken manure compost bin, it’s time to put it together. This section will walk you through the process of building the bin itself.
Step-by-Step Instructions for Constructing the Compost Bin
To build your chicken manure compost bin, start by gathering all the necessary materials. You’ll need 2″ x 6″ lumber for the frame, wire mesh to line the bin and keep pests out, screws or nails for assembly, a drill, and a saw. If you’re feeling ambitious, add some decorative touches like hinges and latches.
Begin by constructing the frame of your compost bin using the 2″ x 6″ lumber. Use screws or nails to secure the corners together, making sure they are square and sturdy. Next, line the inside of the bin with wire mesh, ensuring it’s taut and evenly spaced. This will keep rodents out and make turning the compost easier.
Now that your frame is built and lined, it’s time for assembly. Attach the back panel using screws or nails, making sure to secure it tightly to prevent any gaps. Leave a small opening at the top of the bin for adding materials and turning the compost.
Tips for Ensuring Airflow and Aeration within the Compost Bin
Maintaining proper airflow within your chicken manure compost bin is crucial for several reasons. Firstly, it helps prevent odors from building up and becoming overpowering. When air circulates through the bin, it carries away volatile organic compounds (VOCs) that are released during decomposition. This not only keeps your garden or surrounding area smelling fresh but also reduces the risk of attracting pests.
To ensure adequate airflow, you can start by placing aeration holes in the walls and bottom of your compost bin. These holes should be at least 1-2 inches apart to allow for sufficient oxygen intake. Another way to enhance air circulation is to regularly turn the compost pile. This process, also known as “turning” or “aerating,” helps to distribute heat evenly throughout the pile, speeding up decomposition.
In addition to these measures, you can also add a layer of bulking agents like straw or shredded newspaper at the bottom of your bin. These materials help absorb excess moisture and promote air pockets within the compost pile. By implementing these strategies, you’ll be able to create an environment that’s conducive to efficient decomposition and minimizes odors and pests.
Filling and Maintaining Your Chicken Manure Compost Bin
Once your chicken manure compost bin is built, it’s essential to learn how to fill and maintain it correctly for optimal results. This section will walk you through the process step-by-step.
Adding Chicken Manure and Other Organic Materials to the Compost Bin
When it comes to filling and maintaining your chicken manure compost bin, adding other organic materials is crucial for balancing the carbon-to-nitrogen ratio. This balance is essential for the decomposition process, as too much nitrogen can lead to ammonia buildup and odors, while too little can result in slow decomposition. To achieve this balance, you can add materials like leaves, grass clippings, or food waste to your compost bin.
A general rule of thumb is to maintain a mix of 2/3 “brown” materials (high in carbon) and 1/3 “green” materials (high in nitrogen). For example, if you’re adding chicken manure, which has a high nitrogen content, balance it out with leaves or straw. Be mindful of the moisture levels within your bin as well – aim for dampness like a wrung-out sponge, not soaking wet. This will help regulate temperature fluctuations and prevent pests from being attracted to the area. Regularly turning the pile also helps maintain optimal temperatures (130-140°F) that kill pathogens and weed seeds. By incorporating these principles, you’ll be on your way to creating rich, nutrient-dense compost for your garden.
Monitoring Progress and Turning the Compost Pile
As you begin to notice changes in your compost pile, it’s essential to monitor its progress closely. This will help you determine when it’s ready for use as a nutrient-rich fertilizer for your garden. One of the key indicators of decomposition is color change – from brown and dark to a more earthy tone. You’ll also observe a shift in texture as the material breaks down, becoming finer and more crumbly.
Another crucial aspect to monitor is odor. A well-functioning compost pile should have a slightly sweet or earthy smell. If it starts to emit strong ammonia or unpleasant odors, this could be a sign that the carbon-to-nitrogen ratio needs adjustment.
To ensure optimal results, turn your compost pile regularly – ideally every 7-10 days during the active decomposition phase. This helps maintain oxygen levels and prevents matting of the materials. Remember, patience is key when it comes to chicken manure composting. It can take anywhere from several weeks to a few months for the material to break down fully.
Keep in mind that you may need to turn your pile more frequently during warmer weather or if using high-nitrogen materials like chicken manure.
Managing Odors and Pest Control in Your Chicken Manure Compost Bin
When managing odors and pest control becomes an issue, it’s essential to understand how to balance your compost bin’s ecosystem to keep both you and the environment safe. This section provides tips for achieving a harmonious balance.
Strategies for Minimizing Unpleasant Smells
When it comes to minimizing unpleasant smells from your chicken manure compost bin, there are several strategies you can implement. One effective way is by adding bulking agents, such as straw or shredded newspaper, which help absorb excess moisture and reduce odor-causing pathogens.
Using carbon-rich materials like coconut coir or peat moss can also help neutralize odors. These materials have a high carbon-to-nitrogen ratio, making them ideal for absorbing ammonia and other volatile compounds that contribute to unpleasant smells. Additionally, incorporating beneficial microorganisms, such as effective microorganisms (EM) or compost teas, can aid in breaking down organic matter and reducing odor-causing pathogens.
To get the most out of these strategies, it’s essential to maintain a balanced carbon-to-nitrogen ratio in your compost bin. This means aiming for a mix that’s 2/3 “brown” materials (carbon-rich) and 1/3 “green” materials (nitrogen-rich). By implementing these methods and maintaining a healthy balance of microorganisms, you can minimize unpleasant smells and create a thriving compost ecosystem.
Effective Methods for Keeping Pests Out of the Compost Bin
Keeping pests out of your compost bin is crucial to maintaining a healthy and efficient decomposition process. Rodents like mice and rats, raccoons, and flies can quickly contaminate your compost by eating it before it’s fully broken down or even using it as a nesting site.
To prevent infestations, start by ensuring your compost bin is rodent-proof. Use hardware cloth or chicken wire to cover the top and any openings, making sure to bury the edges 12 inches underground to prevent burrowing. A secure lid that fits tightly on your bin will also help keep pests out.
Maintaining cleanliness is another key factor in preventing infestations. Regularly turn your compost pile to aerate it and speed up decomposition. Remove any rotting or moldy materials, as these are often the first attractants for pests. Finally, consider adding a physical barrier like a layer of wood chips or straw around the bin to deter rodents and other unwanted visitors.
Safety Precautions When Using a Chicken Manure Compost Bin
When using your chicken manure compost bin, it’s essential to take necessary safety precautions to avoid accidents and health risks, such as ammonia gas exposure. We’ll walk you through these crucial steps next.
Protective Gear and Personal Hygiene Practices
When handling chicken manure, it’s essential to take safety measures seriously to avoid exposure to pathogens and other potential health risks. Always wear protective gear such as gloves made from durable materials like nitrile or latex to prevent the manure from coming into contact with your skin. A face mask is also crucial to filter out airborne bacteria and odors. Ensure that your gloves fit snugly and don’t have any holes, which can compromise their effectiveness.
Wash your hands thoroughly after handling chicken manure using soap and warm water for at least 20 seconds. This simple yet critical step prevents the spread of diseases like Salmonella and E. coli. Regular hand washing also reduces the risk of ingesting bacteria when eating or preparing food. Be mindful that soap alone may not be enough; opt for an antibacterial soap to provide extra protection.
Remember, personal hygiene is a top priority in this process. Always maintain a clean environment by disposing of soiled materials and cleaning your equipment regularly. By following these basic guidelines, you’ll minimize the risks associated with handling chicken manure and create a safe working environment.
Understanding Regulations and Permits for Composting Operations
When building a chicken manure compost bin, it’s essential to understand and comply with local regulations regarding composting operations. Regulations can vary significantly from one region to another, so it’s crucial to familiarize yourself with the specific requirements in your area.
In many places, you’ll need to obtain permits or licenses before starting your composting operation. These permits typically ensure that your bin is designed and maintained properly to prevent environmental pollution and public health concerns. To navigate these requirements effectively, start by contacting your local government’s department of public works or waste management agency.
They will provide information on the necessary permits and licenses required for your specific situation. Be prepared to share details about your composting operation, including its size, location, and intended use. By doing so, you’ll be able to determine which regulations apply to you and take the necessary steps to comply.
Frequently Asked Questions (FAQs) About Chicken Manure Compost Bins
We’ve anticipated some of your most pressing questions about building a chicken manure compost bin, so let’s dive into our FAQs section for quick answers.
Addressing Common Concerns and Misconceptions
One of the most common concerns about chicken manure compost bins is the potential for attracting pests. Rodents, flies, and other unwanted critters can be drawn to the bin due to the rich nutrient content of the chicken waste. However, there are several ways to minimize this risk. First, it’s essential to balance the carbon-to-nitrogen ratio in your compost pile by adding a mix of dry materials like straw or shredded newspaper.
This will help maintain an environment that is less conducive to pest infestations. Regularly turning and aerating the pile also helps to eliminate moisture and reduce odors, which can attract pests. Furthermore, some chicken manure compost bin models come equipped with built-in features such as mesh screens or ventilation systems designed to prevent unwanted critters from entering.
Additionally, concerns about odors are often alleviated by simply understanding how a properly functioning compost bin works. When done correctly, the carbon-rich materials will absorb excess moisture and odorous compounds from the chicken waste. Regular maintenance tasks like cleaning out the bin and monitoring temperature can also help minimize unpleasant smells. Regulatory compliance is another area of concern for some readers, but most local jurisdictions have regulations in place that are straightforward to follow.
By understanding your specific regulatory requirements and taking a few simple precautions, you can ensure your composting operation remains compliant with all relevant laws.
Additional Resources for Further Learning and Assistance
If you’re eager to learn more about building and maintaining a chicken manure compost bin, there are numerous resources available to help you on your journey. For instance, you can check out the book “The Backyard Homestead” by Carleen Madigan, which offers practical advice on managing waste in your backyard, including creating a composting system for your chickens.
You can also explore online tutorials and videos that provide step-by-step guides on building and maintaining a chicken manure compost bin. Websites such as YouTube, Udemy, and Skillshare offer a wealth of information and resources to get you started.
Local extension services are another valuable resource for learning more about composting with chicken manure. These services often offer workshops, classes, or one-on-one consultations to help you create an effective composting system tailored to your specific needs.
Some additional online resources include the National Gardening Association’s Composting Guide and the USDA’s Natural Resources Conservation Service (NRCS) publications on composting. These websites provide a wealth of information on best practices for composting with chicken manure, as well as guidance on setting up a successful compost bin system in your backyard.
Keep in mind that building a chicken manure compost bin requires some trial and error, so don’t be discouraged if you encounter setbacks along the way. With patience and persistence, you can create a thriving composting system that benefits both your chickens and your garden.
Frequently Asked Questions
What is the ideal carbon-to-nitrogen ratio for chicken manure compost?
The ideal C:N ratio for chicken manure compost is between 20:1 and 30:1, with a focus on maintaining a balance to prevent odors and pests. Aim to mix in dry materials like straw or shredded newspaper to maintain this ratio, especially when adding large quantities of wet chicken manure.
Can I use a wooden pallet as the base for my compost bin?
Yes, you can repurpose wooden pallets as the base for your compost bin, but ensure they are treated with non-toxic chemicals and properly assembled to prevent water damage. However, be aware that wooden pallets may harbor pests or rot over time, requiring regular maintenance.
How often should I turn my chicken manure compost?
Turn your compost pile every 7-10 days during the initial stages, especially when adding large amounts of fresh chicken manure. This helps maintain airflow, prevents matting, and ensures efficient decomposition. As the pile matures, reduce turning frequency to once a month or as needed.
What are some common mistakes to avoid when building a chicken manure compost bin?
Some common mistakes include inadequate ventilation, excessive moisture buildup, and failure to monitor temperature levels. Ensure proper airflow by including gaps between materials, using baffles for improved mixing, and checking temperatures regularly with a compost thermometer.
How long does it take for chicken manure compost to be ready for use in my garden?
The maturation time varies depending on factors like climate, moisture, and carbon-to-nitrogen ratio. Generally, you can expect the compost to be ready within 3-6 months, but check for stability by looking for a dark brown color, earthy aroma, and crumbly texture before using it in your garden.