Composting with worms is an efficient way to turn kitchen scraps into nutrient-rich fertilizer for your garden. Red wiggler worms are ideal for vermicomposting due to their ability to break down organic matter quickly and efficiently. If you’re interested in sustainable gardening practices, using red wigglers can be a game-changer. By understanding how to set up a worm composting system, monitor conditions, and harvest the resulting compost, you’ll be able to create a nutrient-rich soil amendment for your plants. In this article, we’ll delve into the world of vermicomposting with red wiggler worms, covering everything from setting up a bin to harvesting the finished product. By following these tips and guidelines, you can start creating your own worm compost at home and enjoy the benefits of sustainable gardening.
Benefits of Using Red Wigglers in Composting
One of the most significant advantages of using red wiggler composting worms is their ability to break down organic matter quickly and efficiently, resulting in nutrient-rich soil. This section highlights these benefits in detail.
What are Red Wiggler Worms and Their Ideal Environment
Red Wiggler worms are the most popular composting worms due to their remarkable ability to break down organic matter quickly and efficiently. These worms thrive in a specific environment that mimics their natural habitat. To create an ideal environment for Red Wigglers, you’ll want to maintain a temperature range of 55-77°F (13-25°C), which is slightly cooler than human body temperature.
Their optimal pH level is between 6.5 and 7.5, making them adaptable to most compost piles’ natural acidity. To keep your worms hydrated, ensure the compost pile maintains a moisture level of about 80% – not too wet or dry. Red Wigglers are detritivores, feeding on decaying matter such as food scraps, leaves, and grass clippings.
When setting up their habitat, avoid adding citrus peels or onion skins, as these can be toxic to the worms. Instead, provide them with a diverse diet rich in carbon sources like shredded newspaper, cardboard, or hay. By replicating their natural environment and providing adequate food and water, you’ll be well on your way to creating a thriving Red Wiggler composting ecosystem.
How to Choose Healthy Red Wigglers for Composting
When choosing healthy red wigglers for composting, there are several factors to consider. First and foremost, age is crucial. Look for worms that are at least six months old, as they will have reached their optimal breeding age and be more resistant to disease. Size also matters, with larger worms (about 1-2 inches in length) being more efficient at breaking down organic matter.
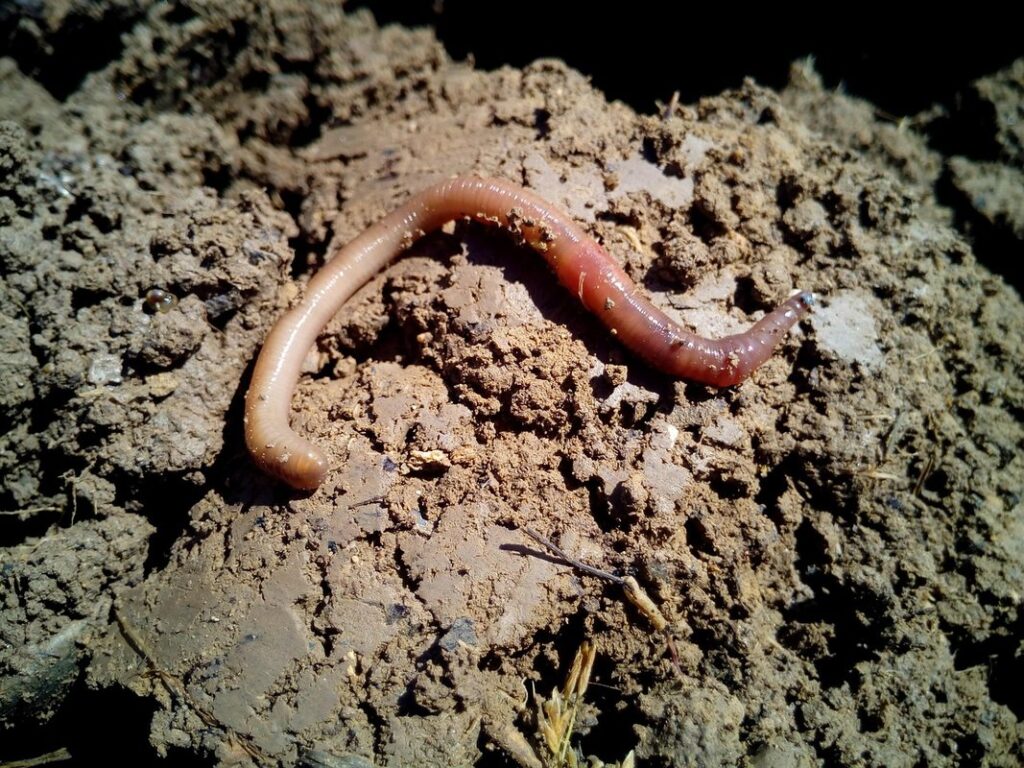
When selecting red wigglers, inspect them carefully for signs of physical condition. Avoid worms that are pale, limp, or have visible injuries. Healthy worms should have a shiny, dark red color and be firm to the touch. When handling the worms, make sure to wear gloves to prevent transferring bacteria from your skin. Store them in a container with moist bedding material like coconut coir or peat moss, keeping the temperature between 55-77°F (13-25°C) until you’re ready to introduce them to your compost bin.
Before using the worms, make sure their new environment is suitable for them. This includes maintaining adequate moisture and oxygen levels in the compost pile.
The Importance of Red Wiggler Worms in Sustainable Composting
When it comes to sustainable composting, Red Wiggler worms play a crucial role. Not only do they break down organic matter efficiently, but they also contribute significantly to reducing greenhouse gas emissions and minimizing waste generation.
One of the key benefits of using Red Wigglers is their ability to cycle nutrients effectively. They consume decaying matter and excrete a nutrient-rich compost that’s perfect for gardening. This process helps retain carbon in the soil, reducing the amount of CO2 released into the atmosphere. In fact, studies have shown that worm composting can reduce methane emissions by up to 80%.
By using Red Wigglers, you’ll also generate minimal waste. The worms consume a wide range of organic materials, from food scraps to yard trimmings, turning them into valuable compost. This not only reduces the amount of waste sent to landfills but also decreases the need for synthetic fertilizers and other chemical-based products.
To incorporate Red Wigglers into your composting routine, start by creating a worm-friendly environment with adequate moisture, oxygen, and food sources. Add 1-2 pounds of worms per square foot of composting area, and maintain a consistent temperature between 55°F and 77°F (13°C to 25°C). Regularly harvest the nutrient-rich compost to use in your garden or indoor plants.
Setting Up a Red Wiggler Composting System
To get your red wiggler composting system up and running, you’ll first need to set up a suitable habitat for these amazing worms. This section will walk you through the essential steps to create their ideal home.
Designing an Ideal Vermicomposting Bin for Red Wigglers
When designing an ideal vermicomposting bin for your red wiggler worms, there are several key considerations to keep in mind. The size of the bin is crucial, as it will determine how much food waste and bedding you can add at one time. A good rule of thumb is to start with a minimum size of 12 inches wide x 24 inches long x 36 inches tall. This will give your worms enough space to move around comfortably.
The material used for the bin is also important, as it should be easy to clean and maintain. Plastic bins are often popular choices due to their durability and ease of cleaning, but you can also use wooden or metal containers if you prefer. Make sure the bin has adequate aeration holes to prevent anaerobic conditions from forming.
To maintain optimal temperature and moisture levels within the bin, ensure it’s located in an area with consistent temperatures between 55-77°F (13-25°C). The ideal moisture level is around 80-90%, so make sure to add sufficient bedding material like coconut coir or peat moss.
Adding Organic Materials to Your Worm Compost
When setting up your red wiggler composting system, it’s essential to introduce organic materials that provide nutrients for your worms while maintaining a healthy environment. Red wigglers thrive on a diet rich in vegetable scraps, fruit peels, and tea bags. However, not all materials are suitable for your vermicomposting system.
When selecting organic materials, consider the following: avoid adding meat, dairy, or oily foods as they can attract pests and create unpleasant odors. Also, steer clear of pet waste, as it may contain pathogens that can harm your worms. On the other hand, coffee grounds, eggshells, and shredded newspaper are excellent additions to your worm compost.
To add these materials effectively, mix them with existing bedding material (like coconut coir or peat moss) before introducing them to the system. This helps prevent over-saturation and maintains optimal moisture levels. Aim for a 2:1 ratio of “brown” materials (dried leaves, shredded newspaper) to “green” materials (vegetable scraps, tea bags). Monitor your system closely, adjusting the material mix as needed to maintain an ideal balance between nutrients and carbon-rich materials.
Monitoring and Maintaining Optimal Conditions
Monitoring temperature is crucial as it can rise to extreme levels during the composting process. A simple thermometer will allow you to check for temperature spikes and adjust accordingly. If temperatures exceed 55°C (131°F), consider adding more bedding or turning the pile to aerate it.
Maintaining optimal moisture levels is also essential, as both drought and excess water can harm your worms. Aim for a consistency like a damp sponge by sprinkling water lightly over the compost pile when needed. Monitor this closely, especially during dry periods, and ensure that the bedding isn’t too compacted.
pH balance is vital in the composting process, with optimal levels ranging between 6.5-7.5 pH. Red wigglers can tolerate a slight deviation from these levels but prolonged exposure to extreme pH conditions will lead to worm mortality. Use pH test strips or a meter to monitor and adjust as necessary.
For instance, if you live in an area with hard water, consider adding a natural buffer like peat moss to the compost pile to prevent pH fluctuations.
Red Wiggler Composting Process: Understanding What Happens
Let’s take a closer look at how red wigglers break down organic matter into nutrient-rich compost, creating a cycle of decomposition that’s fascinating to explore.
How Red Wigglers Digest Organic Materials
When it comes to breaking down organic materials, red wiggler worms are incredibly efficient. These remarkable creatures have a multi-part digestive system that allows them to process and extract nutrients from decaying matter with remarkable speed and accuracy.
The process begins with the worm’s mouth, where enzymes break down complex organic molecules into smaller, more manageable pieces. From there, these compounds move through the worm’s gut, where they’re further decomposed by microorganisms and other digestive enzymes. The resulting nutrient-rich liquid is then absorbed into the worm’s body, providing it with the energy it needs to thrive.
As red wiggler worms continue to feed on organic materials, their castings (worm poop) are deposited behind them, forming a rich, dark compost that’s teeming with beneficial microorganisms. This process can take anywhere from 30 days to several months, depending on factors like temperature, moisture levels, and the type of materials being composted.
In a well-functioning worm composter, red wiggler worms play a vital role in breaking down organic waste into a valuable resource that’s perfect for gardeners and farmers. By harnessing this natural process, we can create a more sustainable future for our planet – one nutrient-rich compost pile at a time!
The Role of Bacteria and Microorganisms in Vermicomposting
As you delve into the world of vermicomposting with red wiggler worms, it’s essential to understand the crucial role bacteria and microorganisms play in this process. These tiny microbes are responsible for breaking down organic matter, releasing nutrients, and creating a nutrient-rich compost.
In fact, research suggests that bacteria and microorganisms make up about 90% of the microbial community in vermicomposting systems (1). They work tirelessly to decompose complex organic molecules into simpler forms, making it easier for red wiggler worms to access and digest them. This process is known as “microbial decomposition,” and it’s a critical step in the nutrient cycling process.
To encourage a healthy balance of bacteria and microorganisms in your vermicomposting system, make sure to provide a mix of “green” (high-nitrogen) and “brown” (high-carbon) materials. This will help create an optimal environment for microbial activity, ensuring that your red wiggler worms have all the nutrients they need to thrive.
By creating this balance, you’ll be able to produce high-quality compost that’s rich in essential micronutrients.
Common Challenges and Solutions for Red Wiggler Composting
Red wiggler composting can be a bit tricky, so let’s tackle some common challenges you may encounter and explore practical solutions to keep your worm bin thriving.
Overcrowding, Under-crowding, and Population Management
Monitoring worm populations is crucial to maintaining a healthy and thriving composting ecosystem. Overcrowding can lead to a decrease in oxygen levels, resulting in the death of worms and contamination of the compost. Signs of overcrowding include slow decomposition rates, poor odors, and a buildup of carbon-rich materials.
To monitor population, simply dig into the bin every few weeks and count the number of worms present. You can also weigh the worm population by scooping out a sample and weighing it against a known weight of worms. Aim for a ratio of 1-2 pounds of worms to 5 gallons of compost material.
Under-crowding, on the other hand, may not seem like an issue, but it can lead to under-composting, leaving behind unfinished compost materials. Signs of under-crowding include slow decomposition rates and an abundance of finished compost material.
To avoid overcrowding or under-crowding, maintain a consistent worm-to-material ratio by monitoring your population regularly.
Identifying and Correcting Issues in the Vermicomposting System
As you navigate the world of vermicomposting with red wiggler worms, it’s essential to identify potential issues and take corrective measures to maintain a healthy system. Temperature fluctuations can be detrimental to your worm population, so keep an eye on the thermostat. A temperature range between 55°F and 77°F (13°C and 25°C) is ideal for red wigglers.
Moisture imbalances are another common problem. If the compost pile is too dry, worms will seek moisture elsewhere, potentially escaping or even dying off. Conversely, excessive moisture can lead to anaerobic conditions and unpleasant odors. Aim for a mix of 75% to 85% moisture levels in your vermicomposting system.
To address these issues, monitor your worm population’s behavior. If you notice worms escaping or clustering at the surface, it may be too dry. Conversely, if the pile emits a strong ammonia smell, it might be too wet. Regularly inspect your system and take corrective action by adding water or carbon-rich materials to balance out the moisture levels.
Some practical tips include:
* Maintaining a consistent temperature range
* Monitoring humidity levels with a hygrometer
* Adding bedding materials like coconut coir or shredded newspaper to regulate moisture
* Inspecting the worm population regularly for signs of stress or discomfort
Harvesting and Using Red Wiggler Compost
Now that you have a thriving red wiggler worm compost, let’s dive into how to harvest it and incorporate this valuable resource into your garden. We’ll cover the best methods for extraction and utilization.
Timing and Preparing for Harvest
When it comes to harvesting worm compost from your red wiggler bin, timing is everything. The ideal time for harvest depends on several factors, including the type of worms you’re using and the desired level of maturity in the compost.
Typically, worm compost is ready between 2-4 months after adding organic matter, but this timeframe can vary depending on the moisture levels, temperature, and aeration within your bin. As a general rule of thumb, check on your compost every 1-2 weeks by looking for the following signs: the liquid level in the bin has decreased significantly, the worm castings are breaking down easily, and there’s no more recognizable food scraps.
To separate worms from finished compost, use a simple sifting method. Transfer the contents of the bin to a fine-mesh sieve or a piece of hardware cloth with holes about 1/4 inch in size. Gently shake the sieve or fabric to allow the worms to fall through while keeping the castings behind. This process may require patience and repetition, but it’s an effective way to extract worms for reuse in another bin.
Preventing contamination is also crucial during this phase. Regularly inspect your bins for signs of pests, disease, or mold. If you notice any issues, take prompt action by adjusting your feeding schedule, improving aeration, or introducing beneficial microorganisms to combat the problem.
Using Red Wiggler Compost in Your Garden or Indoor Space
Using red wiggler compost as a natural fertilizer and soil conditioner is a game-changer for gardeners and indoor plant enthusiasts. This nutrient-rich resource is packed with beneficial microorganisms that can transform your soil, improving its structure and fertility.
To incorporate red wiggler compost into your gardening practices, start by incorporating it into your potting mix or adding it to the soil as an amendment. You can also use it as a top dressing for plants that are struggling with nutrient deficiencies. This will give them an instant boost of energy and promote healthy growth.
For optimal results, mix 10-20% red wiggler compost into your potting mix or add 1-2 inches to the soil surface. You can also create a worm tea by steeping red wiggler compost in water for several hours – this liquid gold is a powerful fertilizer that can be used as a foliar spray or added directly to the soil.
Some benefits of using red wiggler compost include improved soil structure, increased nutrient availability, and enhanced microbial activity. This leads to healthier plants, reduced watering needs, and fewer pest problems.
Conclusion: Maximizing the Benefits of Red Wigglers in Composting
Now that you’ve mastered the art of raising red wiggler worms, it’s time to reap the rewards of your hard work and maximize their benefits in your composting process. Let’s review how to get the most out of these incredible decomposers.
Recapitulating Key Points and Best Practices
In conclusion to our comprehensive guide on red wiggler composting worms, it’s essential to recapitulate the key points and best practices that will ensure a thriving vermicomposting system. By following these guidelines, you’ll be well on your way to successfully harnessing the benefits of red wigglers in composting.
Firstly, remember that maintaining optimal moisture levels is crucial for red wiggler health and activity. Aim for a consistent moisture level between 70-80% by checking the worm castings regularly. Additionally, ensure adequate carbon-to-nitrogen ratios to promote healthy decomposition. A mix of 2/3 “brown” materials (dried leaves, shredded newspaper) and 1/3 “green” materials (food scraps, grass clippings) is a good starting point.
Another critical aspect is monitoring temperature levels. Red wigglers are most active between 55-77°F (13-25°C), so avoid placing your worm bin in direct sunlight or near heating vents. Regularly checking pH levels is also essential, as red wigglers thrive in slightly acidic environments (pH 6.0-7.0).
Proper food waste management is also vital for a successful vermicomposting system. Limit the amount of citrus fruits and onions, which can be toxic to red wigglers, and focus on adding vegetable scraps, fruit peels, and tea bags in moderation.
By following these key takeaways and best practices, you’ll not only maintain a healthy worm population but also create rich compost that’s perfect for your garden. Remember, patience and observation are crucial when it comes to vermicomposting – with time and practice, you’ll become an expert at raising red wiggler composting worms!
Frequently Asked Questions
How Do I Know If My Red Wiggler Worms Are Healthy?
A healthy worm population is crucial for successful vermicomposting. Check for signs of health, such as active movement, a dark brown color, and no visible disease or pests. Also, ensure they have adequate food and water sources.
What Happens to the Worm Castings During Storage?
When storing worm castings (compost), it’s essential to maintain proper moisture levels to prevent drying out or mold growth. You can store them in airtight containers, such as plastic bins or bags, at room temperature. This will help preserve their nutrient-rich properties.
Can I Use Red Wiggler Compost in My Indoor Plants?
Yes! Worm compost is an excellent organic fertilizer for indoor plants, promoting healthy growth and reducing soil-borne diseases. Mix it into potting soil to create a nutrient-dense blend or use it as a top dressing to give your plants an extra boost.
How Do I Balance pH Levels in My Vermicomposting System?
Red wiggler worms prefer a slightly acidic to neutral pH, ranging from 6.0-7.5. To maintain optimal pH levels, add pH-balancing materials like peat moss or limestone to your compost pile. Regularly monitor and adjust the pH as needed.
What Are Some Common Mistakes Beginners Make When Starting Vermicomposting?
One common mistake is over-mixing or compacting the worm bin, which can harm the worms and reduce aeration. Additionally, neglecting to maintain adequate moisture levels or providing insufficient food sources can also hinder vermicomposting success.