Drying pumpkin seeds is a crucial step in preserving their flavor and nutritional value. If you’ve ever tried to store fresh pumpkin seeds, you know how quickly they can become soggy and lose their crunch. But with the right drying techniques, you can enjoy your pumpkin seeds all year round. Whether you’re a seasoned gardener or a beginner cook, learning how to dry pumpkin seeds is a valuable skill that will elevate your recipes and extend the shelf life of your harvest.
In this article, we’ll explore three popular methods for drying pumpkin seeds: air-drying, oven drying, and dehydrator drying. We’ll also provide expert tips on monitoring temperature and humidity levels to ensure optimal results. From preparing the seeds to storing them for long-term use, we’ve got you covered. By the end of this article, you’ll be equipped with the knowledge you need to dry your pumpkin seeds like a pro and savor their delicious flavor all season long.
Preparing Your Pumpkin Seeds
Before you can dry your pumpkin seeds, it’s essential to prepare them properly. This involves cleaning and drying them to remove excess moisture, which is a crucial step in preventing mold and ensuring successful drying.
Harvesting and Cleaning the Seeds
When it’s time to harvest your pumpkin seeds for drying, gently cut open the pumpkin and scoop out the pulp and stringy fibers. Be careful not to damage the seeds, as this can affect their viability for planting.
Next, separate the seeds from the rest of the pulp by rinsing them in a fine-mesh strainer under cold running water. This will help remove any remaining bits of pumpkin and debris that could interfere with drying.
To clean the seeds further, soak them in a bowl of water for about an hour. Then, carefully pick out any floaters or damaged seeds. Discard these and transfer the good seeds to a clean towel where you can gently pat them dry.
It’s essential to remove as much moisture from the seeds as possible before drying them to prevent mold and bacterial growth. To ensure this, spread the cleaned seeds out in a single layer on a paper towel or clean cloth, allowing air to circulate freely around each seed. This will help them dry quickly and evenly, making it easier for you to proceed with the next steps of drying your pumpkin seeds.
Determining Seed Maturity
Determining seed maturity is crucial before you start drying them. You’ll know they’re ready when they’ve reached their full color and texture development. Typically, this takes around 100 to 120 days after pollination, but it can vary depending on factors like the specific pumpkin variety and your local climate.
To check for maturity, gently scrape off some of the seed coats with a spoon or your fingernail. If they’re mature, the inside of the seeds should be plump and have a visible germ (the small white sprout). The seeds’ color will also change from green to their final, characteristic hue – usually orange or yellow, depending on the type.
Timing is essential; if you pick the seeds too early, they might not dry properly, while waiting too long can lead to mold growth and spoilage. A general rule of thumb is to wait until the rinds are hard and the stems have begun to dry out. This usually happens just before the pumpkin is fully ripe.
Once you’ve confirmed seed maturity, it’s time to proceed with the drying process.
Removing Excess Moisture
Removing excess moisture from your pumpkin seeds is a crucial step before drying them. If you don’t take care of this step, it can lead to mold growth, uneven drying, and ultimately affect the quality of your dried seeds.
One simple method for removing excess moisture is air-drying. Spread out the pumpkin seeds on a paper towel or a clean cloth, making sure they don’t overlap each other. Let them sit in a warm, dry place with good airflow. This can take anywhere from 24 to 48 hours, depending on the humidity level and temperature of your environment.
Another method is blotting with paper towels. Gently press the seeds between two layers of paper towels to absorb excess moisture. Repeat this process until the seeds feel dry to the touch. You can also use a clean cloth for this purpose. It’s essential to remove as much moisture as possible before moving on to the drying process, whether it’s air-drying or using a dehydrator.
Remember, removing excess moisture helps ensure even drying and prevents mold growth, giving you high-quality dried pumpkin seeds in the end.
Methods for Drying Pumpkin Seeds
Now that you’ve harvested and prepared your pumpkin seeds, let’s dive into the various methods for drying them to preserve their nutritional value. We’ll explore different techniques to suit your needs and preferences.
Air-Drying Method
To air-dry pumpkin seeds, you’ll need to create a suitable environment for them. This method is ideal when the weather permits drying outdoors. Start by spreading the cleaned and dried seeds out on a paper bag or breathable cloth, allowing for good airflow around each seed.
For optimal results, keep the temperature between 60°F (15°C) and 70°F (21°C), as temperatures above 75°F (24°C) can cause the seeds to spoil. You’ll also want to maintain humidity levels below 50%. A location with gentle air circulation is perfect for this method. If drying indoors, place the seeds on a wire rack or tray to allow for airflow and prevent moisture buildup.
This method typically takes around 7-10 days, depending on the weather conditions. Check the seeds regularly to ensure they’re not developing any mold or mildew. When completely dry, store them in an airtight container to preserve freshness and viability.
Oven Drying Method
To dry pumpkin seeds using an oven is a straightforward process that requires attention to temperature and monitoring for dryness. Set your oven to its lowest temperature setting, usually around 150-200°F (65-90°C). Line a baking sheet with parchment paper or a silicone mat, leaving enough space between the seeds to allow for even drying.
Spread the pumpkin seeds in a single layer on the prepared baking sheet and place it in the oven. Dehydrate for 2-3 hours, checking on them periodically to ensure they’re not getting too hot. You can speed up the process by using two trays stacked with parchment paper or a wire rack. This will allow air to circulate freely between the seeds.
Keep an eye out for signs of dryness, such as brittle texture and a pale golden color. When you notice these changes, remove the seeds from the oven and let them cool completely on the baking sheet. Transfer them to airtight containers or paper bags for storage.
Dehydrator Drying Method
Using a dehydrator is an excellent way to dry pumpkin seeds quickly and evenly. This method allows for precise temperature control, which is essential for drying seeds without compromising their nutritional value. To start, preheat the dehydrator to 135°F (57°C) – this temperature setting helps preserve the delicate enzymes in the seeds.
Place the pumpkin seeds in a single layer on the dehydrator trays, making sure not to overcrowd them. This ensures that each seed has sufficient air circulation and exposure to heat. Set the timer according to the dehydrator’s instructions or your preference, but typically, 6-8 hours is sufficient for complete drying.
Keep an eye on the seeds during the process and stir them occasionally to ensure even drying. Once they reach a crispy texture and a moisture level of around 10%, you can store them in airtight containers for later use. With a dehydrator, you can dry pumpkin seeds efficiently while maintaining their flavor and nutritional content.
Tips for Perfectly Dried Pumpkin Seeds
Now that you’ve got your seeds perfectly dried, let’s talk about how to ensure they come out crispy and delicious every time. This is where our tips for perfectly dried pumpkin seeds come in!
Monitoring Temperature and Humidity
Monitoring temperature and humidity levels is crucial during the drying process to prevent spoilage or mold growth. If the environment is too humid, moisture can seep into the seeds, causing them to become soggy and develop off-flavors. On the other hand, if it’s too dry, the seeds may crack or become brittle.
Aim for a relative humidity (RH) of 30-50% during drying. You can use a hygrometer to measure RH levels in your drying area. Keep an eye on temperature as well; ideal temperatures range from 60°F to 70°F (15°C to 21°C). Higher temperatures can speed up the drying process, but may also lead to over-drying or uneven moisture distribution.
To ensure optimal conditions, store your seeds in a well-ventilated area with minimal direct sunlight. If you’re using an electric food dehydrator or oven, follow the manufacturer’s guidelines for temperature settings and monitoring. Regularly check on your drying seeds to adjust environmental conditions as needed. Remember, maintaining a stable environment is key to successfully drying pumpkin seeds without compromising their quality.
Proper Storage Techniques
Once you’ve dried and cleaned your pumpkin seeds, it’s essential to store them properly to preserve their flavor and nutritional value. To prevent moisture from seeping back into the seeds, causing spoilage or mold growth, follow these storage techniques.
Choose an airtight container that can protect the seeds from air, light, and moisture. Mason jars with tight-fitting lids are ideal for storing dried pumpkin seeds. You can also use glass containers or Mylar bags specifically designed for seed storage. Before sealing the container, ensure it’s completely dry to prevent any condensation from accumulating.
For longer-term storage, consider refrigerating or freezing your dried pumpkin seeds. Place them in an airtight container or freezer bag and store it in the refrigerator at 40°F (4°C) or below. Alternatively, you can store them in the freezer at 0°F (-18°C) or below for up to two years. When you’re ready to use them, simply thaw the seeds and they’ll be good as new.
Uses for Dried Pumpkin Seeds
Dried pumpkin seeds are incredibly versatile and can be used in a variety of ways beyond just snacking on them. One popular use is roasting them to bring out their nutty flavor and crunchy texture. Simply toss the dried seeds with some olive oil, salt, and any other seasonings you like, and roast them in the oven at 350°F (175°C) for about 10-15 minutes, or until fragrant and golden brown.
You can also grind dried pumpkin seeds into a nutritious flour that’s perfect for baking. This “pumpkin seed meal” is high in protein, healthy fats, and fiber, making it an excellent addition to recipes like bread, muffins, and cakes. To grind your own pumpkin seed flour, simply blend the dried seeds in a food processor or coffee grinder until they reach a fine powder.
Dried pumpkin seeds can also be used in crafts, such as making jewelry, decorations, and other ornaments. The seeds can be strung together to create unique necklaces or earrings, while their shell patterns make them perfect for decoupage projects. You can also use the seeds to add texture and interest to your home decor arrangements. With a little creativity, the possibilities are endless!
Troubleshooting Common Issues
Don’t panic if things don’t go as planned! This troubleshooting guide will help you resolve common issues that might arise when drying pumpkin seeds.
Mold or Mildew Growth
Identifying mold or mildew growth during the drying process is crucial to prevent spoilage and ensure a healthy harvest. Mold thrives in warm, humid environments, making it essential to monitor temperature and humidity levels closely. Check for visible signs of mold or mildew on pumpkin seeds, including white patches, black spots, or an unpleasant odor.
To address mold growth:
* Remove affected seeds immediately to prevent the problem from spreading.
* Increase air circulation by turning on a fan or opening windows to improve ventilation.
* Reduce temperature and humidity levels in the drying area. A temperature range of 50-60°F (10-15°C) and 30-40% relative humidity is ideal.
* Use desiccants, silica gel packets, or activated charcoal to absorb excess moisture and inhibit mold growth.
Regularly inspect your pumpkin seeds during the drying process, ideally every few days, to catch any issues early. If you notice even a slight deviation from the expected appearance or texture, take prompt action to prevent further damage. Proper temperature control, air circulation, and monitoring can significantly reduce the risk of mold growth during the drying process.
Seed Damage or Breakage
Seed damage or breakage is one of the most common issues faced by gardeners when drying pumpkin seeds. This can be due to various reasons such as improper moisture removal, sudden temperature changes, or inadequate storage. When seeds are not dried slowly and evenly, it can cause them to crack or break apart.
To prevent seed damage, make sure to dry your pumpkin seeds slowly in a single layer on a paper bag or clean cloth. It’s essential to check the seeds regularly to ensure they’re drying at a consistent rate. If you notice any seeds that are drying faster than others, remove them immediately and allow them to dry separately.
Another critical factor is storage. Seeds can become brittle when stored for too long, making them prone to breakage. Store your dried pumpkin seeds in an airtight container in a cool, dark place. You can also consider using silica gel packets or desiccants to maintain a stable humidity level and prevent moisture from entering the container. This will help preserve the seeds’ viability and integrity for future planting.
Inconsistent Drying Results
Achieving consistent drying results is crucial when it comes to preserving pumpkin seeds for long-term use. One of the main culprits behind inconsistent drying outcomes is poor temperature and humidity control. To ensure that your pumpkin seeds dry evenly, it’s essential to monitor these factors closely.
Adequate air circulation is also vital in preventing uneven moisture distribution. You can achieve this by placing a fan near the drying area or using a dehumidifier to remove excess moisture from the air. If possible, position the drying rack away from direct sunlight, which can cause hot spots and lead to over-drying.
Keep an eye on your seeds’ temperature, aiming for 100°F (38°C) to 110°F (43°C). Overheating can damage the seeds, while temperatures below this range may slow down the drying process. Aim for a humidity level between 20% and 30%. Use a hygrometer or a thermometer with a built-in hygrometer to monitor these levels accurately.
Check on your seeds regularly to prevent over-drying. You can also spread them out in a single layer, allowing air to circulate freely around each seed. This will promote even drying and help you avoid the frustration of inconsistent results.
Additional Considerations
Now that you’ve dried your pumpkin seeds, let’s talk about a few more things to keep in mind when storing and using them. This is where you can really make the most of your harvest.
Seed Variety and Quality
The quality and variety of pumpkin seeds can significantly impact their drying process and storage requirements. When selecting seeds for drying, look for varieties that are specifically bred for seed production, as these will generally have a higher oil content and better flavor profile. Some popular varieties for drying include ‘Baby Boo’, ‘Jack Be Little’, and ‘Lumina’. Avoid using hybrid or genetically modified (GM) seeds, as their drying characteristics may be unpredictable.
When evaluating the quality of your pumpkin seeds, consider factors such as moisture content, seed size, and appearance. Seeds with high moisture levels will take longer to dry and may be more susceptible to spoilage. Opt for seeds that are plump, dark in color, and free from visible mold or damage.
It’s also essential to choose seeds from reputable sources, as those from unknown suppliers may have varying quality control measures in place.
Local Regulations and Guidelines
Before you start drying and storing your pumpkin seeds, it’s essential to check with local authorities about any regulations or guidelines that may apply. These can vary depending on where you live, so make sure to do some research beforehand.
In the United States, for example, the USDA has specific guidelines for storing seeds, including pumpkin seeds. They recommend keeping seeds in a cool, dry place, away from direct sunlight and moisture. This means that if you’re planning to store your dried pumpkin seeds in a garage or shed, make sure it’s well-ventilated and not prone to dampness.
In some areas, there may be regulations around the sale of home-dried pumpkin seeds. If you plan on selling your dried seeds online or at local markets, check with your state’s department of agriculture to see if you need any permits or licenses.
To avoid any potential issues, always err on the side of caution and check with local authorities before drying and storing your pumpkin seeds. This will give you peace of mind and ensure that you’re following all necessary guidelines.
Frequently Asked Questions
Can I dry pumpkin seeds from store-bought pumpkins?
Yes, you can dry pumpkin seeds from store-bought pumpkins. However, it’s essential to note that these seeds may not have the same nutritional profile as those from homegrown or heirloom varieties. Still, they will retain their flavor and crunch when dried properly.
How long does it take for pumpkin seeds to fully dry?
The drying time varies depending on the method used and environmental conditions. Generally, air-drying can take 7-10 days, while oven drying and dehydrator drying can be completed within 1-3 hours.
What’s the best temperature range for drying pumpkin seeds in a dehydrator?
Aim for a temperature between 100°F to 135°F (38°C to 57°C) for optimal drying results. This range helps preserve flavor, texture, and nutritional value.
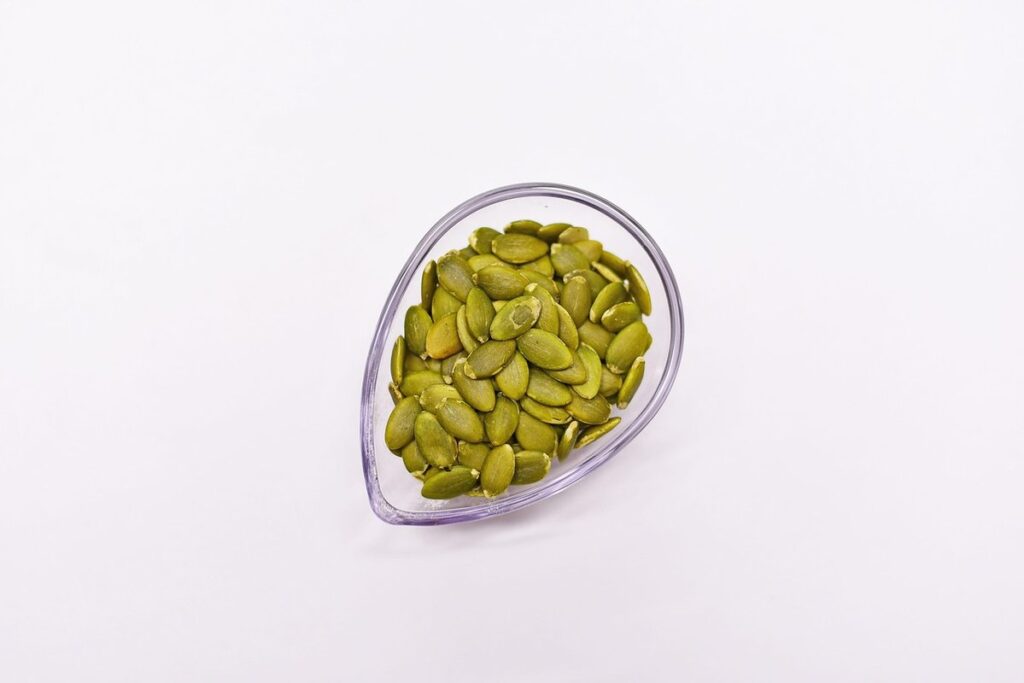
Can I dry pumpkin seeds with their hulls on or off?
It’s generally recommended to remove the hulls before drying, as they can be difficult to remove once dried. However, if you prefer to keep them intact, make sure to pat them dry thoroughly first to prevent mold growth during the drying process.
How do I know when my pumpkin seeds are fully dry and ready for storage?
Check your dried seeds by performing a simple moisture test: break open a seed and examine its interior. If it still feels damp or sticky, continue drying until it reaches a crispy texture. Store them in an airtight container to maintain freshness.