Mint lovers rejoice! Are you tired of buying new packets of mint every few weeks, only to have them wilt away soon after? Or perhaps you’re looking for an easy and eco-friendly way to share your favorite herb with friends and family. Well, you’re in luck because today we’re going to dive into the simple world of water propagation, where you can grow new mint plants from cuttings using just a glass of water. This method is perfect for beginners and experienced gardeners alike, and it’s an excellent way to multiply your favorite mint varieties with minimal fuss. In this article, we’ll walk you through the step-by-step process of propagating mint from cuttings in water, including all the necessary materials, care tips, and troubleshooting common issues.
Benefits and Advantages of Propagating Mint
Now that you’ve successfully rooted your mint cuttings, let’s dive into the benefits and advantages of propagating mint, making it a rewarding process for gardeners. You’ll discover why this method is a game-changer.
Why Choose Water Propagation for Mint
When it comes to propagating mint from cuttings, water propagation offers several benefits that make it an attractive method. One of the main advantages is the reduced risk of contamination, which can be a problem when using soil-based methods. Water propagation allows you to control the environment and prevent pathogens from entering the system.
Another benefit of water propagation for mint is its ease of rooting. This method encourages roots to develop quickly, allowing you to see results in as little as 7-10 days. With soil-based methods, it can take up to several weeks for roots to form, which can be frustrating if you’re eager to get started.
You can also propagate multiple cuttings at once using water propagation, making it a time-efficient method. Simply place the cut ends of your mint stems in a glass or jar filled with water and wait for roots to develop. This way, you can multiply your mint supply quickly and easily, without having to worry about soil-borne diseases or pests.
Preparing Your Mint Plant for Cuttings
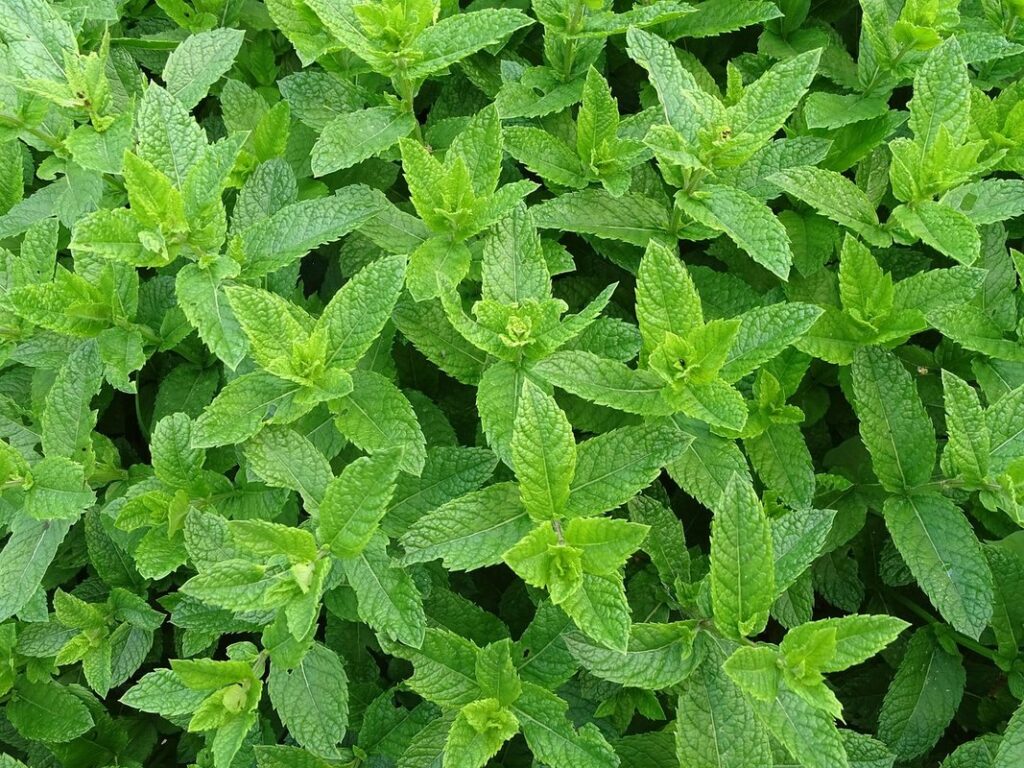
Before you start taking cuttings from your mint plant, it’s essential to choose healthy plants with plenty of new growth. Look for stems that are at least 4-6 inches long and have a few sets of leaves on them. This will ensure that your cuttings have a good chance of rooting successfully.
To prepare your mint plant for cuttings, start by pruning or pinching off any flowers that may be present. This is because the plant’s energy is focused on producing seeds rather than new growth, and you want to encourage it to put its energy into producing healthy stems instead. Simply snip off any blooms with scissors or pinch them off with your fingers.
Next, inspect your plant for any weak or spindly stems that may not be suitable for cutting. Remove these if necessary, as they can compromise the overall health of the plant and make it more challenging to get successful cuttings. By following these simple steps, you’ll be well-prepared to take healthy cuttings from your mint plant and start propagating new plants in water.
Gathering Materials and Tools
To propagate mint from cuttings, you’ll need a few essential tools and materials that we’ll cover in detail below. These will ensure your success in rooting mint plants quickly.
Necessary Equipment for Water Propagation
To propagate mint from cuttings in water, you’ll need some specific equipment. Start by gathering a clean glass jar or vase with a wide mouth – this will serve as the mini-greenhouse for your cuttings. Next, collect rocks or pebbles to use as the base layer in the jar. These will help prevent the roots from rotting by improving drainage and preventing the water from becoming stagnant.
You’ll also need some potting mix specifically designed for indoor plants – this will be used once you’re ready to transfer your newly rooted mint cuttings into a pot. Speaking of which, have scissors or pruning shears on hand to snip off healthy mint leaves with at least two sets of leaves each – these will become the cuttings.
Finally, consider investing in rooting hormone powder or liquid – this can significantly increase your chances of successful propagation by promoting root growth and development. By having these essential items ready, you’ll be well-prepared to embark on the process of propagating mint from cuttings in water.
Optional Tools and Accessories
If you want to give your newly propagated mint cuttings an extra boost, there are several optional tools and accessories that can help. A propagation tray is a great investment for this purpose, as it allows you to keep the cuttings organized and separate from one another while they establish roots.
Another useful tool is a heating mat, which can provide a consistent source of warmth that encourages root growth. This is especially helpful if your environment tends to be cooler than ideal for propagation. A humidity dome is also an excellent accessory to consider, as it maintains a humid microclimate around the cuttings and helps prevent water loss.
These tools may not be essential, but they can certainly make the process more efficient and effective. If you’re new to propagating mint from cuttings in water, using one or all of these tools can help you achieve success with your first try.
Taking Cuttings from Your Mint Plant
To take cuttings from your mint plant, you’ll need a few fresh stems and a clean pair of scissors, which we’ll cover in detail below. This is where the magic begins!
Choosing the Right Cuttings for Propagation
When it comes to propagating mint from cuttings in water, selecting the right stem cuttings is crucial for success. You’ll want to choose healthy stem cuttings that have at least two sets of leaves, as this will give them a better chance of rooting and growing into new plants.
To identify healthy stem cuttings, look for stems with a firm texture and no signs of disease or pests. Avoid taking cuttings from areas where the mint plant is showing signs of stress, such as near the base of the plant where it’s been pruned.
When selecting your cuttings, make sure they have at least two sets of leaves, as this will give them enough energy to grow and establish roots. Cut just above a node (the joint where a leaf meets the stem), using a sharp, clean knife or pruning tool to prevent damaging the cutting. By choosing healthy stem cuttings with plenty of leaves, you’ll be giving your new mint plant every chance to thrive.
Preparing the Cuttings for Water Propagation
When preparing the cuttings for water propagation, it’s essential to trim them correctly and remove lower leaves to prevent rotting. Hold a cutting at an angle and use scissors or pruning shears to cut just above a node – this is where a leaf meets the stem. Cut at a 45-degree angle to help the cutting absorb water more efficiently.
Next, carefully remove any lower leaves from the cutting, leaving only two sets of leaves at the top. This helps prevent the cutting from becoming waterlogged and promotes rooting by reducing competition for nutrients.
To prepare your cuttings for water propagation, place them in a container filled with lukewarm water. Make sure the node is submerged but not buried under water – this will help encourage root growth. You can also add a small amount of rooting hormone powder or liquid to the water to enhance the process. Some gardeners find that cutting a notch at the base of the stem, just above a node, helps promote rooting.
Remember, cleanliness is key when working with cuttings. Wash your hands and any tools before handling the plant material to prevent the spread of disease. Now that your cuttings are prepared for water propagation, it’s time to place them in their new environment – read on to learn how to care for them as they root!
Rooting Mint Cuttings in Water
Now that you’ve prepared your mint cuttings, it’s time to learn how to root them in water. This method is quick and easy, making it perfect for impatient gardeners like yourself.
Creating a Propagation Station
Now that you’ve prepared your mint cuttings and have them ready to be rooted in water, it’s time to set up a propagation station. This is where the magic happens, and your new mint plants start to take shape.
To create a successful propagation station, choose a glass jar or vase that’s at least 6-8 inches deep. Fill the bottom 2-3 inches with rocks or pebbles – this will help prevent the roots from sitting in waterlogged potting mix. Next, add about an inch of potting mix on top of the rocks. This will provide a stable base for your mint cutting to grow.
Gently place the prepared mint cutting into the potting mix, making sure not to compact the soil around it. The node where you made the cut should be submerged in water. Finally, fill the jar with room temperature water, leaving about an inch of space at the top. Be careful not to overfill the jar, as this can cause the water to become stagnant and lead to root rot. Your propagation station is now set up, and all you need to do is wait for your mint cuttings to start rooting!
Caring for Your Cuttings During Root Development
During root development, it’s essential to provide optimal conditions for your mint cuttings. One crucial aspect is maintaining proper watering levels. Make sure not to overwater, as this can lead to rot and kill the cutting. Instead, check on the water level daily and refresh it every 2-3 days. A good rule of thumb is to keep the water level just below the node (where the leaf meets the stem) to encourage root growth.
Proper lighting conditions are also vital for healthy root development. Place your cuttings near a sunny window or use grow lights, providing at least 12 hours of indirect light per day. Keep in mind that mint can tolerate partial shade, but consistent bright light will promote faster growth and root development.
Temperature is another critical factor to consider. Mint prefers temperatures between 65-75°F (18-24°C) during the rooting process. Avoid placing your cuttings near heating or cooling vents, fireplaces, or drafty windows that can cause sudden temperature fluctuations.
To prevent overgrowth, trim your mint leaves back by about one-third every week. This will encourage bushy growth and direct energy towards root development.
Transferring Mint Seedlings to Soil
Now that your mint seedlings have a robust root system, it’s time to transfer them from water to soil where they’ll continue to thrive and multiply. Learn how to do this successfully in the next step.
Identifying When to Transfer Seedlings
As your seedlings continue to grow and thrive in their water propagation setup, it’s essential to monitor their progress for optimal timing to transfer them into individual pots with soil. This is usually around 7-10 days after you’ve inserted the cuttings into the water.
Keep a close eye on the roots’ development during this period. A clear indication of readiness is when you notice tiny white roots extending from the node, where you made the initial cut. These should be at least 1-2 inches long and may even start to curl around the container’s edges.
At this stage, gently remove the seedlings from the water propagation setup, taking care not to disturb the delicate roots. Pot each seedling into a small pot filled with a well-draining mix, firming the soil lightly around the roots as you go. Water them thoroughly and place the pots in bright indirect light until they’re ready for further care. Make sure to handle the seedlings with care during this transfer process to avoid shocking or damaging their fragile systems.
Preparing the Soil and Pots
When transferring mint seedlings to soil, it’s essential to prepare their new environment carefully. Start by selecting a well-draining potting mix specifically designed for herbs like mint. Avoid using regular garden soil, as it can retain too much water and cause root rot.
Choose pots that are at least 6-8 inches deep to accommodate the mint plant’s extensive root system. A slightly larger pot will also provide enough room for the roots to grow without becoming waterlogged. Make sure the pots have drainage holes in the bottom to prevent excess moisture from accumulating.
Now it’s time to plant your seedling in its new home. Gently remove the seedling from the water, taking care not to damage any of its delicate roots or leaves. Plant the seedling in the potting mix at the same depth as it was in the water. Firm the soil gently around the roots and water thoroughly.
By selecting a suitable pot size and planting medium, you’ll be giving your mint seedlings the best chance to thrive in their new environment. With proper care, they should continue to grow and flourish, providing you with an abundance of fresh mint leaves for months to come.
Common Issues and Troubleshooting
We’ve all been there: your lovely mint cuttings start to wilt, or roots fail to develop. Let’s address some common issues and find solutions together!
Identifying Problems During Root Development
As you progress through the process of propagating mint from cuttings in water, you may encounter some common issues that can hinder root development. It’s essential to identify these problems early on and take corrective measures to ensure successful propagation.
One of the most frequent concerns is a lack of root development. This could be due to inadequate water quality, insufficient light, or an incorrect temperature range. To address this issue, make sure you’re using fresh, distilled water and providing your cuttings with sufficient indirect light (around 12-14 hours a day) at a consistent room temperature between 65-75°F (18-24°C).
Another common problem is overgrowth, which can lead to the cutting becoming leggy or developing too many leaves at the expense of roots. To prevent this, ensure that you’re changing the water frequently and trimming back any overgrown foliage to encourage bushy growth.
Pests and diseases can also affect your cuttings, so be on the lookout for signs of infestation (such as white powdery mildew or actual pests like spider mites) or infection (like soft spots on the stem). Regularly inspect your cuttings and take swift action if you notice any issues.
Resolving Issues and Improving Success Rates
When working with water propagation, issues can arise that hinder success rates. One common problem is root rot, which occurs when the cutting becomes too wet and develops fungal infections. To prevent this, ensure the water level remains below the node, and change it every 1-2 weeks to maintain oxygen levels.
Another challenge is slow growth or no growth at all. This might be due to inadequate light or water temperature that’s not suitable for mint (above 70°F/21°C). Make sure your propagation station receives sufficient indirect light and maintains a consistent temperature within this range.
Additionally, sometimes the cutting may not produce roots quickly enough, taking longer than expected. Be patient, as some varieties take more time to develop roots in water. Monitor progress closely and consider transferring the cutting to a soil-based pot once it’s established, which can stimulate further growth.
By being aware of these potential issues and taking preventive measures, you can improve your chances of successful propagation and enjoy the benefits of having fresh mint at hand.
Frequently Asked Questions
Can I use tap water for rooting mint cuttings, or does it need to be filtered or distilled?
Yes, you can use tap water for rooting mint cuttings, but make sure to let it sit for at least 24 hours before using it. This allows the chlorine and other chemicals to evaporate, which can harm the delicate roots of your mint plant.
How long will it take for my mint cuttings to develop roots in water?
The time it takes for your mint cuttings to develop roots in water can vary depending on factors like temperature, light, and humidity. On average, you can expect to see roots develop within 1-3 weeks. Keep an eye out for white or light-colored roots growing from the node.
Can I transfer my rooted mint seedlings directly into a pot with soil without disturbing their roots?
No, it’s best to gently remove the rooted cuttings from the water and plant them in a new container filled with well-draining soil. This allows you to control the amount of disturbance on the delicate roots and ensures a smooth transition.
How often should I change the water in my propagation station, and what signs indicate it’s time?
Change the water every 1-2 weeks or when you notice a decrease in water quality, indicated by an unpleasant odor or mold growth. Make sure to replace the water with fresh, filtered water to maintain optimal conditions for root development.
Can I propagate mint using this method year-round, or are there specific seasons that work better?
You can propagate mint using this method year-round, but some varieties may perform better during certain seasons. In general, spring and summer months tend to be ideal for rooting mint cuttings, as the warmer temperatures and longer days promote healthy growth and development.