If you’re looking for a cost-effective and efficient way to multiply your favorite thyme plants, you’ve come to the right place. Propagating thyme through cuttings in water is a simple technique that requires minimal materials and expertise. Not only does this method allow you to quickly increase your herb collection, but it’s also an excellent way to share thyme with friends and family who love cooking as much as you do.
In this article, we’ll take you through the benefits of using cuttings in water for thyme propagation, including how to prepare the necessary materials. We’ll provide a step-by-step guide on how to successfully root thyme cuttings in water, including tips for achieving optimal results and overcoming common challenges. Whether you’re a seasoned gardener or just starting out, our easy-to-follow instructions will have you growing new thyme plants in no time.
Benefits of Propagating Thyme through Cuttings
Taking thyme cuttings and rooting them in water is a simple yet effective way to propagate this fragrant herb, offering numerous benefits for gardeners. By doing so, you’ll be able to multiply your favorite thyme varieties quickly and easily.
Why Choose Water for Rooting
Water is an ideal choice for rooting thyme cuttings due to its numerous advantages over other mediums. One of the primary reasons is that water allows for a more controlled environment, which is crucial for root development. It’s easier to maintain consistent temperatures and humidity levels when using water, creating an optimal condition for roots to grow.
Another significant benefit is that water prevents the risk of over-watering, which can be a common issue with soil-based propagation methods. This reduces the likelihood of fungal diseases and root rot, making it a safer option for beginners. Moreover, using water enables you to monitor the cutting’s progress closely, as changes in color or growth can be easily observed.
When using water, you’ll also notice that roots tend to develop more quickly compared to other mediums. This accelerated growth is due to the availability of oxygen and nutrients, which are often restricted in soil. By rooting your thyme cuttings in water, you’re providing them with the best possible chance to establish a strong root system before transplanting into soil or a pot.
Advantages of Thyme as a Herb
Thyme has been a staple in many cuisines for centuries, and for good reason. Not only is it a versatile herb with a unique fragrance, but it also boasts an impressive array of culinary and medicinal benefits.
One of the standout advantages of thyme as a cooking ingredient is its ability to add depth and warmth to dishes without overpowering other flavors. Whether you’re using fresh or dried thyme, this herb can elevate soups, stews, and sauces to new heights. The citrusy, slightly minty notes in thyme pair particularly well with ingredients like chicken, lamb, and vegetables.
Beyond its culinary uses, thyme has also been prized for its medicinal properties. Thymol, a compound found in thyme oil, has natural antibacterial and antifungal properties, making it effective against colds, coughs, and even some types of skin infections. In addition, thyme’s antioxidant content can help reduce inflammation and promote overall well-being.
By growing your own thyme from cuttings in water, you’ll have a steady supply of this incredible herb on hand to enjoy in all its forms. Whether you’re using it for cooking, herbal remedies, or even as a natural pest repellent, thyme is an incredibly versatile addition to any garden or kitchen.
Preparing the Cuttings for Water Rooting
To successfully grow thyme from cuttings in water, you’ll need to prepare your cuttings just right before submerging them. Let’s dive into how to properly trim and clean your thyme cuttings for optimal rooting results.
Choosing Healthy Mother Plants
When it comes to successful water rooting of thyme cuttings, choosing healthy mother plants is crucial. A robust and disease-free mother plant will increase the chances of producing strong and healthy cuttings. To select a suitable mother plant, look for one that has been grown under optimal conditions.
This means providing your thyme with plenty of light, ideally 4-6 hours of direct sunlight per day. Water them consistently, but make sure not to overwater as this can lead to root rot. Fertilize regularly using a balanced fertilizer to promote healthy growth.
Avoid selecting mother plants that show signs of disease or pests. These issues can be transferred to the cuttings, making it difficult for them to thrive in water. Check for yellowing leaves, black spots, or white powdery patches on the leaves or stems, which are common indicators of disease.
Select a thyme plant with dense foliage and plenty of new growth. This will ensure that you have access to plenty of healthy cuttings to take from the mother plant.
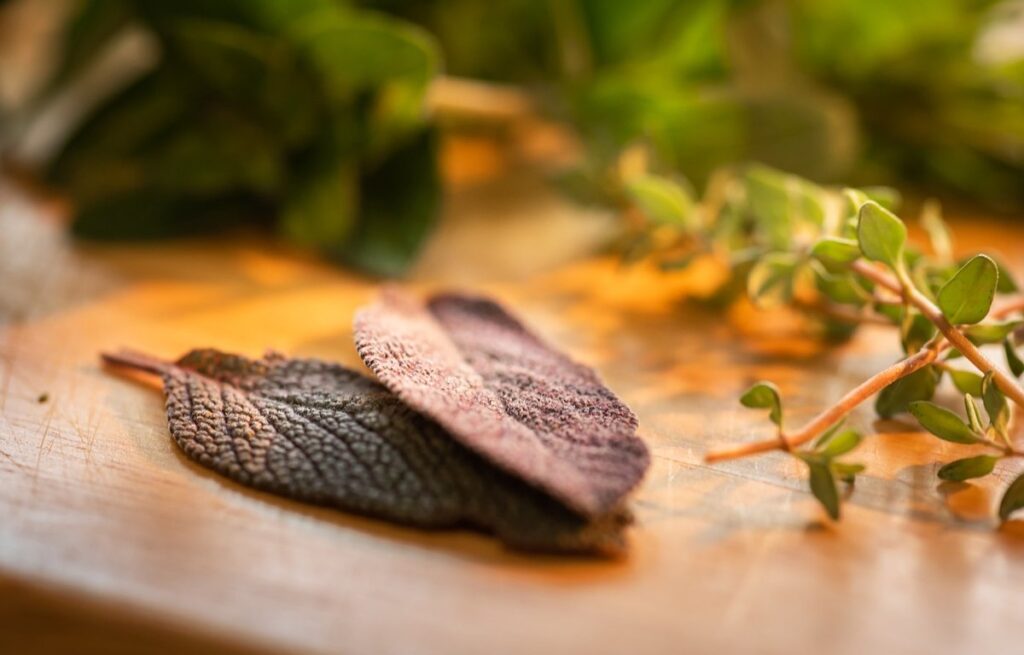
Taking Cuttings from Thyme
Taking cuttings from thyme is an art that requires patience and the right technique. The best time to take cuttings from thyme plants is during the spring and early summer months when the plant is actively growing. Avoid taking cuttings from newly purchased thyme plants, as they may be stressed or not well-rooted.
To take a successful cutting, choose a healthy stem with at least two sets of leaves. Cut just above a node using a sharp, clean knife or pruning tool. Make the cut about 1-2 inches (2.5-5 cm) long, and remove any lower leaves that will be submerged in water. This will help prevent bacterial growth and promote rooting.
When selecting nodes for cutting, look for areas where the stem is slightly thicker than the rest of the plant. These areas tend to produce more roots when propagated through water rooting. By following these simple steps, you’ll be well on your way to successfully taking cuttings from thyme and growing new plants in a vase of water.
Setting Up a Water Propagation Station
To successfully grow thyme from cuttings in water, it’s essential that you set up your propagation station correctly. This includes choosing the right equipment and creating an ideal environment for your thyme cuttings to thrive.
Materials Needed for Rooting
To successfully root thyme cuttings in water, you’ll need some basic materials. Start by gathering clean glass containers with a narrow mouth – you can use old jars or purchase new ones specifically designed for propagation. These will serve as mini-greenhouses for your cuttings, allowing them to absorb moisture and humidity.
Next, grab a pair of sharp, clean scissors. You’ll use these to trim the thyme stems to the right length for water rooting. Make sure your scissors are free from any residue or debris that might contaminate your cutting.
You’ll also need a rooting hormone – a plant growth regulator that stimulates root development. There are various types available, but a general-purpose rooting powder or liquid will work well for thyme cuttings. Follow the product’s instructions for application rates and timing.
Lastly, have some water on hand to fill your containers. Use distilled or filtered water to prevent any impurities from affecting root growth.
Creating a Suitable Environment
When creating a water propagation station for growing thyme from cuttings, it’s essential to provide the right conditions for successful rooting. Temperature plays a significant role in this process. Most herbs, including thyme, thrive between 65°F (18°C) and 75°F (24°C). Avoid placing your propagation station near drafty windows or radiators that can cause temperature fluctuations.
Maintaining optimal humidity levels is also crucial. You want to keep the air around the cuttings consistently moist but not waterlogged. Covering the propagation station with a clear plastic bag will help retain moisture and warmth. However, ensure good air circulation by removing the bag occasionally to prevent fungal diseases from taking hold.
Light exposure should be moderate for thyme cuttings in water. Direct sunlight can cause water to evaporate too quickly, leading to dehydration. Instead, place your propagation station near a bright, indirectly lit area, such as an east- or west-facing window. This will provide the necessary light without causing water stress to the developing roots and shoots.
Roots Development and Transplanting
Now that you’ve successfully propagated your thyme cuttings, it’s time to focus on developing a strong root system. This section covers techniques for encouraging healthy roots development and transplanting your new seedlings.
Monitoring Cutting Progress
Monitoring your thyme cuttings regularly is crucial to ensure they develop roots successfully. To do this, inspect your cuttings every few days for signs of root development. One way to check for progress is to look for changes in color or texture on the cutting. If you notice a slight whitish or off-white discoloration at the bottom end of the stem, it’s likely that the roots are developing.
Another indicator is the texture – as the roots develop, the area just above the node (where you made the cut) might become slightly soft to the touch. This softening is usually accompanied by a slight swelling. Be patient and observe your cuttings closely for these subtle changes, which can be signs that new roots are emerging.
Keep in mind that it may take anywhere from 7-14 days or even longer for visible root development to occur. Don’t be discouraged if you don’t see any change immediately. Continue providing the right conditions, such as sufficient light and water, and observe your cuttings closely to ensure successful rooting.
Transferring Seedlings to Soil
When you see those tiny roots emerging from the thyme cutting and the water is getting cloudy, it’s time to transfer them into individual pots. This is an exciting milestone, but don’t rush – make sure they’re ready for soil.
Choose a pot that’s slightly larger than the root system, and fill it with a well-draining potting mix. You want to avoid using regular garden soil as it can be too dense and might cause waterlogging. Instead, opt for a mix specifically designed for indoor plants or seed starting.
Gently remove the thyme cutting from the glass of water, taking care not to damage the roots. Place the roots in the potting mix, making sure they’re evenly spread out and covered with about 1-2 mm of soil. Water gently but thoroughly to settle the soil. Be patient – it may take a few days for the thyme plant to adjust to its new surroundings.
Once you’ve transferred your thyme seedlings into individual pots, keep an eye on them – they’ll need plenty of light and moderate watering until they’re established. With proper care, you should start seeing significant growth within a week or two.
Tips and Tricks for Success
Now that you’ve successfully grown thyme from cuttings in water, here are some expert tips to help you maximize your chances of a healthy harvest.
Common Pitfalls and Solutions
When growing thyme from cuttings in water, it’s common to encounter some setbacks. One of the most frequent pitfalls is overwatering, which can lead to root rot and kill the cutting. To avoid this, make sure to only submerge the nodes (the joint where a leaf meets the stem) in water, and change the water frequently to prevent bacterial growth.
Another mistake is not providing enough light for the cutting. Thyme requires bright, indirect light to photosynthesize and develop roots. If your space doesn’t receive direct sunlight, consider using grow lights to supplement the natural light.
Finally, be patient! Growing thyme from cuttings in water can take time – usually 2-4 weeks before visible roots appear. Don’t get discouraged if you don’t see any progress right away. Instead, focus on maintaining a healthy environment for your cutting and keep an eye out for signs of growth.
By being aware of these common pitfalls and taking preventative measures, you’ll be well on your way to successfully growing thyme from cuttings in water.
Encouraging Healthy Growth
As you successfully grow thyme from cuttings in water and transplant them into soil, it’s essential to encourage healthy growth in these newly transplanted seedlings. This is a critical stage where they’re adapting to their new environment, and with the right care, they’ll thrive.
To promote optimal light for your thyme seedlings, place them in a spot that receives bright, indirect sunlight. Direct sunlight can be too intense and may cause scorching, so an east- or west-facing window is ideal. If you’re growing indoors, use grow lights to provide the necessary light spectrum for healthy growth.
Water your transplanted thyme seedlings gently but thoroughly, making sure the soil isn’t waterlogged. Thyme prefers well-draining soil, and overwatering can lead to root rot. As for fertilization, a balanced, water-soluble fertilizer will suffice. Dilute it according to the manufacturer’s instructions and apply it once a week. This will provide your thyme seedlings with essential nutrients for healthy growth.
Remember, consistency is key when caring for your transplanted thyme seedlings. Stick to a routine of providing optimal light, watering, and fertilization, and you’ll be rewarded with lush, fragrant thyme plants in no time!
Conclusion
Now that you’ve successfully grown thyme from cuttings in water, let’s summarize the key takeaways and tips to help you replicate the process at home.
Recap of Key Takeaways
To successfully grow thyme from cuttings in water, remember these key points:
When taking cuttings, choose healthy stems with at least two sets of leaves. Trim just below a node to encourage root development and prevent the cutting from becoming waterlogged.
Keep the water fresh by changing it every 7-10 days to prevent bacterial growth. Monitor for signs of root emergence, usually within 2-4 weeks. Once roots are visible, transfer the thyme cutting into a pot with well-draining soil.
Maintain an optimal environment with bright indirect light and temperatures between 65°F to 75°F (18°C to 24°C). Water sparingly once in the pot, allowing the top inch of soil to dry out before watering again. With proper care, your thyme cutting should thrive in its new home.
Don’t forget that not all thyme varieties are created equal when it comes to rooting from cuttings. Some popular types like ‘English Thyme’ and ‘Lemon Thyme’ tend to work well, while others may require more patience or different conditions. Experiment with your specific variety to achieve the best results.
Final Tips and Recommendations
To ensure successful propagation of thyme from cuttings in water, maintaining a humid microclimate is crucial. This can be achieved by placing the container on a tray filled with water and pebbles or using a cloche to cover the top. The humidity helps prevent moisture loss through transpiration, allowing the cutting to focus its energy on root development.
Another key consideration is providing adequate light for the thyme cuttings. Since they’re being grown in water, they’ll require more intense lighting than if they were planted directly into soil. Aim for a spot with bright, indirect sunlight or supplement with grow lights. Avoid direct sunlight as it can cause scorching and reduce the chances of successful propagation.
Regular monitoring of the cutting’s condition is also essential. Check for signs of root growth, such as white roots emerging from the node, and adjust your care routine accordingly. With the right conditions and attention to detail, you should see healthy roots developing within 2-3 weeks.
Frequently Asked Questions
How often should I change the water for my thyme cuttings?
It’s recommended to change the water every 1-2 weeks, or when you notice a decrease in its clarity or an increase in bacterial growth. This will help prevent the buildup of toxins and ensure optimal rooting conditions.
Can I use a glass jar with a wide mouth instead of a propagation station?
Yes! A glass jar with a wide mouth is an excellent alternative to a propagation station. Just make sure it’s clean, has a lid to reduce evaporation, and provides enough space for the cuttings’ roots to develop.
How do I know when my thyme cuttings have successfully rooted in water?
You can check for successful rooting by gently tugging on the cutting. If it resists being pulled out of the water, it’s likely developed a strong root system. You can also observe any white roots growing from the node (where you made the cut).
Can I transfer my thyme seedlings to soil as soon as they have developed a few sets of leaves?
No! It’s best to wait until the seedlings have developed a more extensive root system and are able to support themselves outside of water. This can take anywhere from 1-3 weeks, depending on growing conditions.
What should I do if my thyme cuttings are developing yellow or brown leaves in water?
This is often a sign that the water has become too cloudy or contaminated with bacteria. Change the water immediately and make sure to provide your cuttings with adequate light, as thyme prefers bright conditions for healthy growth.