Are you looking to preserve your favorite blooms in a beautiful, delicate form? Pressed flower crafts are a wonderful way to capture memories and add a touch of elegance to any space. But with so many types of flowers out there, it can be tricky to know which ones work best for pressing and drying. From classic roses and carnations to exotic orchids and lavender, the right choice can make all the difference in achieving that perfect press.
In this article, we’ll explore the best flowers to press and dry, sharing techniques, tips, and creative ways to use them in your crafting projects. Whether you’re a seasoned crafter or just starting out, you’ll discover how to bring these beautiful blooms back to life in a stunning preserved form, making it easy to create lasting memories with your favorite flowers.
Understanding the Basics of Pressed Flowers
To begin working with pressed flowers, you’ll first want to understand their basic characteristics and how they can be preserved. This section will cover the fundamental principles of pressing and drying flowers.
What are Pressed Flowers?
Pressed flowers have been a cherished art form for centuries, with a rich history that spans various cultures and industries. The process of pressing flowers involves extracting the moisture from delicate blooms to preserve them for use in crafts, decorations, and even scientific research. This ancient technique has been employed by botanists, artists, and crafters alike to create stunning works of art.
In traditional Chinese culture, pressed flowers were used to create intricate designs on fabrics, paper, and other materials. Similarly, in Victorian-era England, pressed flowers were often used as a sentimental keepsake, with people pressing flowers from special occasions like weddings or anniversaries. Today, pressed flowers are still used in various industries, including floristry, crafting, and even perfumery.
To press your own flowers at home, you’ll need a few simple tools, such as blotting paper, a heavy book, or a flower press. Simply place the flowers between two sheets of absorbent paper, and let them dry completely – this can take anywhere from a few days to several weeks, depending on the moisture content of the flowers. With patience and practice, you’ll be able to create beautiful, delicate pressed flowers that can be used in a variety of creative ways.
Choosing the Right Flowers for Pressing
When it comes to choosing flowers that are suitable for pressing, there are several factors to consider. First and foremost, petal thickness plays a crucial role. Delicate petals tend to crumble under pressure, while thicker ones hold their shape better after drying. Look for flowers with sturdy petals, such as gerbera daisies or sunflowers.
Another essential factor is stem length. Flowers with longer stems are easier to press and dry, as they allow for more even distribution of weight. This makes roses and carnations ideal choices.
Fragrance can also be a consideration. While some people enjoy the scent of fragrant flowers like freesia and jasmine, others may find them overpowering when pressed. It’s essential to consider your personal preferences when selecting flowers for pressing.
Some popular flowers that are perfect for pressing include baby’s breath, lavender, and marigolds. These blooms have delicate petals, long stems, and a light fragrance, making them ideal for creating beautiful pressed flower arrangements.
Tips for Preparing Flowers for Pressing
Before you start pressing your beautiful flowers, it’s essential to prepare them properly. This will ensure that they dry evenly and retain their delicate shape and color.
When selecting flowers for pressing, make sure to choose ones with a high moisture content, as this will help them flatten quickly and maintain their structure. Delicate petals like rose and camellia are ideal for pressing, while sturdy stems like lavender and gerbera can withstand the process without losing their shape.
To prepare your flowers for pressing, gently remove any excess foliage or debris from the stem. Trim the stem to about an inch long to prevent it from getting in the way of the pressing process. If necessary, use a soft brush to gently dust off any dirt or pollen from the petals. This will help the pressing paper adhere evenly and prevent any unwanted texture.
Next, place your prepared flowers between sheets of blotting paper or newspaper, making sure not to overlap them. Secure with weights or clips, and let them dry for 2-4 weeks in a cool, dark place.
Best Flowers for Pressing by Type
For those of you who want to press and dry flowers by type, we’ve organized our top picks into categories that make it easy to find your favorite blooms. Look here for some great options!
Annuals and Perennials: A Guide to Popular Choices
When it comes to pressing flowers, you’ll want to choose varieties that retain their color and shape well. Annuals like marigolds (Tagetes spp.) are popular choices for their vibrant colors and delicate petals. Their bright yellow and orange hues tend to hold up nicely under pressure, making them perfect for adding a pop of color to your pressings.
Perennials offer more longevity in the garden, but also often result in higher-quality pressings due to their thicker petal structure. Roses (Rosa spp.) are a classic choice for pressing, with many varieties holding their color and shape remarkably well. Lavender (Lavandula spp.), with its delicate purple petals, is another perennial that dries beautifully. Consider pairing annuals like marigolds with perennials like roses or lavender to create visually striking pressings.
When selecting flowers, remember that the key to successful pressing lies in their natural pigmentation and petal thickness. Opt for varieties with deep, rich colors and sturdy petals, as these will hold up better under pressure.
Exotic and Uncommon Flowers for Unique Projects
When it comes to adding an extra touch of uniqueness to your pressed flower arrangements, you’ll want to consider incorporating some exotic and uncommon blooms into your design. One popular choice is the orchid, with its delicate petals and elegant appearance making it a stunning addition to any arrangement. To press orchids, gently remove the petals from the stem and place them between sheets of paper towel or coffee filters.
Proteas are another great option for adding an element of surprise to your designs. These South African natives boast vibrant colors and intricate details that will add texture and interest to your arrangements. When pressing proteas, be sure to remove any excess foliage and place the blooms between dry towels or cloth napkins.
Succulents also make an excellent choice for unique pressed flower projects. Their thick, waxy leaves can withstand the drying process without losing their shape, making them a great option for more rustic or organic designs. Experiment with different succulent species to find the perfect combination for your arrangement. By incorporating these unusual flowers into your designs, you’ll add a level of sophistication and individuality that’s sure to impress.
Pressing Techniques for Beginners and Experts
Mastering various pressing techniques is a crucial part of preserving flowers, regardless of your skill level, from delicate to robust methods. This section will walk you through some essential techniques to try at home.
The Traditional Method: Air Drying and Pressing
The classic air drying and pressing method using a flower press or heavy books is a timeless technique that’s easy to master. To get started, you’ll need a few basic tools: a flower press or a set of heavy books, some paper towels or blotting paper, and the flowers themselves.
Begin by preparing your flowers by gently removing excess leaves and trimming the stems. Place a sheet of blotting paper in the bottom of the flower press or between the pages of the heavy books. Arrange the prepared flowers on top, overlapping them slightly to ensure even drying.
Next, place another sheet of blotting paper over the flowers, followed by the remaining pages or press lid. The pressure and airflow will help to draw out moisture from the flowers, causing them to dry completely within a few days or weeks, depending on the type and size of the blooms. It’s essential to keep the press in a cool, dry place, away from direct sunlight.
By following these simple steps, you’ll be able to preserve your pressed flowers in excellent condition, ready for use in crafts, decorations, or as a keepsake.
Using Modern Methods: Spray Fixative and Heat Pressing
When it comes to preserving flowers, traditional pressing methods can be time-consuming and may not always yield the best results. Fortunately, there are modern alternatives that can help you achieve perfectly preserved blooms with minimal effort.
One such method is using spray fixatives. These products contain a mixture of chemicals that help dry and preserve flowers quickly, often in as little as 15-30 minutes. To use a spray fixative, simply hold the flower upside down under a gentle stream of spray, making sure to cover all surfaces evenly. This method works particularly well for delicate flowers like orchids and hydrangeas.
Another option is heat pressing, which involves using a specialized machine or even a domestic iron with parchment paper to dry and flatten flowers. When using a heat press, it’s essential to follow the manufacturer’s instructions and experiment with different temperatures (usually between 120°F to 150°F) to find what works best for your specific flower type.
Some popular types of flowers that respond well to these modern methods include roses, carnations, and baby’s breath. Experimenting with spray fixatives or heat pressing can also help you achieve more vibrant colors and longer-lasting results.
Tips for Preserving and Displaying Pressed Flowers
Now that you’ve learned which flowers are perfect for pressing, let’s dive into some expert tips on how to preserve and beautifully display your delicate blooms.
Storage and Handling of Dried Flowers
When storing dried flowers, it’s essential to maintain their delicate nature. Store them away from direct sunlight and moisture, as this can cause fading, discoloration, or even mold growth. A cool, dry place like a closet or cupboard is ideal.
For long-term storage, consider using acid-free tissue paper or archival boxes specifically designed for preserving dried flowers. This will prevent damage from chemicals in regular packing materials. Label each container clearly so you can easily identify the contents later.
When handling pressed flowers, be gentle to avoid damaging the petals. Avoid touching them excessively, as oils from your skin can cause discoloration. Use a soft-bristled brush or tweezers to handle delicate areas if needed.
To preserve the shape of large, flat flowers like peonies or roses, you can press them between sheets of cardboard or use a flower press specifically designed for this purpose. This helps prevent warping and keeps the petals flat. For smaller flowers like violas or pansies, a simple sheet of paper will suffice.
Creative Ways to Display Pressed Flowers
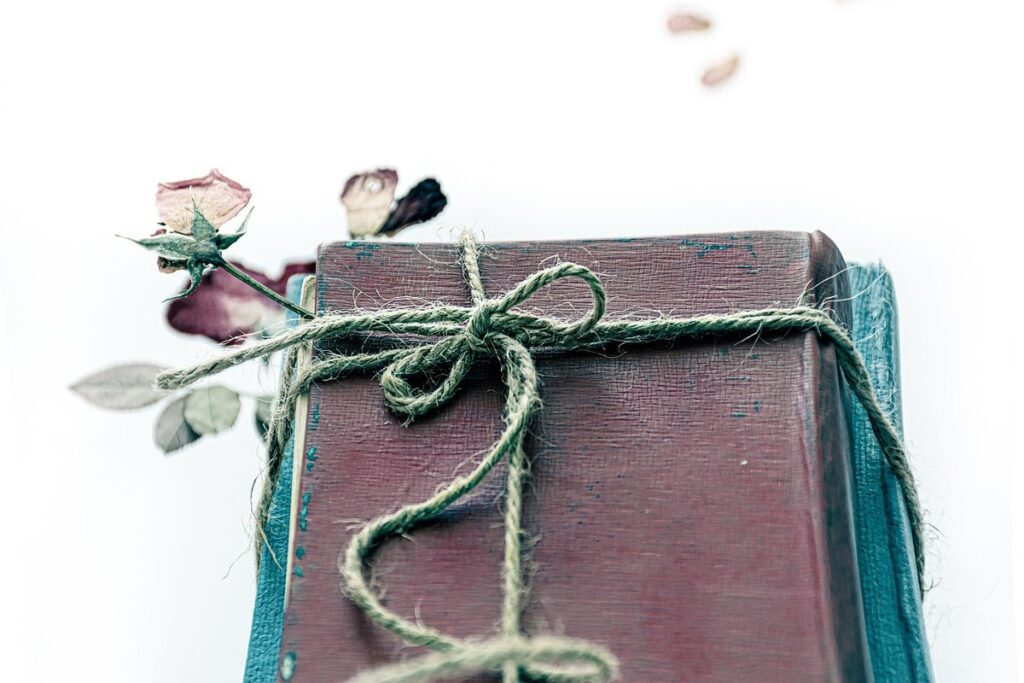
Pressed flowers can be more than just a delicate reminder of a special moment – they can be transformed into stunning pieces of art that add a touch of elegance to various settings. When it comes to displaying pressed flowers, the possibilities are endless, and with a little creativity, you can turn them into unique jewelry, artwork, or wedding decorations.
One way to incorporate pressed flowers is through jewelry making. Pressed flower pendants, earrings, or brooches can be created using resin, glass, or metal settings. These delicate adornments add a whimsical touch to any outfit and make for thoughtful gifts. For example, you can press roses or lavender to create beautiful, fragrant pendants that evoke a sense of romance.
Pressed flowers can also be used as decorative elements in wedding decorations. Delicate flower arrangements, garlands, or wreaths made from pressed blooms add a vintage charm to the big day. Consider pressing wildflowers or baby’s breath for a soft, whimsical look. Alternatively, you can press larger flowers like peonies or garden roses and use them to create stunning floral crowns.
To get creative with your pressed flower display, consider the following ideas:
• Pressed flower art: Use resin or glass to embed pressed flowers into beautiful artwork that can be hung on walls or displayed on a shelf.
• Collages: Combine pressed flowers with other materials like leaves, twigs, or lace to create intricate collages that tell a story.
• Resin boxes: Fill decorative boxes with pressed flowers and use them as beautiful storage containers for jewelry or accessories.
Preserving Memories with Pressed Flowers: A Guide to Making Your Own Crafts
Now that you’ve learned how to press and dry your favorite flowers, let’s explore a beautiful way to preserve those memories in the form of delicate crafts. With this guide, you’ll discover how to create stunning pressed flower art.
Creating Customized Pressed Flower Crowns and Accessories
Creating customized pressed flower crowns and accessories is an art form that requires some creativity and patience. To get started, you’ll need a selection of pressed flowers in various shapes, sizes, and colors. When choosing the flowers for your crown or accessory, consider the theme and occasion you want to create for.
For example, if you’re making a crown for a wedding, you might choose delicate pastel-colored flowers like rose petals or baby’s breath. If you’re creating a more whimsical piece, you could use bold, brightly colored flowers like gerbera daisies or marigolds.
To design your custom crown or accessory, start by arranging the pressed flowers on a flat surface, experimenting with different patterns and combinations. You can also use other materials like leaves, twigs, or ribbon to add texture and interest. When you’re happy with your design, secure the flowers in place using a strong adhesive like decoupage medium or floral wire.
Some popular designs for pressed flower crowns include:
• Delicate wreaths using small, intricate flowers
• Bold, statement pieces featuring large, colorful blooms
• Nature-inspired designs incorporating leaves and branches
Remember to work patiently and gently when handling the delicate pressed flowers, as they can be easily damaged. With practice and creativity, you’ll be able to craft beautiful, one-of-a-kind pressed flower crowns and accessories that preserve memories for years to come.
DIY Pressed Flower Art and Decorations for Home and Garden
Pressed flowers can add a delicate touch to various home and garden decorations. For this purpose, it’s essential to choose flowers that dry well and retain their color and shape. Delicate petals like those of roses, carnations, and lavender work well for pressed flower art.
To create beautiful DIY arrangements, you can use a variety of methods such as pressing flowers between sheets of paper or using specialized tools like flower presses or drying racks. You can also experiment with different shapes and sizes to create unique designs.
When selecting flowers for your projects, consider their natural color palette and texture. For instance, marigolds and sunflowers have bright, vibrant colors that can add a pop of color to any room. On the other hand, subtle blooms like orchids or gerbera daisies provide a softer look. Consider mixing and matching different flower types to create visually appealing arrangements.
To preserve your pressed flowers for a longer period, use acid-free paper and store them in a cool, dry place. This will help maintain their color and prevent damage over time.
Conclusion and Future Projects
Now that you’ve learned how to press and dry your favorite flowers, let’s discuss our next steps: what we’re working on next and future projects in flower preservation.
Recap of Key Takeaways and Tips
As you’ve reached the end of this comprehensive guide on pressing and drying flowers, it’s time to recap the key takeaways and share some valuable tips. You now know which flowers are perfect for pressing and drying, from delicate forget-me-nots to vibrant sunflowers. Remember that not all flowers can be pressed or dried, so always check their suitability before attempting.
To press your favorite blooms effectively, follow these crucial steps: gently remove excess leaves, place the flower between sheets of paper or cardboard, weigh it down, and allow 2-3 weeks for air-drying. You can also experiment with other techniques like using a desiccant or pressing with a hair straightener (yes, really!). When displaying your pressed flowers, consider arranging them in a collage or frame, or using them as embellishments on gifts.
Lastly, don’t forget to have fun and be creative with your pressed flowers! Experiment with different arrangements, colors, and textures to add a personal touch.
Inspiration for Future Projects and Ideas
As you’ve now explored the wonderful world of flowers for pressing and drying, we hope you’re itching to try out new techniques and experiment with different blooms. The possibilities are endless, and we encourage you to keep exploring and pushing the boundaries of what’s possible.
Consider trying out different flower shapes, colors, and textures to create unique and visually appealing designs. For instance, delicate wildflowers like lavender or chamomile work beautifully in small, intricate arrangements, while bold and vibrant blooms like gerbera daisies can make a statement on their own.
Don’t be afraid to experiment with new techniques either – try layering flowers for added depth, or using different materials like leaves or branches to add texture. You could also try combining pressing with other crafts, such as making jewelry or creating art pieces.
Some ideas to get you started include:
* Creating a pressed flower journal or calendar
* Making delicate paper flowers for decorations or gifts
* Designing a custom bouquet using dried flowers
* Developing a new technique for preserving specific types of blooms
Remember, the key to creativity is experimentation and taking risks – so don’t be afraid to try something new!
Frequently Asked Questions
What’s the best way to store dried flowers for long-term preservation?
It’s essential to store your dried flowers properly to maintain their color, texture, and longevity. Store them in airtight containers or ziplock bags, away from direct sunlight and moisture. You can also use acid-free paper or tissue to separate layers of flowers within the container. This will help prevent damage and keep your pressed flowers looking vibrant for years to come.
Can I press flowers using heat instead of air drying?
Yes, you can use a heat press or a hair dryer on a low setting to speed up the drying process. However, be cautious not to overheat the flowers, as this can cause them to become brittle and discolored. It’s also crucial to monitor the temperature and humidity levels to prevent damage.
What are some common mistakes to avoid when preparing flowers for pressing?
When preparing flowers for pressing, it’s essential to remove excess foliage and stems, but avoid cutting or bruising the delicate petals. Also, ensure that the flowers are completely dry before storing them, as moisture can cause mold or mildew.
Can I use a spray fixative on all types of flowers, or are there any exceptions?
Not all flowers respond well to spray fixatives. Delicate blooms like orchids and lavender may become stiff or brittle when exposed to chemicals. It’s best to test the fixative on a small area first or opt for air drying instead.
How long does it typically take for flowers to dry completely after pressing?
The time it takes for flowers to dry completely can vary depending on factors such as temperature, humidity, and the type of flower. Generally, it can take anywhere from 2-6 weeks for flowers to air dry, while heat pressing can reduce this time significantly.