Are you eager to learn the secrets of growing healthy and thriving rosemary plants from scratch? Propagating rosemary from clippings can be a bit tricky, but with the right guidance, you’ll be well on your way to becoming a rosemary expert. Not only is rosemary a fragrant and versatile herb that adds depth to any dish, but it’s also incredibly easy to grow indoors or outdoors. The key to success lies in understanding how to properly propagate and care for these delicate clippings.
In this article, we’ll take you through the step-by-step process of growing rosemary from clippings, covering topics such as propagation techniques, essential care tips, and troubleshooting common issues that can affect healthy growth. With our expert advice, you’ll be able to successfully grow robust and fragrant rosemary plants in no time, perfect for adding a fresh touch to your cooking or enjoying as a beautiful ornamental plant.
Understanding the Basics of Rosemary Propagation
To grow rosemary from clippings successfully, it’s essential to understand the basics of propagation. Let’s dive into the fundamental steps involved in multiplying your favorite herb.
What is Rosemary and Why Grow it from Clippings?
Rosemary is a versatile and aromatic herb that has been prized for its culinary, medicinal, and ornamental value for centuries. It’s an excellent addition to soups, stews, roasted meats, and vegetables, and its fragrant oils are used in perfumes and potpourri. Rosemary’s health benefits are also well-documented, with studies showing it may improve memory and cognitive function, as well as possess antimicrobial properties.
When it comes to growing rosemary from clippings, you’re not just saving money on seed packets – you’re preserving the unique characteristics of your existing plant. This method ensures that your new rosemary plants will have the same flavor profile, fragrance, and growth habits as their parent plant. Additionally, growing from clippings reduces the risk of introducing pests or diseases into your garden. By propagating rosemary through cuttings, you’re also taking advantage of its ability to grow rapidly and produce a high yield of fragrant leaves.
To make the most of this method, choose healthy rosemary stems with plenty of new growth, ideally just before pruning. This will give your cuttings the best chance of rooting successfully.
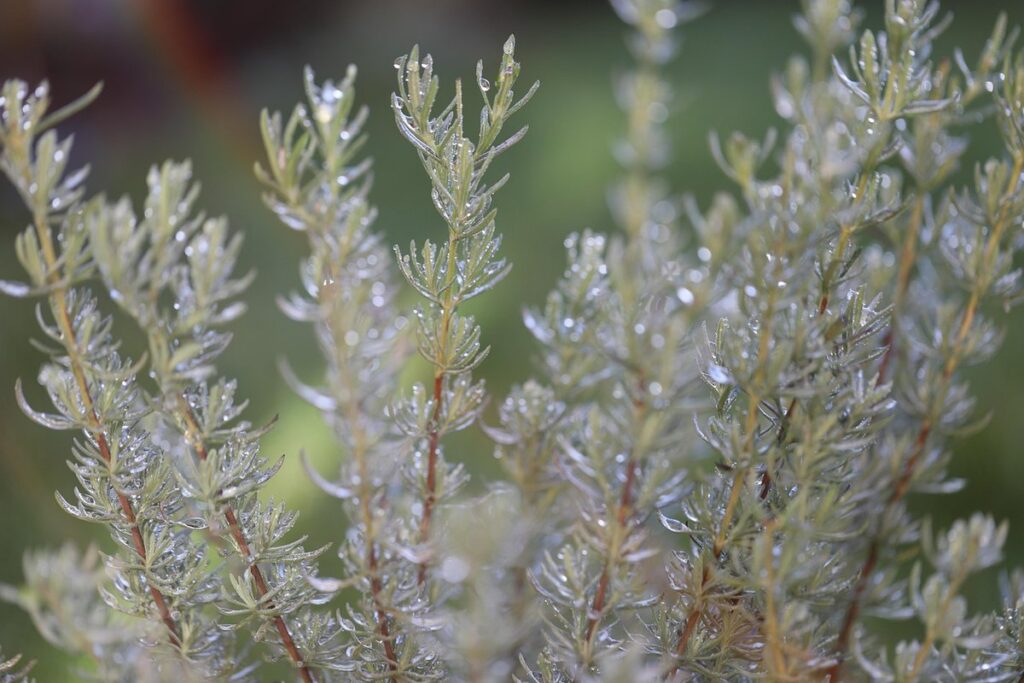
Choosing Healthy Rosemary Clippings for Propagation
When it comes to propagating rosemary from clippings, choosing healthy stems is crucial for successful growth. To select the best rosemary clippings, look for stems with at least two sets of leaves. This ensures that the cutting has enough stored energy and nutrients to sustain new growth.
Different types of rosemary have varying characteristics that can affect propagation success. For example, compact or dwarf varieties like ‘Tuscan Blue’ or ‘Miss Jessop’s Upright’ tend to produce more robust clippings than their taller counterparts. If you’re working with a larger variety, opt for smaller stems from the current season’s growth, as these are typically stronger and more vigorous.
When selecting clippings, also consider the color and condition of the leaves. Choose stems with firm, green leaves that are not wilted or discolored. Avoid taking cuttings from weak or stressed plants, as this can transfer diseases to your new propagation. By choosing healthy rosemary stems, you’ll be well on your way to successful propagation and a thriving new plant.
Preparing the Rosemary Clippings for Growth
Now that you’ve taken your rosemary clippings, it’s time to prepare them for growth by trimming and drying the stems to encourage healthy roots. This will help them thrive in their new environment.
How to Prepare Cuttings for Rooting
To successfully grow rosemary from clippings, it’s crucial to prepare the cuttings correctly. Start by selecting healthy stems with at least two sets of leaves. Cut these stems off about an inch below a leaf node using sharp, clean scissors or pruning shears.
Next, trim the stem tips at an angle. This helps prevent water from collecting on the cutting and promotes better rooting. Remove any weak or damaged leaves, as these can become a source of infection during the rooting process.
Now it’s time to clean the stems thoroughly. Rinse them under cold running water to remove any dirt or debris. Gently scrub the cut ends with a soft-bristled brush to dislodge any remaining particles. Finally, pat the cuttings dry with a paper towel to prevent moisture from accumulating and encourage healthy rooting.
By following these steps, you’ll have your rosemary clippings prepared for successful rooting.
Creating a Rooting Medium for Optimal Results
When it comes to growing rosemary from clippings, creating a suitable rooting medium is crucial for optimal results. A rooting medium, such as potting mix or water, provides the necessary support and nutrients for the newly formed roots to develop. The right choice of rooting medium can make all the difference in encouraging healthy root growth.
To create an optimal environment for root growth, start by preparing a well-draining potting mix specifically designed for herbs like rosemary. A mix with high peat content will help retain moisture but prevent waterlogged soil. You can also use a mixture of perlite and vermiculite to improve drainage further.
Alternatively, you can use water as the rooting medium. Fill a clean glass or container with filtered water, making sure it’s not too cold for the rosemary clippings. The water should be at room temperature (around 20-25°C) to encourage root growth.
In either case, ensure the rooting medium is moist but not soggy. A good rule of thumb is to use a spray bottle to gently mist the medium once or twice a week, depending on humidity levels in your area. This will help maintain optimal moisture levels and promote healthy root development.
Planting and Caring for Rosemary Clippings
Now that you have your rosemary clippings, it’s time to plant them and give them the TLC they need to thrive. Here’s how to care for and nurture your new cuttings into healthy plants.
The Best Conditions for Planting Rosemary Cuttings
When it comes to planting rosemary cuttings, providing them with the right conditions is crucial for healthy growth. The ideal temperature range for rosemary cuttings is between 65°F to 75°F (18°C to 24°C). Avoid exposing them to extreme temperatures, as this can cause shock and slow down growth.
Rosemary cuttings prefer bright, indirect light. Placing them near an east- or west-facing window is perfect, but avoid direct sunlight, which can lead to scorching of the leaves. If you’re planting indoors, make sure they receive at least 4-6 hours of direct light per day.
Water your rosemary cuttings gently but thoroughly when the top inch of soil feels dry to the touch. Overwatering is a common mistake that can be detrimental to their growth. Water them in the morning, so the plants have the entire day to dry out slightly before nightfall.
Keep the moisture level consistent by watering every 2-3 days during hot weather and reducing it to once a week during cooler months. This will help your rosemary cuttings establish a strong root system and promote healthy growth.
Transplanting Rosemary into Individual Pots or the Garden
When it’s time to transplant your rosemary clippings into individual pots or directly into the garden, make sure you’re giving them the best chance at success. To do this, choose a location with full sun and well-draining soil. Rosemary prefers slightly acidic to neutral soil pH, so test your soil before planting.
If transplanting into pots, use a minimum of 6-8 inch deep containers filled with a good quality potting mix specifically designed for herbs. Plant the clipping at the same depth as it was in its original location and water thoroughly. Water sparingly over the next few days to help settle the soil around the roots.
Hardening off is an essential step when transplanting rosemary clippings into individual pots or the garden, especially if you’re direct sowing. This process allows your plant to gradually adjust to outdoor conditions by exposing it to sunlight and wind for a period of 7-10 days before full sun exposure. Simply move the pot or newly planted clipping outside to a shaded area during this time and gradually increase its exposure over several days.
Rosemary can be directly sown into the garden, but make sure to space them at least 18 inches apart. Planting at the right depth is crucial: rosemary roots are shallow and spreading, so plant the cutting just above root level.
Troubleshooting Common Issues with Rosemary Clippings
Don’t worry if things aren’t growing as planned, we’ve got you covered. This section will walk you through common problems and solutions for rosemary clippings to get your plants thriving again.
Identifying and Addressing Root Rot in Rosemary Cuttings
When growing rosemary from clippings, one common issue that can arise is root rot. This occurs when the cutting’s roots become waterlogged and start to decay, often due to overwatering or poor drainage. To identify if your rosemary cutting has developed root rot, look for signs such as soft, mushy stems, a foul odor, or a yellowish hue on the leaves.
Preventing root rot is simpler than treating it. When planting your rosemary cuttings, ensure that the soil drains well and doesn’t retain excess moisture. Water sparingly, only when the top inch of soil feels dry to the touch. Keep an eye out for pests like spider mites or mealybugs, which can exacerbate root rot issues.
If you do notice signs of root rot, act quickly by repotting the cutting in fresh, well-draining potting mix. Remove any affected roots and treat the cutting with a fungicide specifically designed to combat root rot. With proper care and attention, your rosemary plant should recover from this issue and thrive.
Overcoming Pests or Diseases Affecting Rosemary Clippings
If you notice pests or diseases affecting your rosemary clippings, it’s essential to address the issue promptly to prevent further damage and ensure their healthy growth. Fungal infections are common culprits that can affect rosemary clippings, especially if they’re not given enough air circulation.
To identify fungal infections, look for signs such as yellowing leaves, black spots, or a powdery white coating on the leaves’ surface. Treat these issues with fungicides specifically designed to target root rot and leaf spot diseases.
Spider mites are another pest that can infest rosemary clippings, sucking their sap and causing them to turn yellow and eventually drop off. These tiny insects are usually found in dry environments, so maintain a humid atmosphere around your clippings by misting the area with water regularly.
When pruning infected areas or disposing of affected clippings, ensure you wear gloves to avoid spreading the disease. To prevent pests and diseases from affecting your rosemary clippings, practice good hygiene by cleaning your pruning tools between cuts and using sterile soil mix when repotting.
Tips for Encouraging Healthy Growth in Established Rosemary Plants
Now that your rosemary plants are established, it’s time to nurture them into even healthier and more vibrant specimens, with these expert tips on how to encourage their growth.
Fertilizing and Pruning Rosemary for Optimal Health
To keep your established rosemary plant thriving, fertilizing and pruning are essential steps. Fertilize with a balanced, water-soluble fertilizer during the growing season (spring-fall), following the manufacturer’s instructions for application rates. You can also use compost or well-rotted manure as an alternative to commercial fertilizers.
When it comes to pruning, rosemary is a hardy herb that responds well to regular maintenance. Prune back leggy stems in late winter or early spring to promote bushy growth and encourage new foliage. Remove any dead or diseased branches to prevent pest issues like spider mites or mealybugs from taking hold.
For optimal health, prune your rosemary plant every 2-3 weeks during the growing season to control its size and shape. This will also help to promote root development and prevent the plant from becoming leggy. Be sure to disinfect your pruning tools between cuts to prevent the spread of disease.
Pest Management Strategies for Mature Rosemary Plants
As your rosemary plant matures, it’s not uncommon for pests to become an issue. Mature rosemary plants are particularly susceptible to infestations due to their dense foliage and high nutrient content, making them a prime target for various pests. To prevent these unwanted visitors from taking over your plant, it’s essential to implement effective pest management strategies.
Regular inspections can help you catch issues early on. Check the undersides of leaves, stems, and soil for signs of infestation. For example, aphids often congregate on the lower portions of plants, while spider mites might be found on the upper surfaces of leaves. Whiteflies and thrips are also common pests that target rosemary.
To manage these pests, use a combination of techniques. Start by removing any heavily infested branches or stems to prevent the problem from spreading. Next, apply neem oil or insecticidal soap to control aphid, whitefly, and spider mite populations. For more stubborn issues, consider introducing natural predators like ladybugs or lacewings.
Remember to also maintain a healthy environment by ensuring good air circulation around your plant and avoiding overwatering. This will help prevent pest-related problems from arising in the first place.
Advanced Techniques for Propagating Rosemary through Division or Layering
Now that you’ve mastered growing rosemary from clippings, it’s time to take your propagation skills to the next level by learning advanced techniques for dividing and layering. This will help you reproduce this fragrant herb even more efficiently.
Understanding the Process of Dividing Established Rosemary Roots
Dividing established rosemary roots is an advanced technique that allows you to multiply your favorite rosemary plants quickly and efficiently. This method involves cutting and replanting the established roots, resulting in multiple new plants with minimal soil disturbance.
When dividing established rosemary roots, it’s essential to consider the health of the mother plant. The best time for division is during the spring or fall when the plant is dormant, allowing you to handle its delicate roots without causing damage. Start by gently digging around the base of the plant, taking care not to cut any of the roots. Gently lift the root ball out of the ground and separate the sections using a sharp, sterile knife.
To maximize your chances of success, make sure each division has at least two growth nodes or ‘eyes’ from which new shoots will emerge. Replant the divisions immediately, water well, and keep the soil consistently moist until established. This technique not only ensures healthy propagation but also rejuvenates the mother plant by removing any dead or overgrown sections, allowing it to focus its energy on producing fresh growth.
Creating New Plants by Layering Stem Cuttings
To create new rosemary plants through layering stem cuttings, you’ll need to select a healthy stem with plenty of nodes and leaves. This method is ideal for propagation as it allows the new plant to establish its roots while still attached to the mother plant. Begin by making a small incision on the underside of the stem, just above a node. Then, gently bend the stem downwards towards the ground, securing it in place with a rock or U-shaped wire.
As the stem takes root, you’ll start to notice new growth emerging from the nodes. After about 6-8 weeks, carefully cut the new plant at the base of the stem, making sure each section has at least two sets of leaves and some roots. Remove any weak or spindly growth, leaving only the healthiest sections.
When transplanting your layered rosemary plants, be sure to provide a well-draining potting mix and a sunny location with temperatures above 60°F (15°C). Water sparingly until established, as this can help prevent root rot. By following these steps, you should have a robust collection of new rosemary plants within a few months.
Preserving and Storing Harvested Rosemary Clippings for Future Use
To get the most out of your rosemary harvest, it’s essential to properly preserve and store your clippings so they remain healthy and viable for future use. This section will show you how to do just that.
Tips for Drying, Freezing, or Processing Harvested Rosemary
When you’ve harvested your rosemary clippings, it’s essential to preserve them for future use. This ensures that your efforts don’t go to waste and allows you to enjoy the benefits of your homegrown herbs year-round.
Drying is a simple method for preserving rosemary clippings. Tie the cut stems in small bunches and hang them upside down in a warm, dry place with good air circulation. You can also use a food dehydrator or your oven on its lowest temperature setting to speed up the process. It’s crucial to note that drying will preserve the flavor and aroma of rosemary but may cause it to lose some of its potency.
Freezing is another excellent method for preserving rosemary clippings. Chop or bruise the leaves and place them in an airtight container or freezer bag. Label and store them in your freezer, where they’ll retain their flavor and aroma for up to six months. When you’re ready to use them, simply thaw and chop as needed.
Processing your harvested rosemary clippings involves creating products that can be used throughout the year. Infuse olive oil with dried rosemary by placing a few sprigs in a clean glass jar and topping it off with oil. Let it sit for several weeks before straining and using as desired. You can also make rosemary salt by mixing crushed leaves with kosher salt and storing them in an airtight container.
When preserving rosemary clippings, consider the end-use of your preserved herbs. If you’re planning to use them in cooking or herbal remedies, freezing may be the best option. However, if you’re looking for a more convenient way to add flavor to dishes throughout the year, drying or processing could be the better choice. Experiment with different methods and find what works best for you and your needs.
Frequently Asked Questions
Can I grow rosemary from clippings indoors year-round?
Yes, rosemary can thrive indoors with the right conditions, including bright light, moderate temperatures (above 60°F/15°C), and well-draining soil. To keep your indoor rosemary healthy, ensure good air circulation and avoid overwatering.
How often should I water rosemary clippings after planting?
Water newly planted rosemary clippings sparingly, allowing the soil to dry slightly between waterings. As they establish roots, increase watering frequency but avoid overhydration, which can lead to root rot. Monitor your plant’s response and adjust your watering schedule accordingly.
What are some common pests or diseases that affect rosemary clippings?
Rosemary is susceptible to spider mites, mealybugs, and aphids. Regularly inspect your plants for signs of infestation or disease, such as yellowing leaves, black spots, or white powdery residue. Use organic pest control methods whenever possible, like neem oil or insecticidal soap.
Can I propagate rosemary from clippings taken at any time of the year?
While rosemary can be propagated year-round, it’s best to take clippings during the spring or early summer when the plant is actively growing. Avoid taking cuttings during the dormant winter season, as this may reduce success rates.
How do I store harvested rosemary clippings for future use?
To preserve rosemary clippings for later use, dry them thoroughly in a cool, dark place or freeze them immediately after harvesting. You can also process dried rosemary into teas, oils, or other products for convenient use throughout the year.