Drying your own herbs at home is a great way to preserve their flavor and aroma, but with so many methods out there, it can be hard to know where to start. If you’re wondering whether to use a dehydrator or try air drying for your herb preservation needs, you’ve come to the right place. Not only will we delve into the benefits of each method, but we’ll also cover some essential considerations to keep in mind when deciding which route to take.
From the speed and efficiency of using a dehydrator to the cost-effectiveness of air drying, our expert guide aims to equip you with all the knowledge you need to dry your herbs like a pro. In this article, we’ll explore the benefits, drawbacks, and expert tips for both methods, helping you make an informed decision that suits your needs and preferences when it comes to preserving your favorite herbs at home.
Benefits and Considerations
Now that you’ve weighed the pros of each method, let’s explore the key benefits and considerations to keep in mind when drying herbs at home. This is where your decision will really come together.
Introduction to Herb Drying Methods
When it comes to preserving herbs for future use, you have two main methods at your disposal: using a dehydrator and air drying. Both techniques offer benefits and considerations that are essential to understand before deciding which approach suits your needs.
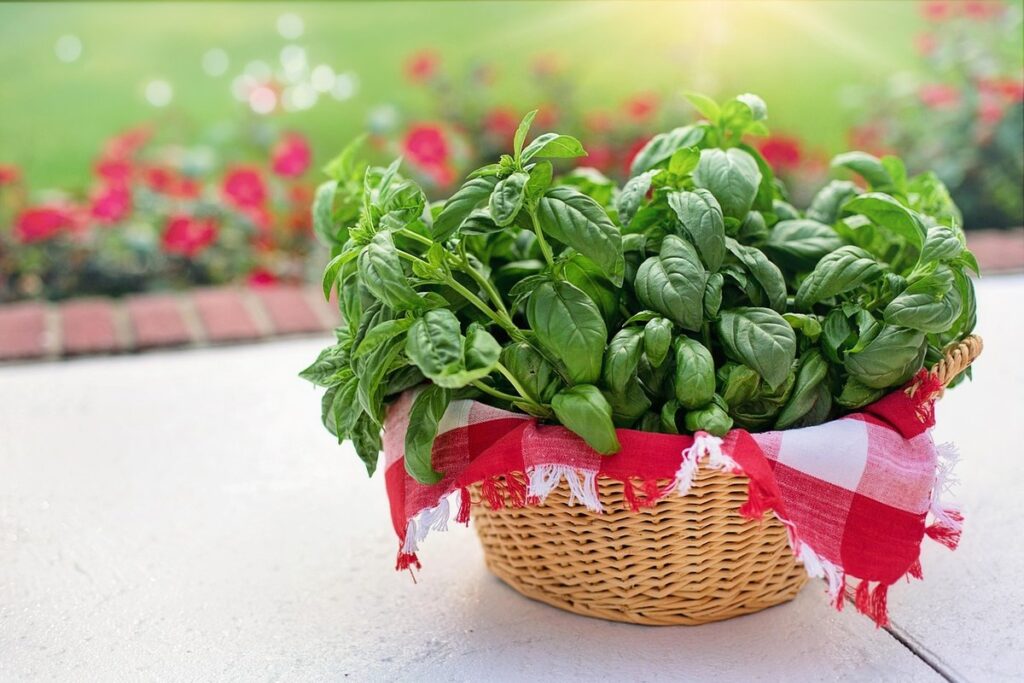
Air drying is a simple and cost-effective method that allows you to dry herbs naturally by exposing them to air. This process can be done using a variety of methods, such as tying the herbs in small bunches or hanging them upside down from a string. One of the main benefits of air drying is that it preserves the herbs’ natural flavor and aroma. However, this method can take longer, typically requiring 1-3 weeks to complete.
Using a dehydrator offers faster results, often taking just a few hours to dry herbs completely. Dehydrators also provide more control over temperature settings, allowing for optimal drying conditions. This precision is particularly beneficial for sensitive herbs like basil and mint. However, dehydrators can be an investment, and some users may find the process less forgiving than air drying.
Advantages of Dehydrators for Herb Drying
Using a dehydrator for drying herbs offers several advantages that make it an attractive option for herb enthusiasts. One of the most significant benefits is consistent temperature control. Dehydrators allow you to set a precise temperature, ensuring that your herbs dry evenly and at an optimal rate. This is particularly important when it comes to delicate herbs like basil or mint, which can be easily damaged by excessive heat.
Another advantage of dehydrators is faster drying times. With a dehydrator, you can dry a batch of herbs in as little as 1-2 hours, depending on the type and thickness of the herbs. This not only saves time but also helps preserve the herb’s flavor and aroma. Dehydrators also reduce the risk of spoilage, which is common when air drying herbs. By controlling the temperature and humidity levels, dehydrators prevent the growth of bacteria and mold, ensuring your herbs stay fresh for a longer period.
Air Drying Method: Pros and Cons
Air drying herbs is a traditional and natural method of preserving herbs without using electricity. The process involves tying the herbs in small bunches and hanging them upside down in a warm, dry, dark place with good air circulation. This method allows the herbs to dry slowly over time, which helps preserve their natural colors and flavors.
One of the benefits of air drying herbs is that it’s an energy-free method that doesn’t require any specialized equipment. However, this also means that the process can be slow, taking anywhere from a few days to several weeks depending on the humidity and temperature of your environment. Additionally, air drying requires you to be mindful of the weather – if it’s raining or humid outside, you’ll need to find an alternative drying method.
When done correctly, air drying herbs can result in high-quality dried products with minimal loss of flavor and aroma. To achieve this, it’s essential to maintain good air circulation around the herbs and avoid exposing them to direct sunlight, which can cause fading. By following these simple steps, you can successfully air dry your herbs and enjoy their fresh flavors year-round.
Equipment and Setup
To get started, you’ll need a few essential pieces of equipment for both dehydrator and air drying methods: a dehydrator and/or a clean, dry area for air drying.
Choosing a Dehydrator for Herb Drying
When selecting a dehydrator for drying herbs, several key factors come into play. Temperature control is essential to preserve the delicate flavors and aromas of herbs. Look for a dehydrator that offers precise temperature control between 95°F to 155°F (35°C to 68°C), allowing you to customize the settings based on the specific herb type.
Capacity is also crucial, as you’ll want a dehydrator that can accommodate the quantity of herbs you plan to dry. Consider a model with multiple trays or adjustable shelves for flexible use. Power consumption is another critical aspect; choose an energy-efficient dehydrator that consumes minimal electricity while maintaining optimal performance.
Some popular features to consider include digital displays, timer controls, and even smartphone app connectivity for remote monitoring and scheduling. Be mindful of the overall size and design of the dehydrator, ensuring it fits comfortably in your kitchen space. With these considerations in mind, you can confidently select a dehydrator that suits your needs and ensures optimal herb drying results.
Air Drying Equipment: What You Need
When it comes to air drying herbs, having the right equipment is crucial for success. You’ll need a few basic items to get started. First and foremost, you’ll require trays or racks specifically designed for air drying. These trays should be made from food-grade materials, such as stainless steel or silicone, to prevent any contamination of your herbs.
You may also want to invest in storage containers to keep your dried herbs fresh once they’re dry. Airtight glass jars or plastic containers with tight-fitting lids are ideal for storing your dried herbs. Make sure the containers are clean and dry before adding your dried herbs.
For optimal setup, ensure good air circulation by placing the trays at least 6-8 inches apart from each other. This will prevent moisture buildup and promote even drying. You can also use a fan to enhance air circulation, but be cautious not to create drafts that might knock over your trays.
To maximize space, consider using stackable trays or shelves. This will allow you to dry multiple batches of herbs simultaneously without taking up too much room in your kitchen or dedicated drying area.
Preparation and Pre-Drying Steps
Before you start drying, it’s essential to prepare your herbs properly for optimal results. This includes cleaning, trimming, and arranging them in a way that ensures even drying.
Harvesting and Cleaning Herbs
Proper harvesting and cleaning techniques are essential for ensuring the quality of dried herbs. This step sets the foundation for a successful drying process, whether you choose to use a dehydrator or air dry your herbs.
When it comes to trimming, different herb varieties require unique approaches. For example, delicate herbs like basil and mint should be trimmed just above a leaf node using scissors or pinch off individual leaves with your fingers. On the other hand, thicker herbs such as rosemary and thyme can be trimmed using pruning shears. Make sure to leave enough stem length for efficient drying.
Cleaning is also crucial to prevent contamination and preserve flavor. Gently brush away any dirt or debris from the herb leaves with a soft-bristled brush. For more stubborn stains, mix 1 tablespoon of white vinegar with 2 tablespoons of water in a spray bottle. Spray the solution onto the herbs and gently wipe clean with a damp cloth.
Remember to handle your herbs gently during the harvesting and cleaning process to avoid bruising or damaging the leaves. This will ensure that they dry evenly and retain their natural oils, resulting in a more flavorful final product.
Preparing Herbs for Drying
Before you start drying your herbs, it’s essential to prepare them properly. The preparation steps may vary depending on whether you’re using a dehydrator or air-drying method.
To begin with, trim the stems of your herb plants, leaving about 1-2 inches of leafy material attached. This will help prevent the herbs from becoming too dense and ensure even drying. For those using air-drying, tie bunches of herbs together in small clusters to promote air circulation and speed up the drying process.
For dehydrator users, spread the herb leaves flat on the trays, making sure not to overlap them. You can also use a single layer of paper towels or a silicone mat to prevent the herbs from sticking to the trays. This will help preserve their delicate texture and flavor.
Regardless of your chosen method, make sure to remove any excess moisture from the herbs by gently patting them dry with a clean towel. This step is crucial in preventing mold growth during the drying process. By taking these simple steps, you’ll be well on your way to successfully preparing your herbs for drying.
Drying Process: Dehydrator vs Air Drying
Let’s dive into the specifics of drying your herbs, comparing two popular methods: using a dehydrator and air drying. We’ll weigh their advantages and challenges.
Using a Dehydrator to Dry Herbs
Using a dehydrator to dry herbs is a quick and efficient method that preserves their flavor, aroma, and nutritional value. To get started, first prepare the herbs by washing them thoroughly and patting them dry with paper towels. Next, choose the right temperature setting for the type of herb you’re drying. For example, delicate herbs like basil and mint do well at 95°F to 105°F (35°C to 40°C), while more robust herbs like rosemary and thyme can handle temperatures between 115°F to 125°F (46°C to 52°C). Place the herbs in a single layer on the dehydrator trays, making sure not to overcrowd them. Monitor the temperature and drying time closely, as this will vary depending on the herb’s moisture content and the dehydrator’s model. Typically, it takes between 1-3 hours for most herbs to dry completely, but it’s essential to check on them every 30 minutes to ensure they don’t overdry or become brittle.
Air Drying Method: Temperature and Humidity Control
When air drying herbs, it’s essential to maintain optimal temperature and humidity levels to preserve their flavor, aroma, and nutritional value. The ideal temperature range for air drying herbs is between 60°F to 70°F (15°C to 21°C), as this allows for slow evaporation of moisture without promoting bacterial growth.
To control the humidity level, you can use a hygrometer or a dehumidifier in your drying area. A relative humidity (RH) level of 30% to 50% is recommended to prevent mold and yeast formation. It’s also crucial to maintain good air circulation around the herbs by placing them on trays or racks with space between each layer.
Monitor the temperature and humidity levels regularly, especially during the first few days of drying, when moisture loss is highest. You can check on the herbs every 24 hours and adjust the drying conditions as needed. For instance, if you notice excessive moisture accumulation or uneven drying, you may need to increase air circulation or adjust the RH level accordingly. By maintaining optimal temperature and humidity levels, you’ll be able to achieve perfectly dried herbs that retain their natural flavors and aromas.
Post-Drying Steps and Storage
Once you’ve dried your herbs, it’s essential to take the next steps to preserve their flavor, aroma, and potency. Here, we’ll guide you through proper storage methods for long-term herb preservation.
Monitoring and Maintaining Herb Quality
Evaluating dried herbs for quality is crucial to ensure they remain potent and flavorful. To determine if your dried herbs are suitable for storage, check their appearance, texture, and aroma.
Start by inspecting the color of your dried herbs. If they have been over-dried or exposed to heat fluctuations, they may develop an unappealing brownish tint. Optimal drying conditions should preserve the natural color of the herb. For example, dried parsley should retain its vibrant green hue, while thyme should remain a deep purple-brown.
Next, examine the texture of your dried herbs. They should be crisp and brittle, not soft or pliable. If they still feel moist or sticky, it may indicate that they require re-drying. A good rule of thumb is to store dried herbs in airtight containers to maintain their moisture levels.
Lastly, take a sniff test to assess the aroma of your dried herbs. They should retain their characteristic scent and not have an unpleasant, musty odor. If you notice any off-putting smells, it’s best to re-dry or discard the batch altogether.
Long-Term Storage Solutions
Once you’ve dried your herbs using a dehydrator or air drying method, it’s essential to store them properly to maintain their flavor and aroma. Airtight containers are ideal for storing dried herbs as they prevent moisture, light, and air from entering the container. You can use glass jars with tight-fitting lids or plastic containers specifically designed for storing herbs.
When selecting a storage container, consider the type of herb you’re drying. Delicate herbs like basil and mint require more gentle handling, so it’s best to store them in smaller containers or freezer bags. For bulkier herbs like thyme and rosemary, larger containers are suitable. To maintain freshness, store your dried herbs away from direct sunlight, heat sources, and moisture-prone areas.
To ensure long-term storage, follow these tips: seal the container tightly after each use to prevent air from entering; label the container with the date and herb name; store in a cool, dry place like a pantry or cupboard. For added protection, consider storing your dried herbs in the freezer using airtight bags or containers specifically designed for freezing. This will help preserve their flavor and aroma for an extended period.
Comparison and Tips
Now that you’ve weighed the pros and cons of dehydrator drying, let’s dive into some valuable tips for getting the best results from your chosen method. Here are our top suggestions to help you perfect your herb-drying skills.
Comparing Dehydrator and Air Drying Methods
When it comes to drying herbs, you have two popular methods at your disposal: dehydrator and air drying. While both techniques can produce high-quality dried herbs, they differ significantly in terms of efficiency, speed, and preservation of flavor and aroma.
Dehydrators are ideal for large quantities of herbs and can dry them quickly, usually within 1-2 hours. They also preserve the herbs’ natural color and nutrients due to their controlled temperature settings. However, dehydrators require electricity and can be expensive to purchase or rent.
Air drying, on the other hand, is a cost-effective method that utilizes room temperature and humidity to dry herbs over several days or weeks. It’s suitable for small batches and is often preferred by those who want to avoid energy consumption. Nevertheless, air-dried herbs may lose some of their flavor and aroma due to exposure to environmental factors.
To choose between dehydrator and air drying methods, consider the quantity of herbs you need to dry, your budget, and the preservation of the final product’s quality.
Expert Tips and Tricks
When it comes to drying herbs, even with the best equipment and techniques, there can be room for improvement. That’s why we’re sharing expert tips and tricks from experienced herb growers and preservers on optimizing results with both dehydrators and air drying techniques.
To ensure even drying in a dehydrator, consider investing in a thermometer to monitor temperatures, especially when using a high-heat setting. This will help prevent over-drying or under-drying of your herbs. Another pro tip is to rotate the trays regularly for uniform drying. For instance, you can place delicate herbs like basil on the top tray and more robust ones like thyme on the bottom.
When air drying herbs, it’s essential to maintain good airflow by placing them in a single layer, away from direct sunlight. To speed up the process, you can also use paper bags or mesh bags to promote air circulation. Always store dried herbs in airtight containers to preserve their flavor and aroma.
Some additional advice worth noting is to monitor your herbs’ color and texture closely, as these can indicate optimal dryness levels.
Frequently Asked Questions
Can I dry herbs with a dehydrator if they’re already wilted or partially dried?
Yes, you can still use a dehydrator to finish drying wilted or partially dried herbs. However, be aware that the dehydration process may not restore the herb’s original texture and color. It’s essential to monitor their condition closely during the drying process to ensure optimal preservation.
How long does it take to dry herbs using air drying versus a dehydrator?
The time required for both methods varies depending on factors like humidity, temperature, and herb type. Generally, air drying can take 1-3 weeks, while a dehydrator typically takes 6-12 hours. However, the speed of dehydration is often influenced by the specific model and settings used.
What’s the best way to store dried herbs after they’ve been processed in a dehydrator or air-dried?
To maintain their flavor and aroma, it’s crucial to store dried herbs properly. Store them in airtight containers made from glass or ceramic materials, away from direct sunlight, heat sources, and moisture. You can also consider freezing them for extended storage periods.
Can I dry multiple herb types together in a dehydrator?
It’s generally recommended to dry single herb types separately to prevent cross-contamination of flavors and aromas. However, if you’re using a large dehydrator with multiple trays, you can experiment with drying small batches of different herbs together. Ensure proper air circulation between each tray for optimal results.
What’s the ideal temperature setting for drying herbs in a dehydrator?
The recommended temperature range for drying herbs is usually between 95°F (35°C) and 105°F (40°C). However, this may vary depending on the specific herb type and your personal preference. It’s always best to consult the manufacturer’s guidelines or experiment with different temperatures to achieve optimal results.