Division propagation is a simple yet effective way to multiply your favorite perennials, promoting healthy growth and sustainability in your garden. If you’re looking for an eco-friendly method to expand your plant collection without breaking the bank or relying on seeds, division propagation is definitely worth exploring. Not only does it allow you to share plants with friends and family, but it also helps reduce waste by giving new life to matured roots.
In this article, we’ll delve into the benefits of division propagation for perennials, covering suitable species and step-by-step instructions to get you started. From understanding when to divide your plants to selecting the best tools for the job, we’ll provide a comprehensive guide on how to propagate perennials through division. By the end of this article, you’ll be equipped with the knowledge needed to multiply your favorite perennials and maintain a thriving, sustainable garden.
Understanding the Basics of Division Propagation
Division propagation for perennials can seem intimidating, but it’s surprisingly easy to grasp once you understand the basic principles. Let’s start with the fundamentals: how division propagation works and what tools you’ll need to get started.
What is Division Propagation?
Division propagation is a crucial aspect of plant reproduction that allows gardeners to multiply their favorite perennials with minimal effort. At its core, division propagation involves separating a mature perennial plant into smaller sections, each containing roots and growth nodes. These sections are then replanted to grow into new individual plants. This method not only helps to control the spread of perennials but also allows for the sharing of healthy, vigorous root systems.
The importance of division propagation cannot be overstated. It enables gardeners to maintain the health and vigor of their perennial plants by giving them a fresh start with new roots. By dividing established plants, you’re essentially creating an exact replica of the parent plant, complete with its unique characteristics and traits. This process also helps to eliminate pests and diseases that may have taken hold in the original plant, ensuring that your new divisions are healthy and robust from the outset.
Benefits of Division Propagation
When you divide perennials, you’re not just creating new plants – you’re giving them a fresh start. And that’s where the benefits of division propagation truly shine.
For one, dividing perennials encourages increased root growth. When roots are divided and spread out, they have more room to develop, resulting in healthier, more robust plants. This is especially true for perennials like daylilies, hostas, and coneflowers, which can quickly become pot-bound if not divided regularly.
By dividing your perennials, you’re also improving their overall plant health. When roots are congested, they can become susceptible to disease and pests. But with a fresh division, you’re giving your plants the chance to start anew, free from these potential problems. Plus, dividing perennials can help reduce transplant shock – a common issue when moving established plants into new soil.
Remember to choose the right time for division, typically in spring or fall when the plant is dormant. This will give it the best chance to thrive and establish itself quickly in its new location.
Common Types of Perennials Suitable for Division
When it comes to division propagation, some perennial species are more suitable for this process than others. If you’re looking to propagate perennials that benefit from division, consider the following popular options.
Hostas, for instance, are a prime candidate for division. These versatile plants can quickly outgrow their containers and spread beyond their designated areas. Dividing hostas allows you to control their growth, maintain their health, and even share them with friends and family. Simply dig up the entire plant, separate the rhizomes, and replant them in new locations.
Daylilies are another perennial that thrive from division. These low-maintenance plants produce an abundance of blooms every summer, but can become overgrown if not properly managed. By dividing daylilies, you can rejuvenate their growth, encourage more blooms, and even create new hybrid varieties by combining different cultivars.
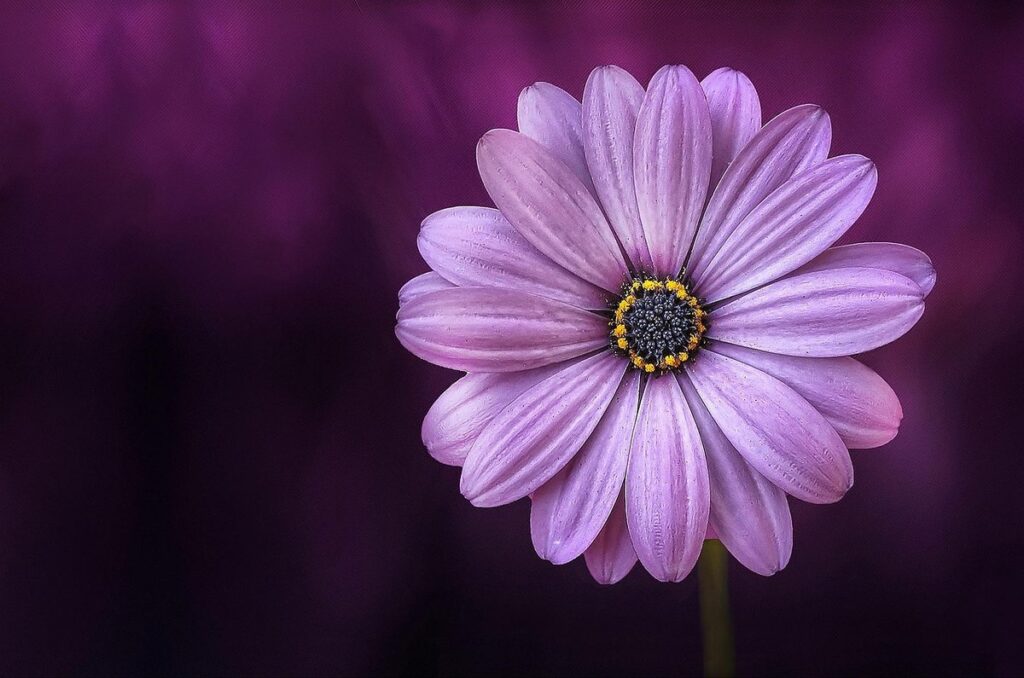
Coneflowers are also well-suited for division propagation. These drought-tolerant plants produce stunning purple, pink, or white flowers that attract pollinators and add visual interest to your garden. When dividing coneflowers, be sure to separate the roots carefully to avoid damaging them. This will help prevent shock and ensure a successful transplant.
These three perennials are just a few examples of species that benefit from division propagation. By understanding which plants respond well to this process, you can take advantage of their unique characteristics and create new growth in your garden.
Preparing the Plant for Division
Before dividing your perennial, it’s essential to inspect the plant and prepare it for division by gently removing any dead or damaged growth. This step sets the stage for successful separation of healthy roots and stems.
Choosing the Right Time to Divide
When it comes to dividing perennials, timing is everything. You want to divide at a point when the plant is actively growing, but not during its peak bloom period. This allows you to minimize stress on the plant and increases the chances of successful propagation.
Consider the climate in your area. In temperate regions with mild winters, spring or fall are ideal times for division. The cooler temperatures reduce transplant shock, making it easier for the divided sections to establish themselves. For areas with hot summers, divide in the fall, after the heat has subsided but before the first frost.
Some perennials, like daylilies and hostas, can be divided almost anytime during their active growth period. Others, such as peonies and irises, are best divided immediately after blooming. Observe your plants’ specific growth habits and seasonal fluctuations to determine the optimal time for division. For example, if a perennial tends to go dormant during the summer months, wait until it starts to grow again in the fall or spring before dividing.
Watering and Fertilizing Before Division
Watering and fertilizing before division propagation are crucial steps that often get overlooked, but they play a significant role in promoting healthy root development. When preparing to divide your perennials, it’s essential to give them the right amount of water and nutrients.
About 1-2 weeks prior to division, stop fertilizing your plants to prevent over-fertilization, which can lead to weak or spindly growth during division. This break will also allow the plant to focus its energy on developing a robust root system.
Watering is equally important. Make sure the soil is consistently moist but not waterlogged. A well-watered plant with good moisture retention will help reduce transplant shock and promote healthy root development. If you’re dividing in the spring, make sure the soil has warmed up sufficiently for optimal growth. Aim to water your plants deeply once or twice a week, depending on weather conditions.
By getting watering and fertilization right before division, you’ll be setting yourself up for success with your propagation efforts.
Removing Dead or Damaged Leaves and Stems
Removing dead or damaged leaves and stems from the plant is an essential step before dividing perennials. These decaying parts can harbor diseases and pests that may spread to the healthy sections of the plant during division, causing further damage.
When inspecting the plant, look for yellowed, wilted, or brown leaves, as well as any damaged stems with cracks or soft spots. Gently grasp these affected areas with your fingers or a pair of gloves and twist them counterclockwise to avoid tearing the surrounding healthy tissue. Remove dead or damaged sections from the plant by cutting them off at the base using clean pruning shears or scissors.
It’s also crucial to inspect the roots when dividing perennials, as diseased or damaged roots can affect the plant’s ability to absorb water and nutrients. If you notice any rotting or soft spots on the roots, trim them back with a sterile tool to prevent the spread of disease. By removing dead or damaged leaves and stems, you’ll ensure a clean and healthy division process that promotes strong growth and establishment for your newly divided perennials.
The Division Process
Now that you understand the basics of division propagation, let’s dive into the specific steps involved in dividing your perennials to create new plants. We’ll walk through the division process together.
Step-by-Step Instructions for Dividing Perennials
When dividing perennials, it’s essential to follow these step-by-step instructions to ensure the process is done correctly and efficiently. Start by preparing the soil by loosening it with a fork, about 12-18 inches deep. This will make it easier to dig up the entire root system without causing damage.
Next, carefully dig around the perimeter of the plant, making sure to go as far down as possible. Use a spade or garden fork to gently pry the roots loose from the surrounding soil. Once you’ve exposed most of the root system, use your hands or a specialized tool like a division bar to separate individual plants from the rest.
As you dig, avoid cutting into the roots with your spade, as this can cause unnecessary damage and stress to the plant. Continue digging until you have separated all the individual plants, taking care not to break any of their roots in the process.
Gently wash away excess soil from the roots before replanting or storing the divided perennials. This will help prevent root rot and ensure healthy growth when they’re re-established in new locations.
Handling Roots During Division
When dividing perennials, handling the roots is just as crucial as separating the plant material. Trimming and replanting roots are essential techniques to minimize transplant shock and ensure a smooth transition for your newly divided plants.
Start by gently washing away any dirt from the roots with lukewarm water. This helps you assess the root system and identify any damaged or rotting areas. Use sterile pruning tools to trim back any circling or broken roots, taking care not to damage the surrounding tissue. For perennials like daylilies and hostas, it’s often necessary to cut back some of the larger roots to encourage new growth.
Replanting the trimmed root system can be done in two ways: replanting the entire section as is, or dividing the sections further to promote better establishment. For example, if you’re dividing a mature daylily clump, consider replanting the smaller sections separately to give them the best chance of recovery.
This process may seem daunting at first, but with practice, handling roots becomes second nature. Remember, minimizing transplant shock sets your newly divided plants up for success, ensuring they’ll thrive in their new environment.
Aftercare: Caring for Newly Divided Plants
After dividing perennials, it’s essential to provide optimal care for newly separated plants to ensure they establish strong root systems and thrive. Watering is critical during this period. Avoid overwatering, which can lead to rot and other problems. Instead, water deeply once or twice a week, depending on weather conditions. A general rule of thumb is to provide about 1 inch of water per week.
Fertilizing newly divided plants should be done lightly. Feed them with a balanced, slow-release fertilizer in early spring when new growth appears. This will promote healthy root development and encourage establishment. Mulching around the base of newly divided perennials helps retain moisture, suppress weeds, and regulate soil temperature. Organic mulch options like bark chips or straw are ideal as they improve soil structure over time.
When caring for newly divided plants, be gentle and avoid compacting the soil. This allows roots to grow freely and prevents water from accumulating around the base of the plant. Monitor your plants closely during their first growing season, and adjust watering and fertilizing schedules accordingly based on their specific needs.
Troubleshooting Common Issues with Division Propagation
Division propagation for perennials can be a game-changer, but it’s not without its challenges. Let’s tackle some common issues and find solutions to get you back on track.
Over-Tendrilled or Under-Developed Roots
When dividing perennials, it’s not uncommon for problems to arise during the propagation process. Two common issues are over-tendrilling and under-developed roots. Over-tendrilling occurs when you’ve dug up too much of the plant’s root system, leaving behind a bare crown with insufficient roots to support new growth. This can lead to poor establishment rates and increased susceptibility to disease.
To avoid over-tendrilling, gently rock the soil back and forth while digging around the plant, rather than cutting it away aggressively. This will help loosen the roots without causing unnecessary damage. For example, when dividing a mature clump of peonies, take care not to disturb the central crown more than necessary.
On the other hand, under-developed roots can also hinder successful propagation. When roots are under-developed or stunted, new plants may struggle to establish themselves in their new environment. To promote healthy root development, provide perennials with a deep layer of mulch and adequate moisture after division. This will encourage the roots to grow deeper into the soil, making it easier for the plant to absorb nutrients and water.
Pests or Diseases Affecting Divided Plants
Divided perennials can be vulnerable to pests and diseases that can quickly spread and compromise their health. Identifying these issues early on is crucial for effective control.
Some common pests affecting divided plants include spider mites, mealybugs, and scale insects. These tiny creatures feed on the plant’s sap, causing yellowing or stunted growth. Look for fine webbing, white cottony patches, or sticky honeydew droplets on the leaves or stems. To manage infestations, use neem oil or insecticidal soap to suffocate these pests.
Diseases such as root rot and crown rot can also affect divided perennials. These fungi thrive in moist environments and feed on plant tissues. Signs of infection include soft, mushy roots, blackening crowns, or unusual growth patterns. Treat affected plants with fungicides like copper-based products or take preventative measures by ensuring good air circulation and not overwatering.
Regular monitoring, proper hygiene practices, and taking prompt action when issues arise will help you mitigate these risks and ensure healthy division propagation for your perennials.
Ensuring Successful Transplantation of Divided Plants
When dividing and replanting perennials, it’s essential to give them time to adjust to their new surroundings. This process is called hardening off, and it’s crucial for the survival of your newly divided plants. Start by keeping them in a shaded area outdoors for 1-2 hours a day, gradually increasing the duration over the course of 7-10 days.
During this period, make sure to monitor their water intake closely. Keep the soil consistently moist but not waterlogged. If you’re dividing plants during a dry spell, be prepared to provide additional watering as soon as possible after replanting. You can also speed up the hardening off process by misting them with water daily.
Once your divided perennials have acclimated, they’ll be more resilient to extreme temperatures and humidity fluctuations. This will significantly increase their chances of thriving in their new location. By following these simple steps, you can ensure a smooth transition for your newly divided plants and enjoy healthy growth in the seasons to come.
Best Practices for Maintaining Health and Sustainability
To ensure the health of your newly propagated perennials, follow these best practices for maintaining their well-being and promoting sustainability in the garden. This includes proper watering, pruning, and pest management techniques.
Record-Keeping: Tracking Division Dates and Plant Performance
As you continue to propagate perennials through division, it’s essential to keep track of your efforts. This involves recording not only the dates of each division but also monitoring the performance of the newly divided plants. By doing so, you’ll be able to refine your strategies over time and make informed decisions about which techniques work best for specific plant varieties.
Start by creating a spreadsheet or log to record key details such as the date of division, the type of perennial propagated, and any notable observations about the plant’s growth or performance. You can also include photos or notes on the specific conditions under which each division was carried out. This will enable you to identify patterns or correlations between certain variables and plant success.
Consider tracking metrics such as survival rates, root development, and overall health of the newly divided plants. This data will help you pinpoint areas where your techniques may be improving or areas that require further adjustment. By regularly reviewing your records and adjusting your strategies accordingly, you’ll become a more skilled propagator in no time!
Identifying Plant Decline or Disease Symptoms
When you divide and replant perennials, they can be more susceptible to disease and decline due to stress from transplanting. This is especially true if the division process wasn’t done correctly. One way to identify potential problems is by looking for signs of decline or disease.
Some common symptoms include:
* Yellowing leaves: This could indicate overwatering, nutrient deficiency, or root damage
* Wilting or droopy stems: Often caused by drought, heat stress, or root disturbance during division
* Black spots on leaves: Fungal infections like leaf spot can spread quickly in moist conditions
* White powdery patches: Fungal diseases like powdery mildew can reduce plant vigor and lead to decline
Causes of these symptoms often stem from:
* Over-watering or under-watering
* Nutrient deficiencies due to depleted soil
* Root damage during division
* Poor air circulation, which allows fungal diseases to thrive
To address potential issues, monitor your newly divided plants closely. Adjust watering habits based on climate and soil conditions. Fertilize with a balanced fertilizer to replenish nutrient-depleted soil. Provide good air circulation around the plant by spacing it correctly in the garden.
Long-Term Health Benefits for Plants Undergoing Division Propagation
When done correctly, division propagation can have numerous long-term health benefits for perennials. One of the most significant advantages is improved growth rates. By dividing mature plants, you’re essentially giving them a fresh start and allowing them to focus their energy on producing new growth rather than sustaining existing roots. This leads to more vigorous and robust plants that are better equipped to handle environmental stresses.
In addition to enhanced growth rates, division propagation can also increase resistance to pests and diseases. When a perennial is divided, the stress it undergoes stimulates its natural defense mechanisms, making it less susceptible to common issues like fungal infections or insect infestations. This boost in immunity enables your plants to thrive even in challenging conditions.
Studies have shown that properly propagated perennials can go on to live longer and healthier lives than those left undivided. In fact, some nurseries report seeing significant improvements in plant health after just one division. By incorporating regular division propagation into your care routine, you’ll be giving your perennials the best chance at long-term success.
Frequently Asked Questions
What’s the optimal timing for replanting newly divided perennials?
Replant newly divided perennials as soon as possible, ideally during the spring or fall when the weather is cooler. This helps minimize transplant shock and allows the plants to establish themselves quickly. Make sure to provide adequate moisture and care in the first few weeks after replanting.
Can I divide perennials during any stage of their growth cycle?
No, it’s best to divide perennials when they’re dormant or have completed their active growing season. This typically occurs in late summer or early fall for most perennial species. Dividing at this time reduces stress on the plant and allows it to focus its energy on establishing new roots.
How do I prevent over-tendrilled or under-developed roots during division?
To avoid these common issues, inspect the roots of your perennials before dividing them. If the roots have become pot-bound, gently tease them apart with a fork to encourage healthy growth. Conversely, if the roots appear sparse, consider repotting the plant in fresh soil to stimulate root development.
What’s the best way to care for newly divided plants during their first growing season?
Newly divided perennials require careful attention during their first growing season. Make sure to provide consistent moisture and fertilize lightly to promote healthy growth. Prune or deadhead flowers as needed, but avoid over-pruning, which can stress the plant further.
Can I propagate more than one type of perennial using division propagation?
Yes, you can divide multiple types of perennials using this method, but be sure to research the specific needs and requirements for each species. Some perennials may require different care or handling during division, so it’s essential to tailor your approach to each plant’s unique characteristics.