Are you tired of relying on store-bought tomato seeds every season? Saving your own tomato seeds can be a game-changer for gardeners, and with our comprehensive guide, you’ll learn how to do it like a pro. Not only will you save money on seed packets, but you’ll also have the satisfaction of growing heirloom varieties that are tailored to your specific climate and region.
Saving tomato seeds is easier than you think, and with our step-by-step instructions, you’ll be able to select the best seeds, harvest them at the right time, clean and store them for optimal viability and germination. Whether you’re a seasoned gardener or just starting out, this guide will walk you through everything you need to know to get started. By the end of this article, you’ll have the skills and knowledge to grow your own tomatoes from seed next season.
Understanding the Importance of Seed Saving
Understanding why seed saving is essential for sustainable gardening and how it benefits both you and your community is crucial before we dive into the practical steps. Let’s explore its importance together.
Benefits of Seed Saving
Saving seeds from your tomato plants is not just a fun hobby, but it also comes with numerous benefits that can transform the way you approach gardening. One of the most significant advantages of seed saving is the cost savings. By collecting and storing seeds from your own tomato plants, you can avoid purchasing expensive commercial seeds every year. This can add up to a substantial amount over time, especially if you’re growing multiple varieties.
Another benefit of seed saving is the preservation of genetic diversity. When you save seeds from your own plants, you’re not only ensuring that your favorite varieties continue to thrive but also helping to maintain the rich genetic heritage of tomato cultivation. This is particularly important for heirloom and open-pollinated varieties, which are at risk of being lost due to commercial seed companies’ focus on hybrid seeds.
By saving seeds from tomatoes, you’ll also gain independence from commercial seed companies, allowing you to make your own informed decisions about the types of plants you grow.
Why Save Tomato Seeds Specifically
When it comes to saving seeds for the first time, tomato seeds are an excellent place to start. They’re relatively easy to save and require minimal equipment, making them a great starting point for beginners. But beyond their ease of use, tomato seeds offer several benefits that make them particularly valuable for gardeners.
One of the main advantages of saving tomato seeds is that they can develop resistance to diseases over time. This means that if you’ve been growing tomatoes in a particular area and have noticed issues with certain diseases, such as fusarium wilt or bacterial spot, your saved seeds may already carry some level of immunity. By selecting and saving seeds from plants that exhibit these traits, you can create a more resilient crop.
Additionally, saving tomato seeds allows you to adapt them to your local climate. Tomatoes come in a wide range of varieties, each with its own unique characteristics. By growing and saving the seeds from tomatoes that thrive in your area, you can select for traits like early maturation or heat tolerance, making them better suited to your specific environment. This process is called selection, and it’s a key part of seed saving.
By choosing tomato seeds as your starting point, you’ll be able to develop a deeper understanding of the seed saving process and gain hands-on experience with a relatively easy crop to work with.
Preparing Tomatoes for Seed Saving
Before you can save those precious tomato seeds, it’s essential to prepare them for harvesting. This process involves selecting healthy tomatoes and removing any seeds that won’t germinate properly.
Choosing the Right Variety
When selecting tomatoes for seed saving, it’s essential to consider several factors to ensure you’re choosing varieties that will produce high-quality seeds. Disease resistance is a crucial factor, as you’ll want to avoid spreading diseases like fusarium wilt or nematodes to other plants. Look for tomato varieties that have built-in disease resistance, such as ‘Early Girl’ or ‘Patio’.
Another critical consideration is maturity days – how long it takes for the plant to produce fruit and mature seeds. If a variety matures too quickly, its seeds may not have had enough time to develop properly. Conversely, if it takes too long for the plant to mature, you might miss the optimal seed saving window.
Growth habits are also vital when selecting tomatoes for seed saving. Bush varieties tend to be more compact and easier to manage, while indeterminate varieties can grow quite large and may require support. Some popular varieties that excel in these areas include ‘Tiny Tim’, ‘Yellow Pear’, and ‘Brandywine’. By carefully choosing the right variety, you’ll set yourself up for successful seed saving.
When to Harvest Seeds
When to Harvest Tomato Seeds is a critical consideration for successful seed saving. As you wait patiently for your tomato seeds to mature, it’s essential to know when they’re ripe and ready for harvesting.
One of the primary visual cues for determining ripeness is the color change of the pod or capsule enclosing the seeds. Typically, this occurs around 60-90 days after sowing, depending on the variety and growing conditions. As the pod starts to dry out and turn from green to brown or tan, it’s a sign that the seeds are almost ready.
Another crucial indicator is the softening of the seed pods’ stems. Gently twist the stem; if it breaks easily, the seeds are likely mature. Be cautious not to damage the plant when harvesting, as this can reduce next year’s yield.
Timing-wise, consider the optimal harvest period: most varieties reach peak maturity in late summer to early fall. Harvesting too soon may result in underdeveloped or immature seeds, while waiting too long risks losing them entirely due to decay or spoilage. Check your plant daily during peak ripening periods to ensure you catch the perfect moment for harvesting.
Keep an eye out for these visual and timing cues, and with a little patience, you’ll be able to harvest high-quality tomato seeds for next year’s crop.
Collecting and Cleaning Tomato Seeds
When it comes to collecting and cleaning tomato seeds, you’ll want to carefully separate the seeds from the gel-like substance surrounding them, known as pith. This process is crucial for successful seed saving.
Removing Fruit Flesh
Removing excess fruit flesh from tomato seeds is an essential step to ensure successful germination and seedling growth. To do this efficiently, start by cutting the tomatoes into small pieces, making it easier to extract the seeds. Use a spoon or specialized seed scoop to carefully remove the seeds from the pulp.
Next, rinse the seeds in a fine-mesh strainer under cold running water to wash away any remaining pulp and debris. This step helps prevent fungal diseases that can develop on damp seed coats. After rinsing, place the seeds in a bowl of clean water to separate them further. Let it sit for about 15-20 minutes, allowing the light seeds to float to the surface.
Skim off the floating seeds using a slotted spoon and transfer them to a clean paper towel-lined plate. Gently pat dry with another paper towel to remove excess moisture. Avoid rubbing or pressing too hard on the seeds as this can cause damage.
Now your tomato seeds are ready for drying, either air-drying in a well-ventilated area or using a seed dryer specifically designed for seed preservation. Proper removal of fruit flesh and cleaning is crucial to maintaining seed viability.
Drying and Storage
Drying seeds properly is crucial to maintain their viability and longevity. Excess moisture can cause mold, bacteria, and fungal growth that can destroy the seeds. To dry tomato seeds, spread them out on a paper towel or cloth and allow them to air dry for 1-2 weeks. You can also use a dehydrator on low heat (95°F – 105°F) for 1-3 days.
Proper storage of dried seeds is equally important. Store them in a cool, dark place with low humidity, such as an envelope or jar inside a cupboard. The ideal temperature for storing tomato seeds ranges from 32°F to 50°F (0°C to 10°C). Avoid storing seeds near direct sunlight, heaters, or air conditioning vents.
When packing seeds for long-term storage, use breathable materials like paper envelopes or cloth bags. Label each container with the seed variety and date. Store small quantities of seeds in separate containers to avoid cross-contamination and maintain seed integrity. This will ensure your tomato seeds remain viable for future planting seasons.
Seed Germination and Viability Testing
Now that you’ve harvested your tomato seeds, it’s essential to test their viability to ensure they’ll grow into healthy plants. We’ll walk you through the simple process of germination and testing.
The Role of Moisture Control
Moisture levels play a crucial role in seed germination and storage. Seeds require a certain level of moisture to activate enzymes that break down stored food reserves, allowing the seedling to grow. However, excess moisture can lead to mold growth, rotting, and seed death.
To maintain optimal humidity levels during storage, it’s essential to keep seeds away from direct sunlight, heat sources, and high-humidity areas. Store seeds in airtight containers or envelopes, ensuring they are completely dry before sealing. You can also use desiccants like silica gel or activated charcoal to absorb excess moisture.
When storing seeds for long-term preservation, aim for a relative humidity (RH) level between 20-50%. This range allows for slow and controlled moisture loss, preventing seed degradation. For example, you can store tomato seeds in an envelope with a small packet of silica gel for up to two years without significant losses.
Monitor the storage conditions regularly to ensure the RH levels remain within the optimal range. By controlling moisture levels, you’ll be able to preserve your precious tomato seeds and maintain their viability for future planting.
Performing Seed Viability Tests
To ensure that you’re saving viable seeds for future planting, it’s essential to test their viability before storing them. This process involves assessing whether the seeds are capable of germinating under optimal conditions. Two popular methods for testing seed viability are the float test and paper towel method.
The float test is a quick and easy way to determine if your tomato seeds are viable. To perform this test, fill a glass or container with water and gently add a few seeds to it. Observe whether the seeds sink or float to the surface. Non-viable seeds will usually sink to the bottom of the container, while healthy seeds will remain suspended in the water. This method is particularly useful for large quantities of seeds.
The paper towel method involves placing a single seed between two moistened paper towels and sealing them in a plastic bag or ziplock. Place this bag in a warm location, such as a pantry or cupboard, and wait 3-5 days to observe germination. If the seed sprouts, it’s likely viable. This method is more accurate than the float test but requires a bit more time.
When performing either of these tests, be sure to handle your seeds gently to avoid damage. It’s also essential to use fresh water and maintain proper humidity levels during the testing process. By following these steps, you’ll have a clear indication of your seed viability, allowing you to store or discard them accordingly.
Planting Saved Tomato Seeds
Now that you’ve saved your tomato seeds, it’s time to plant them and give them a chance to grow into healthy seedlings. This process requires attention to soil quality and optimal growing conditions.
Preparing Soil Conditions
When planting saved tomato seeds, it’s essential to prepare the soil conditions for optimal growth. The pH level of your soil plays a crucial role in seed germination and plant development. Most tomatoes prefer a slightly acidic to neutral soil pH between 6.0 and 7.0. If your soil is too alkaline or acidic, it can hinder seedling growth.
Before planting, test the pH level of your soil using a pH meter or send a sample to a laboratory for analysis. Based on the results, you may need to adjust the pH by adding lime to raise the pH or sulfur to lower it. Nutrient content is also vital; tomatoes require a balanced mix of nitrogen, phosphorus, and potassium.
To enhance nutrient levels, consider adding compost or well-rotted manure to your soil. You can also use a fertilizer specifically formulated for tomatoes, following the manufacturer’s instructions. If you’re using saved seeds from a hybrid variety, be aware that the resulting plants may not produce true-to-type offspring.
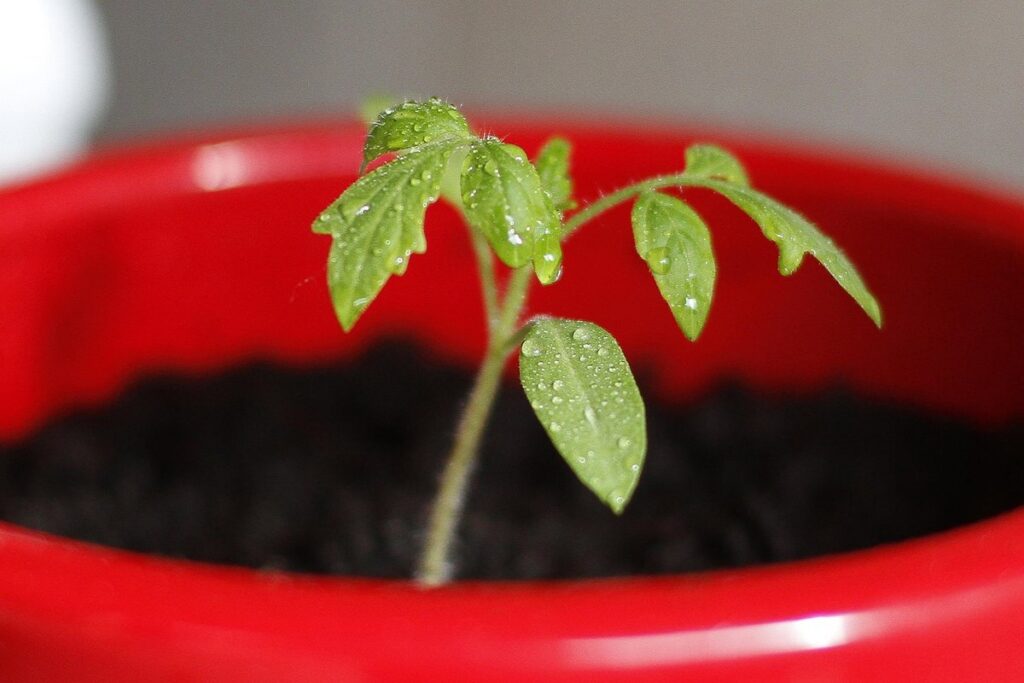
Seedling Care and Transplantation
Once you’ve successfully germinated and transferred your seedlings to individual pots, it’s time to focus on their care. Watering is crucial at this stage, as the seedlings need consistent moisture to develop strong root systems. Make sure to water thoroughly, but avoid overwatering, which can lead to fungal diseases.
As for pruning, remove any weak or spindly growth to promote healthy development and encourage bushy growth. You can also trim back the seedlings by about half to prevent them from becoming leggy. This will help them focus their energy on producing robust fruit rather than extensive foliage.
Another essential aspect of seedling care is protection from pests and diseases. Keep a close eye out for common issues like aphids, whiteflies, and powdery mildew. To prevent these problems, use neem oil or insecticidal soap to control infestations, and ensure good air circulation around the seedlings.
To give your seedlings an extra boost, provide them with partial shade during the hottest part of the day. This will help regulate their growth and prevent scorching from intense sunlight.
Frequently Asked Questions
How do I know if my tomato seeds are viable after a year of storage?
Yes, you can still have successful germination rates even after storing your tomato seeds for up to two years or more. However, it’s crucial to perform regular seed viability tests using simple methods like the paper towel test or agar gel. This will ensure that you’re not planting dead seeds.
What’s the best way to store dried tomato seeds in a small space?
When storing dried tomato seeds in a small space, it’s essential to maintain optimal humidity and temperature levels. You can use glass jars with tight-fitting lids, paper envelopes, or even seed packets specifically designed for long-term storage. Store them in a cool, dark place like a pantry or cupboard.
Can I save seeds from cherry tomatoes?
Yes, you can definitely save seeds from cherry tomatoes. In fact, they’re one of the easiest varieties to work with due to their small size and high germination rates. Just make sure to select seeds from healthy, disease-free plants for optimal results.
How do I handle cross-pollination when saving seeds from heirloom tomatoes?
To minimize cross-pollination issues, it’s essential to isolate your tomato plants from other varieties. You can achieve this by growing them in separate containers or using row covers to prevent bees and other pollinators from transferring pollen between plants.
Can I share my saved tomato seeds with friends and family who live far away?
Yes, you can definitely share your saved tomato seeds with others, but make sure they understand the importance of seed saving and proper storage techniques. Also, encourage them to save seeds from their own plants to create a diverse gene pool and promote regional adaptability.