Starting a community garden is more than just digging in the dirt – it’s about building connections, growing healthy food, and cultivating a sense of community. If you’re dreaming of transforming an underused space into a vibrant oasis where people can come together to grow and learn, then this guide is for you. Whether you’re a seasoned gardener or a newcomer to green thumbs, we’ll walk you through the essential steps to get your community garden off the ground. From selecting the perfect location to securing funding and resources, we’ll cover it all. In this comprehensive article, you’ll discover expert tips and advice on how to plan, build, and launch a thriving community garden that brings people together and serves as a model for sustainable living in your neighborhood.
Choosing the Perfect Location
When selecting a location for your community garden, consider factors like sunlight, accessibility, and available resources to ensure its long-term success. A well-chosen spot will set the stage for a thriving garden.
Assessing Sunlight and Water Accessibility
When selecting a location for your community garden, it’s essential to consider the accessibility of sunlight and water. These two factors will significantly impact the success of your garden, and making informed decisions upfront can save you time and resources in the long run.
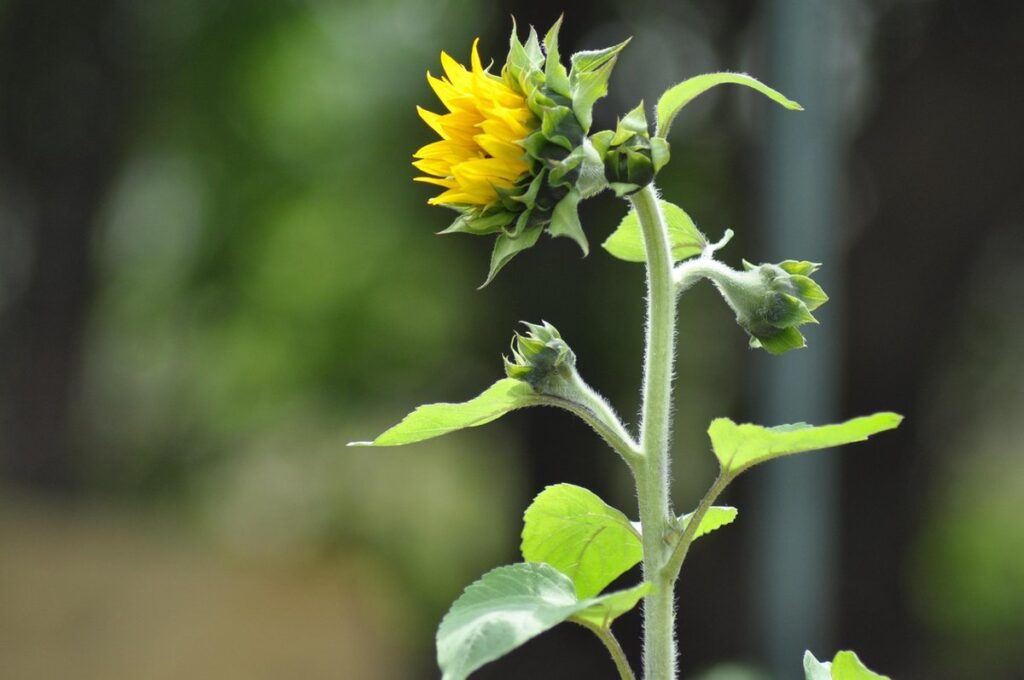
Start by assessing the amount of direct sunlight your potential site receives throughout the day. Most vegetables require at least six hours of direct sunlight per day to thrive, so choose a spot that gets unobstructed sunlight for at least half the day. If possible, observe the location during different times of year and weather conditions to ensure it remains sunny even during winter months.
Next, evaluate the water accessibility in your chosen location. Consider the proximity to a reliable water source, such as a municipal water supply or a rainwater collection system. You’ll also want to think about the slope and drainage of the land to prevent waterlogging and erosion. Ideally, choose a flat area with good drainage to make maintenance easier.
Some community gardens even incorporate green roofs or vertical gardening systems that utilize existing walls for growing space. When evaluating sunlight and water accessibility, keep in mind these innovative solutions can help maximize your garden’s potential while minimizing its footprint.
Evaluating Soil Quality and Potential Contamination
When evaluating soil quality and potential contamination risks, it’s essential to consider several factors that can impact the health of your community garden. Start by examining the site’s history: has it been used for industrial purposes, farmed extensively, or contaminated with pollutants? Check local records or consult with nearby residents to gather information.
Look for visible signs of soil degradation, such as compacted earth, nutrient deficiencies, or excessive weed growth. Test the pH levels and nutrient content using a DIY kit or hiring a professional to conduct more comprehensive analysis. Keep in mind that even if the results are within acceptable ranges, certain contaminants like heavy metals can still pose risks.
To mitigate potential contamination issues, consider implementing measures such as installing a French drain to redirect polluted water away from the site, or using raised beds and containers to reduce soil contact with contaminated materials. If you do identify contaminated soil, consult with local experts on remediation strategies before proceeding with garden development.
Planning Your Community Garden
Now that you’ve got a great location, let’s dive into planning your community garden – where to start, how much space you’ll need, and what features are must-haves for success.
Defining Your Mission and Goals
Defining your community garden’s mission and goals is a crucial step in the planning process. It will help you clarify what you want to achieve with your garden, who it will serve, and how you’ll make it happen. Take some time to reflect on the following questions: What values do you want your garden to represent? Who will be the primary users of the garden (residents, local businesses, schools)? What specific needs or goals do you hope to address through the garden?
As you consider these questions, think about the “why” behind your community garden. Is it to provide a green oasis in an urban area, to promote sustainability and environmental stewardship, or to bring people together through shared gardening experiences? Once you have a clear sense of your mission and goals, use them as a guiding light throughout the planning process. This will help you make informed decisions about everything from garden design to programming and maintenance.
For example, if your goal is to serve low-income families, you may prioritize accessibility features like raised beds or adaptive tools. If your mission is to promote education, you may plan workshops and training sessions for gardeners of all skill levels. By defining your mission and goals up front, you’ll create a clear vision for your community garden and set the stage for its success.
Identifying and Engaging with Key Stakeholders
Engaging local government officials, neighbors, and other stakeholders is crucial for the success of your community garden. They can provide valuable resources, expertise, and support to help you overcome challenges and achieve your goals.
Start by identifying key stakeholders, such as city planners, parks department representatives, and local business owners. Reach out to them through email, phone calls, or in-person meetings to discuss your project and gauge their interest in supporting it. Be prepared to present a clear vision, mission statement, and project plan to help them understand the benefits of your community garden.
Building a strong support network also involves engaging with neighbors and other local residents. Host community meetings, distribute flyers, and use social media to spread the word about your initiative. Encourage interested individuals to join a planning committee or volunteer group to help with tasks such as fundraising, outreach, and maintenance. By fostering a collaborative environment, you’ll be able to build a strong foundation for your community garden and ensure its long-term success.
Some essential tips to keep in mind:
* Be transparent about your goals, budget, and timeline
* Respect the opinions and concerns of stakeholders
* Foster open communication channels through regular updates and meetings
* Show appreciation for support by acknowledging donors, volunteers, and sponsors
By following these steps and building a strong network of supporters, you’ll be well on your way to creating a thriving community garden that benefits not only the environment but also the local community.
Building Your Community Garden Team
As you start building your community garden, recruiting a dedicated team is crucial to its success. This team will help you share responsibilities and ensure the garden thrives over time.
Recruiting and Onboarding Volunteers
Recruiting and onboarding volunteers is crucial to the success of your community garden. You’ll want to create a clear volunteer management plan that outlines roles, responsibilities, and expectations from the get-go. This will help set the tone for a productive and respectful team dynamic.
Start by identifying the key areas where volunteers can make an impact, such as gardening tasks, events planning, and administrative duties. Be specific about what you need help with, whether it’s weeding, harvesting, or building garden infrastructure. Consider creating volunteer opportunities that cater to different skill levels and interests.
When recruiting volunteers, tap into local networks like community centers, schools, and social media groups. Word of mouth is also a powerful tool – ask existing volunteers to spread the word about your garden and encourage others to join in. Be sure to clearly communicate the time commitment, skills required, and benefits (such as access to fresh produce) for each volunteer role.
Once you’ve got a pool of interested volunteers, schedule an orientation session to discuss expectations, share resources, and outline responsibilities. Make sure to provide necessary training and tools for each role, so they feel equipped to contribute meaningfully from the start.
Establishing Leadership Roles and Decision-Making Structures
Establishing clear leadership roles and decision-making structures is crucial for the success of your community garden team. Without a well-defined organizational chart, communication can break down, decisions may be delayed, and responsibilities may become unclear. This can lead to conflicts, inefficiencies, and ultimately, a struggling garden.
To create an effective organizational chart, start by identifying key roles such as Garden Manager, Treasurer, Communications Officer, and Volunteer Coordinator. These roles should be tailored to your community’s specific needs and goals. Consider the skills and strengths of your team members when assigning tasks. For example, if you have an accountant on board, they might take on financial management responsibilities.
Some essential roles to include are:
• Garden Manager: oversees daily operations, sets priorities, and makes tactical decisions
• Treasurer: manages finances, prepares budgets, and ensures compliance with regulations
• Communications Officer: handles social media, public outreach, and marketing efforts
Once you’ve defined these roles, create a functional organizational chart that illustrates how decisions will be made and responsibilities delegated. This can be a simple diagram or a more detailed flowchart.
Securing Funding and Resources
To turn your community garden vision into a reality, you’ll need to secure funding and resources to cover initial costs, including materials and personnel. We’ll explore how to do this effectively next.
Exploring Grant Opportunities and Donations
When starting a community garden, securing funding is crucial to ensure its success. While it’s easy to get caught up in the excitement of planting seeds and watching them grow, you’ll need financial resources to cover initial start-up costs, maintain the garden, and provide educational programs.
Fortunately, there are numerous grant opportunities available for community gardens. These grants can be sourced from local government agencies, foundations, and non-profit organizations that support urban agriculture and environmental initiatives. Research grants in your area by searching online, attending networking events, or reaching out to local gardening associations.
To increase the chances of securing a grant, tailor your proposal to highlight the garden’s unique features and benefits for the community. Showcase how the garden will contribute to environmental sustainability, promote social connections among neighbors, and provide access to fresh produce for underserved populations.
When approaching local businesses, organizations, or individuals for donations, be clear about what their contribution will fund, such as infrastructure costs, tool purchases, or educational workshops. Consider offering recognition in exchange for their support, such as naming a garden bed or sponsoring an event. This approach not only secures much-needed resources but also fosters partnerships and encourages community engagement.
Building Partnerships with Local Businesses and Organizations
Building partnerships with local businesses and organizations can be a game-changer for your community garden. Not only do these relationships bring in valuable resources, but they also help spread the word about your project and build a sense of ownership among stakeholders.
When reaching out to potential partners, consider what each organization can offer. A nearby nursery might donate plants or provide discounted materials, while a local café could host workshops or fundraising events. Even small contributions, like donating soil or offering a discount on gardening tools, can make a big difference.
It’s essential to approach these partnerships in a mutually beneficial way. Clearly outline the benefits of collaboration and be specific about what you’re asking for. For instance, if you’re partnering with a local hardware store, suggest that customers receive a discount when purchasing items for your garden in exchange for the store’s donation.
By fostering these relationships, you’ll not only secure essential resources but also create a sense of community around your garden. This collaborative approach will help drive growth and make your project more sustainable in the long run.
Preparing Your Garden Site
Before breaking ground, it’s essential to prepare your garden site properly to ensure a thriving community garden. This includes clearing debris and leveling the land for optimal growth conditions.
Clearing and Preparing the Land
Clearing and preparing the land is one of the most critical steps in establishing a thriving community garden. It’s essential to start with a clean slate to ensure the health and productivity of your plants. Begin by removing debris such as rocks, twigs, and weeds. You can use a rake or a hoe for this task, depending on the size of the area and the type of debris.
Next, till the soil to loosen it up and remove any compacted layers. This will allow roots to grow deeper and facilitate better drainage. Use a garden fork or a rototiller for this step, being careful not to damage nearby plants or structures.
To create a level surface, use a rake and a shovel to build up low areas and fill in holes. You can also use a laser level to ensure your surface is perfectly even. This might seem like a tedious task, but trust us – it’s worth the effort for a garden that will thrive for years to come.
Remember to take into account any slope or uneven terrain on your site and adjust your preparations accordingly.
Installing Irrigation Systems and Other Essential Infrastructure
Installing irrigation systems and other essential infrastructure is a crucial step in preparing your garden site. Not only will it save you time and effort in maintaining your community garden, but it will also ensure that plants receive the right amount of water to thrive.
When selecting materials for irrigation systems, consider using durable and long-lasting options such as PVC pipes or recycled plastic tubes. These materials are easy to install and maintain, and can withstand harsh weather conditions. For example, you can use a drip irrigation system to deliver water directly to plant roots, reducing evaporation and runoff.
In addition to irrigation systems, paths and fencing are essential infrastructure for your community garden. Paths made from permeable materials like gravel or wood chips will allow rainwater to percolate into the soil while preventing erosion. Fencing can help define different areas within the garden, provide security, and create a sense of enclosure. Consider using reclaimed wood or sustainable materials for fencing to minimize environmental impact.
Launching Your Community Garden
Now that you’ve got a solid plan, it’s time to bring your community garden to life by launching it and getting it up and running smoothly. This involves securing a location and gaining support from local residents.
Developing Educational Programs and Workshops
Developing educational programs and workshops is a crucial aspect of launching a thriving community garden. By offering these resources, you can engage community members, promote sustainable gardening practices, and create a sense of ownership among participants.
Educational programs and workshops should focus on teaching essential skills such as composting, rainwater harvesting, and integrated pest management. These topics not only benefit the garden’s ecosystem but also empower individuals to adopt environmentally friendly practices in their own backyards.
To make your programs more engaging, consider partnering with local experts or organizations to lead workshops. For example, you could invite a master gardener to teach a session on permaculture principles or collaborate with a local nursery to host a seed-starting workshop.
By investing time and effort into developing educational programs and workshops, you’ll not only enhance the garden’s reputation but also foster a sense of community among participants. As word spreads about your innovative approach, more people will be attracted to join and contribute to your thriving community garden.
Establishing Rules and Guidelines for Garden Use
Establishing clear rules and guidelines for garden use is crucial to ensure the success of your community garden. It sets expectations for plot maintenance, waste management, and conflict resolution, creating a harmonious environment where members can share resources and knowledge.
When it comes to plot maintenance, define what’s expected in terms of weeding, watering, and fertilizing. Specify that each plot holder is responsible for their assigned area and should maintain it according to the garden’s standards. This may also include requirements for pruning, deadheading, or removing weeds from adjacent plots.
Additionally, outline a waste management plan to ensure members properly dispose of organic waste, recyclables, and trash. Designate areas for composting and recycling to encourage sustainable practices within the community. When conflicts arise, establish a clear process for addressing grievances, such as mediation, compromise, or involving garden leaders if necessary.
By implementing these guidelines, you’ll create an organized and respectful environment where members can thrive. This will also help prevent misunderstandings and resolve issues before they escalate.
Frequently Asked Questions
How do I involve local schools and youth groups in my community garden’s planning process?
Involving local schools and youth groups can bring fresh ideas, enthusiasm, and a sense of ownership to your community garden. Start by reaching out to school administrators or community centers to discuss potential collaborations. Consider hosting workshops or events that engage youth in the design process, allowing them to contribute their perspectives on what features they’d like to see in the garden.
Can I start small with a pilot project before scaling up my community garden?
Starting small is an excellent approach when building a community garden, especially if you’re new to gardening or haven’t secured funding yet. Consider launching a pilot project that focuses on a specific aspect of your vision, such as composting or educational programs. This will allow you to test ideas, refine processes, and build momentum before expanding.
How can I ensure my community garden is accessible for people with disabilities?
Creating an inclusive space is crucial for building a thriving community garden. Consider consulting with accessibility experts or organizations specializing in inclusive design. You might also consider installing ramps, wide pathways, and accessible irrigation systems to ensure that all gardeners can participate comfortably.
What are some common mistakes to avoid when planning my community garden’s infrastructure?
When designing your garden’s infrastructure, be mindful of common pitfalls such as inadequate drainage, insufficient storage space, or poorly planned irrigation systems. Research best practices for community garden design and consider consulting with experienced gardeners or experts in sustainable gardening practices to ensure your infrastructure is functional and efficient.
Can I partner with local businesses to secure funding or resources for my community garden?
Partnering with local businesses can be a great way to secure funding, expertise, or resources for your community garden. Research potential partners by attending community events, networking with business owners, or reaching out to local business associations. Develop clear proposals outlining the benefits of collaborating and how their involvement will contribute to the success of your garden.