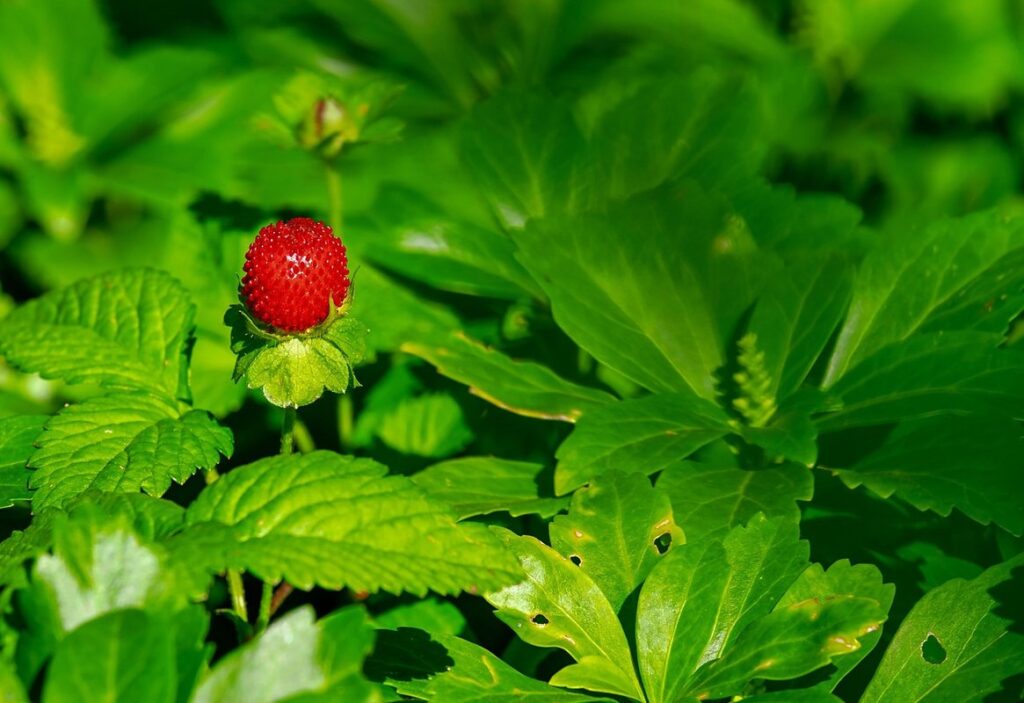
Are you looking to give your strawberry bed a much-needed boost? A well-maintained strawberry bed is crucial for a bountiful harvest, but signs of renewal needs can quickly pile up if not addressed. Your strawberry plants need regular care to stay healthy and productive, but it’s easy to overlook the importance of renewal. A revitalized strawberry bed means more delicious fruits for you and your family, and that’s exactly what we’re here to help you achieve.
In this comprehensive guide, we’ll walk you through the benefits of renewing your strawberry bed, signs that indicate a need for renewal, preparation steps, and best practices to ensure a thriving harvest. By following our expert advice, you’ll be able to identify areas for improvement in your strawberry bed and implement necessary changes to revive it. With our help, you can enjoy a more productive and fruitful strawberry season than ever before.
Understanding the Importance of Strawberry Bed Renewal
When it comes to maintaining a thriving strawberry bed, renewal is essential for optimal yields and long-term productivity. Let’s dive into why regular renewal is crucial for your strawberries’ success.
Benefits of Regular Renovation
Regular strawberry bed renewal is not just a maintenance task; it’s an investment in your crop’s future. By renewing your strawberry bed regularly, you can expect to see significant improvements in crop yield, reduced disease risk, and enhanced soil fertility.
One of the most noticeable benefits is the increase in crop yield. When old plants are removed, new ones have room to grow, leading to a healthier and more productive harvest. For example, if you’re currently getting 5-6 strawberries per plant, with regular renewal, you can expect that number to jump to 8-10 or even more. This is because the new plants will be less susceptible to diseases and pests, allowing them to grow stronger and produce more fruit.
Regular renewal also reduces the risk of disease by breaking the disease cycle that old plants often harbor. New soil and plants bring in fresh nutrients, making it harder for diseases to take hold. Additionally, regular soil aeration and replacement improve soil fertility, providing your strawberry plants with the optimal growing conditions they need to thrive. By incorporating renewal into your routine, you’ll be giving your strawberries the best chance at a healthy and productive life cycle.
Signs That Your Strawberry Bed Needs Renewal
As you tend to your strawberry bed, it’s not uncommon for it to reach its limit and require renovation. But how do you know when it’s time to give your bed a facelift? Look out for these telltale signs that indicate your strawberry bed needs renewal:
Declining yields are often the first indicator that your bed is due for a makeover. If you’re not harvesting as much fruit as you used to, or if the quality of the strawberries has decreased, it may be time to revamp your bed.
Increased weed pressure can also signal the need for renovation. Weeds can outcompete strawberry plants for water and nutrients, leading to reduced yields and plant stress. If you find yourself constantly battling weeds in your strawberry bed, it’s likely that the bed itself is a contributing factor.
Visible damage to the plants is another clear sign that your bed needs attention. Pests, diseases, or physical damage can all take their toll on your strawberries, making them more susceptible to further harm. Regular inspections of your bed will help you catch any problems before they become major issues.
Preparing for Strawberry Bed Renovation
Before you start renovating your strawberry bed, it’s essential to prepare thoroughly to avoid any setbacks and ensure a successful renewal process. This section will guide you through the necessary steps to get ready for the transformation.
Assessing the Current Soil Conditions
Before embarking on a strawberry bed renovation, it’s crucial to assess the current soil conditions. This step may seem mundane, but it can make all the difference in the success of your project. A thorough evaluation will help you identify areas that need improvement, ensuring your strawberry plants receive the right environment to thrive.
Start by checking the pH level of your soil using a DIY testing kit or sending a sample to a lab for analysis. The ideal pH range for strawberries is between 5.5 and 6.5. If your soil falls outside this range, you’ll need to take corrective measures to adjust it. For example, if your soil is too acidic (low pH), adding lime can help raise the pH.
Next, examine the nutrient levels in your soil. Strawberries require a balanced diet of nitrogen, phosphorus, and potassium (NPK) to grow robustly. You can test for these macronutrients using a similar DIY kit or lab analysis. Based on the results, you may need to fertilize your soil accordingly.
Finally, inspect the structure of your soil. Check its texture, drainage, and aeration. Strawberries prefer well-draining, loose soil that allows their roots to breathe easily. If your soil is too dense or waterlogged, consider adding organic matter like compost to improve its structure.
By taking these initial steps, you’ll be better equipped to create an optimal environment for your strawberry plants to flourish during the renovation process and beyond.
Removing Old Plants and Debris
Removing old strawberry plants, weeds, and debris from the bed is an essential step in preparing for a successful renovation. It’s not just about clearing out space; it’s also about reducing competition for nutrients and minimizing the risk of disease and pests transferring to new plants.
To begin, put on your gardening gloves and take a closer look at the existing strawberry plants. Identify any diseased or damaged plants that need to be removed immediately. Cut back any dead or overgrown stems using pruning shears or loppers. For more extensive renovation, consider using a garden fork to gently loosen the soil around the old plant roots.
Make sure to dispose of all debris properly, either by composting it or sending it to a local recycling facility. Be cautious when removing weeds, as some may have spread their seeds or developed underground rhizomes that can resprout if not completely eradicated. Take care to remove any remaining debris and level the soil to create an even surface for your new strawberry bed.
Strawberry Bed Design and Layout
When it comes to renewing your strawberry bed, proper design and layout are crucial for a bountiful harvest. Let’s dive into the key considerations for creating an optimal growing space.
Choosing the Right Variety for Your Climate
When selecting strawberry varieties for your bed renewal project, it’s crucial to choose ones that thrive in your local climate and growing conditions. This is where things can get tricky, as strawberries come in a wide range of varieties, each with its own strengths and weaknesses.
To start, consider the average temperature, rainfall, and sunlight patterns in your area. Some strawberry varieties are bred specifically for cooler or warmer climates, while others are more tolerant of drought or heavy rainfall. For example, ‘Albion’ is a popular variety that performs well in coastal areas with mild winters and cool summers, but may not fare as well in hotter inland regions.
When choosing the right variety for your climate, look for the following characteristics:
• Chill hours: Some strawberry varieties require a certain number of chill hours (hours below 45°F) to produce fruit. If you live in an area with limited winter chill hours, choose a variety that is less sensitive to this requirement.
• Disease resistance: In areas prone to disease outbreaks, select varieties with built-in resistance to common strawberry diseases like powdery mildew or botrytis.
• Maturity days: Consider how long it takes for the variety to mature from planting to harvest. If you’re looking for an early crop, choose a variety that matures quickly (around 60-70 days).
Planning an Efficient Bed Layout
When planning an efficient bed layout for your strawberry plants, it’s essential to consider several key factors. First and foremost, think about spacing. Strawberries need adequate room to grow and spread out their roots. Aim for a minimum of 12-18 inches between each plant, depending on the variety. This will also make it easier to access each plant for pruning and harvesting.
Another crucial factor is sunlight. Most strawberry varieties require at least six hours of direct sunlight per day. Make sure your bed receives sufficient sunlight by choosing a location that faces east or south. If this isn’t possible, consider using grow lights to supplement the natural light.
Irrigation requirements are also critical. Strawberries need consistent moisture, especially during fruiting. Ensure your bed has good drainage and consider installing a drip irrigation system for efficient watering. Aim to provide about 1-2 inches of water per week, either from rainfall or irrigation. By considering these factors in your bed layout, you’ll be well on your way to creating an optimal growing environment for your strawberries.
Renovation Techniques for Strawberry Beds
When it comes to giving your strawberry beds a makeover, renovation techniques can make all the difference in their health and productivity. Let’s dive into some effective methods to revitalize your strawberry patch.
Tilling and Turning Over the Soil
When it’s time to renew your strawberry bed, tilling and turning over the soil is an essential step. This process breaks up compacted soil, removes weeds, and prepares the ground for new strawberry plants. Start by removing any debris, old plant material, or remaining strawberries from last season.
To till effectively, use a garden fork or rototiller to loosen the top 6-8 inches of soil. If you have heavy clay or rocky soil, consider renting a more powerful tool like a power tiller. Be cautious not to over-till, as this can damage the underlying root system and affect future crop yields.
As you work, turn over the soil in multiple passes, incorporating any organic matter such as compost or well-rotted manure. This will improve drainage, fertility, and overall structure of the soil. After tilling, rake the area to smooth out the surface and create a level bed for planting new strawberries. Remember to water thoroughly after completing this process to settle the soil and prepare it for the next step in strawberry bed renewal.
Adding Organic Matter and Fertilizers
When renovating strawberry beds, it’s essential to add organic matter and fertilizers to improve soil structure, fertility, and overall health. Organic matter such as compost, manure, or peat moss helps to enrich the soil by increasing its water-holding capacity, aeration, and nutrient supply. This in turn promotes healthy root growth, fruit production, and disease resistance.
Compost, for instance, can be made from kitchen waste, leaves, or grass clippings. Mixing 2-3 inches of compost into the top 6-8 inches of soil will greatly improve its structure. Additionally, fertilizers such as fish bone meal, alfalfa meal, or blood meal provide a slow release of nutrients that promote plant growth.
Aim to add 1-2 pounds of fertilizer per square foot of bed, depending on the variety and age of your strawberry plants. You can also use mulch like straw or wood chips to retain moisture, suppress weeds, and regulate soil temperature. Apply these amendments in spring or fall when plants are dormant, allowing them to absorb nutrients throughout the growing season.
Aftercare and Maintenance
Now that you’ve renewed your strawberry bed, it’s essential to keep it thriving with proper care and maintenance to ensure a bountiful harvest next season. We’ll walk you through what to do after planting is complete.
Watering and Irrigation Strategies
Proper watering and irrigation are crucial for newly renovated strawberry beds. The goal is to provide enough moisture without over- or under-watering, which can lead to nutrient deficiencies or even plant loss. A general rule of thumb is to water deeply but infrequently, allowing the soil to dry slightly between waterings.
To determine how much water your strawberries need, monitor soil moisture by inserting a finger into the soil up to the knuckle. If the top 2-3 inches feel dry, it’s time for watering. You can also use a moisture meter or install an irrigation system with a timer and sensor.
Aim to deliver about 1 inch of water per week, either through rainfall or irrigation. For young plants, you may need to water more frequently, while mature plants can tolerate longer periods between waterings. Be mindful of temperature fluctuations, as strawberries require more water in warmer weather and less in cooler conditions.
Monitoring and Controlling Pests and Diseases
Monitoring and controlling pests and diseases is crucial for maintaining a healthy strawberry bed. Common issues that can affect strawberries include aphids, whiteflies, spider mites, powdery mildew, and botrytis. These pests and diseases can be detrimental to the health of your plants, reducing yields and affecting fruit quality.
To monitor for these issues, inspect your plants regularly, checking for signs of infestation or disease such as yellowing leaves, distorted growth, or visible insects on the undersides of leaves. Keep an eye out for eggs, larvae, or actual pests like aphids, whiteflies, or spider mites. If you notice any problems, take action quickly to prevent them from spreading.
Use integrated pest management (IPM) techniques to control pests and diseases. This approach involves using a combination of methods such as crop rotation, cultural controls, biological controls, chemical controls, and resistant varieties. For example, introducing beneficial insects like ladybugs or lacewings can help control aphid populations naturally.
Conclusion
Now that you’ve completed the strawberry bed renewal process, let’s review what you’ve learned and summarize key takeaways to ensure long-term success. Here are some final reminders.
Recap of Key Takeaways
In recap, we’ve covered all the essential aspects of strawberry bed renewal to ensure your strawberry plants continue thriving. Regular renewal is crucial for maintaining soil health, promoting healthy root growth, and preventing pests and diseases from taking hold.
To begin with, preparation is key. This involves assessing your current strawberry bed’s condition, clearing out weeds, and removing any debris or old plants that may be hindering the growth of new ones. Don’t forget to take note of the soil pH level, as strawberries prefer a slightly acidic environment (around 5.5-6.5). Make sure to mix in organic matter like compost or well-rotted manure to enrich the soil with nutrients.
When it comes to renovation techniques, there are several methods you can employ depending on your strawberry bed’s state. For example, if your bed is relatively young and healthy, a simple rotation of plants every 3-4 years will suffice. However, if your bed is struggling or has become depleted in certain areas, consider dividing the existing plants to create more space for new growth.
Aftercare plays just as significant a role in strawberry bed renewal. Be sure to water newly planted strawberries regularly until they’re established, and provide adequate support with netting or trellises to keep them upright. Mulching around your strawberry plants will also help retain moisture, suppress weeds, and regulate soil temperature.
Finally, maintenance is essential for keeping your strawberry bed running smoothly. Monitor for signs of pests, diseases, or nutrient deficiencies regularly, and take corrective action as needed. Keep a record of your strawberry bed’s progress, noting any areas that require special attention in the future. By following these guidelines and staying on top of routine care, you’ll be able to enjoy a bountiful harvest from your strawberry bed for years to come.
Frequently Asked Questions
What if I don’t know my strawberry bed’s exact age, can I still proceed with the renewal process?
Yes, you can still proceed with the renewal process even if you’re unsure about your strawberry bed’s exact age. As a general rule of thumb, it’s recommended to renew your strawberry bed every 3-5 years to maintain optimal productivity and prevent disease buildup.
How often should I be checking for signs of renewal needs in my strawberry bed?
It’s essential to regularly inspect your strawberry bed for signs of renewal needs, ideally at the beginning and end of each growing season. This will help you catch any potential issues early on and make necessary adjustments before they impact your crop yield.
Can I reuse old strawberry plants after a complete bed renovation, or should I replace them entirely?
Yes, you can reuse old strawberry plants after a complete bed renovation if they’re healthy and show no signs of disease. However, it’s often recommended to replace them entirely every 3-5 years to maintain optimal productivity and prevent disease buildup.
What are some common mistakes beginners make when renovating their strawberry beds, and how can I avoid them?
Common mistakes include not preparing the soil adequately before planting new strawberries, over-tilling the soil which can damage roots, and not removing all debris and old plant material. To avoid these mistakes, take your time to thoroughly prepare the soil, remove all debris and old plants, and consider consulting with an experienced gardener if needed.
Can I use organic matter like compost or manure tea as a substitute for synthetic fertilizers in my strawberry bed?
Yes, you can use organic matter like compost or manure tea as a substitute for synthetic fertilizers. In fact, using natural methods to improve soil fertility is often recommended as it promotes long-term soil health and reduces the risk of disease buildup associated with synthetic fertilizers.