Are you ready to unlock the secrets of one of nature’s most versatile plants? Witch hazel has been used for centuries in skincare, medicine, and more – but have you ever tried growing it yourself? With its fascinating history and numerous benefits, witch hazel is a must-have plant for any gardener or DIY enthusiast. In this ultimate guide, we’ll take you on a journey from the origins of witch hazel to propagation methods, care tips, and harvesting techniques. We’ll cover everything you need to know to successfully grow and utilize your own witch hazel plants, from its uses in skincare products to its medicinal properties. Whether you’re looking for natural remedies or simply want to add some unique greenery to your garden, this guide has got you covered – let’s dive into the world of growing witch hazel together!
History and Origins of Witch Hazel
Witch hazel has a rich history that spans centuries, from its early use by Native Americans to modern-day skincare routines. Let’s delve into its fascinating origins and evolution over time.
Brief History of Witch Hazel Use
Witch hazel has been used for centuries in traditional medicine, skincare, and perfumery. Its origins date back to North America, where the Native Americans would use the plant’s bark, leaves, and twigs to treat various ailments. They believed it had antiseptic and anti-inflammatory properties, which could be used to heal wounds, reduce fever, and ease pain.
Early European colonizers learned about witch hazel from the Native Americans and began cultivating it in their own gardens. They discovered its versatility and started using it not only for medicinal purposes but also as a skin toner and astringent. The plant’s fragrant flowers were used to create perfumes and potpourri.
In fact, by the 18th century, witch hazel was widely cultivated in Europe and was considered an essential ingredient in many high-end skincare products. Skincare enthusiasts would apply it directly to their skin to reduce the appearance of pores and calm irritated complexions. Perfumers, on the other hand, prized the plant’s flowers for their unique, sweet fragrance.
Today, witch hazel remains a popular ingredient in modern skincare routines and is still used to treat various health issues. Its natural antiseptic properties make it an effective remedy for acne, redness, and irritation.
Medicinal Properties of Witch Hazel
Witch hazel has been revered for centuries for its medicinal properties, which have made it an essential remedy for various ailments. Its antiseptic qualities make it effective against bacteria and other microorganisms, reducing the risk of infection and promoting faster healing. This is evident from its traditional use as a treatment for wounds, cuts, and burns.
The anti-inflammatory properties of witch hazel also play a crucial role in soothing irritated skin and reducing redness. It’s often used to alleviate symptoms associated with eczema, acne, and rosacea. By applying witch hazel topically, you can calm down inflamed areas and promote a healthy balance of skin oils.
In addition to its antiseptic and anti-inflammatory properties, witch hazel has strong astringent qualities that help tighten and tone the skin. This makes it an excellent remedy for reducing pores and minimizing the appearance of fine lines and wrinkles. You can use witch hazel as a toner after cleansing your face or as a treatment for specific skin concerns.
When using witch hazel medicinally, be sure to dilute it with water according to the product’s instructions. Witch hazel is a concentrated liquid, so excessive application can cause irritation. As with any new skincare product, perform a patch test before incorporating it into your routine to ensure you don’t have any adverse reactions.
Choosing the Right Variety
When it comes to growing witch hazel, selecting the right variety is crucial for success. With dozens of species and cultivars to choose from, we’ll help you narrow down your options in this section.
Understanding Witch Hazel Types
Witch hazel comes in several species and cultivars, each with its unique characteristics. One of the most common species is Hamamelis virginiana, native to eastern North America. This variety grows relatively slowly, reaching a mature height of around 20-30 feet. It thrives in well-drained soil and tolerates drought conditions, but also prefers moist, acidic soils. Its hardiness zone ranges from 5-8.
Hamamelis mollis, on the other hand, is native to China and Japan. This species grows more quickly than H. virginiana, reaching heights of up to 30 feet in a few years. It prefers well-drained soil with a slightly acidic pH and tolerates full sun to partial shade. Its hardiness zone ranges from 5-9.
Hamamelis vernalis is another popular variety, native to the western United States. It grows relatively quickly, reaching heights of up to 30 feet in 10 years. This species prefers moist, well-drained soil and full sun to partial shade. Its hardiness zone ranges from 6-8.
Selecting a Suitable Location for Your Witch Hazel
When it comes to selecting a suitable location for your witch hazel plants, there are several essential factors to consider. First and foremost, keep in mind that witch hazels prefer full sun to partial shade, so choose a spot that receives at least 6 hours of direct sunlight per day. This will help them thrive and produce those beautiful, fragrant flowers.
Next, think about the soil type. Witch hazels prefer well-draining soil with a slightly acidic pH (around 6.0-7.0). If your soil is heavy clay or prone to waterlogging, consider raising the bed or installing a French drain to ensure good drainage.
Finally, pay attention to moisture levels. Witch hazels are relatively drought-tolerant once established, but they do prefer regular watering during their first year of growth. Avoid overwatering, which can lead to root rot and other problems. Water them deeply once or twice a week, depending on weather conditions.
When selecting a location, also consider the mature size of your witch hazel plant (around 6-10 feet tall). Give it plenty of space to grow without overcrowding nearby plants. With these factors in mind, you’ll be well on your way to creating an ideal environment for your witch hazels to flourish.
Planting and Care
Now that you’ve got a witch hazel plant, it’s time to focus on planting and caring for it, ensuring it thrives in its new home. This is where things can get a bit tricky!
Preparing the Soil for Your Witch Hazel
When it comes to planting witch hazel, preparing the soil is just as important as choosing the right location and variety. Witch hazel prefers well-draining, fertile soil that’s rich in organic matter. To achieve this, start by testing your soil pH. Witch hazel thrives in a slightly acidic to neutral soil pH range of 6.0-7.0. If your soil is too alkaline or acidic, you may need to add lime or sulfur to adjust the pH.
In terms of nutrient requirements, witch hazel needs a balanced fertilizer diet. A general-purpose fertilizer with a 10-10-10 NPK ratio will suffice. However, avoid over-fertilizing as this can lead to weak growth and increased susceptibility to pests and diseases. Also, be aware of potential soil contaminants like heavy metals or salinity, which can harm your witch hazel plant.
To prepare the soil, mix in 2-3 inches of compost or well-rotted manure to improve drainage and fertility. If you’re dealing with poor soil structure, consider adding perlite or vermiculite to enhance water retention and aeration. Finally, remove any debris, rocks, and weeds from the planting area to give your witch hazel roots ample space to grow.
Watering and Pruning Practices
When it comes to watering and pruning practices for witch hazel, consistency is key. Witch hazel prefers well-draining soil and moderate watering, especially during its first year of growth. Water your plant when the top inch of soil feels dry to the touch, but avoid overwatering as this can lead to root rot. Aim for about 1-2 gallons of water per week, either from rainfall or irrigation.
Pruning is essential to promote healthy growth and encourage blooming in witch hazel. Remove any dead or damaged branches in late winter or early spring, cutting them back to the base of the plant. This will help prevent the spread of disease and encourage new growth. For shape maintenance, prune your plant in summer after it has finished flowering, removing about one-third of the new growth.
When pruning for size control, focus on reducing the overall height of the plant by no more than a foot or two per year. Make clean cuts just above a node, using sharp, sterile tools to prevent spreading disease. By following these simple watering and pruning practices, you’ll be rewarded with vibrant flowers and lush foliage in your witch hazel plant.
Propagation Methods
To successfully grow witch hazel, you’ll want to know how to propagate it from cuttings and seeds, two methods that ensure a steady supply of these versatile plants. Let’s dive into the details of each method now.
Root Cuttings and Layering
Root cuttings and layering are two effective methods for propagating witch hazel. To take root cuttings, select a stem section with at least one node (the joint where a leaf meets the stem) and remove lower leaves, leaving only a few at the top. Cut the stem just below a node using a sharp, clean knife or pruning tool. Dip the cut end into rooting hormone to enhance the chances of successful root growth.
Plant the cutting in a moistened potting mix, firming it gently but thoroughly to ensure good contact between the roots and soil. Water regularly, providing adequate moisture without overwatering. Roots should develop within 2-3 weeks.
Layering involves bending a stem section down to the ground and securing it with a rock or U-shaped wire. Cover the buried portion with soil, leaving a small section of stem exposed above the surface. Roots will form on the buried section as new growth occurs on top. After several months, cut the stem below the node where roots have formed, then pot up the rooted section.
While root cuttings and layering are reliable methods for witch hazel propagation, they can be time-consuming and may not always produce high success rates. However, with proper technique and patience, you can successfully multiply your favorite varieties.
Grafting Techniques
When it comes to propagating witch hazel through grafting, there are two primary techniques: whip-and-tongue and cleft-grafting. Whip-and-tongue grafting involves removing a small section of stem from the rootstock (the base plant) and attaching it to the scion (the top plant), creating a V-shape with the cut ends. This method is often used for species like Hamamelis x intermedia, which are more challenging to propagate through traditional methods.
Cleft-grafting, on the other hand, involves making a horizontal cut in the rootstock and attaching the scion to it, creating a cleft-like shape. This technique is well-suited for varieties like Hamamelis vernalis, which respond well to grafting.
Grafted plants offer several benefits, including increased vigor, improved disease resistance, and accelerated growth rates. However, they can also be more expensive than seed-grown or stem-cutting propagated plants, and may require specialized care during the initial stages of establishment. If you’re new to grafting, it’s essential to start with a reputable supplier and follow proper techniques to minimize risk. With practice and patience, grafted witch hazel plants can thrive and produce stunning flowers for years to come.
Common Pests and Diseases
As you care for your witch hazel plant, be aware of common pests like spider mites and mealybugs that can infest its delicate leaves. Fungal diseases can also occur if not properly managed.
Recognizing Signs of Infestation or Disease
Witch hazel plants are susceptible to various pests and diseases that can weaken their overall health. Some common infestations include spider mites and mealybugs, which feed on the plant’s sap, causing white cottony patches or sticky substance on leaves. To identify these issues early, inspect your plant regularly for yellowing or dropping leaves, fine webbing on stems, or actual insects.
Diseases such as root rot and leaf spot can be just as detrimental. Root rot often results from overwatering or poorly draining soil, causing the roots to decay. Signs include softened or mushy stems, blackened roots, and reduced growth. Leaf spot, usually caused by fungal infections, appears as small, circular lesions on leaves, turning yellow or brown.
To prevent infestations and diseases, maintain good air circulation around your plant, ensure proper watering habits (letting the top inch of soil dry out between waterings), and monitor for pests like aphids. Regularly inspect your plant’s roots by gently removing it from its pot to catch potential issues before they spread.
Integrated Pest Management (IPM) Strategies
When it comes to managing pest populations on your witch hazel plants, it’s essential to consider Integrated Pest Management (IPM) strategies that prioritize natural methods over chemical pesticides. This approach not only reduces the risk of harming beneficial insects and the environment but also helps to promote a balanced ecosystem.
One effective IPM strategy is introducing beneficial insects, such as ladybugs or lacewings, which prey on common pests like aphids and whiteflies. These natural predators can be purchased from garden centers or online and released into your witch hazel plant’s environment. To encourage these beneficial insects, create a welcoming habitat by providing sheltered areas with flowers that attract pollinators.
Another essential component of IPM is using neem oil to control pest populations. Neem oil disrupts insect growth and development, preventing pests from reproducing and eventually dying off. Mix neem oil with water according to the label instructions and spray it on your witch hazel plants as a preventative measure or after identifying pest infestations.
Keep in mind that IPM strategies often require patience and persistence, as they may not provide immediate results like chemical pesticides do. However, with consistent effort, you can create a healthier environment for your witch hazel plants to thrive without relying on toxic chemicals.
Harvesting and Using Witch Hazel
Now that you have a thriving witch hazel plant, let’s dive into how to harvest its leaves and bark for use in homemade remedies. We’ll cover extraction methods too.
When to Harvest Witch Hazel Buds
When harvesting witch hazel buds, timing is everything. The ideal time to pick these delicate flowers depends on several factors, including weather conditions and plant maturity.
As a general rule of thumb, wait until the winter months (December to February) when the plants are dormant. This ensures that the buds are fully formed and less susceptible to damage from frost or other harsh weather conditions. Avoid harvesting in extreme temperatures, as this can cause the buds to become brittle and prone to breakage.
It’s also essential to consider the plant’s maturity level. Witch hazel plants typically take 2-3 years to reach their full potential, so it’s best to wait until they’re at least 1-2 years old before harvesting. Younger plants may produce smaller, less desirable buds that are more prone to damage.
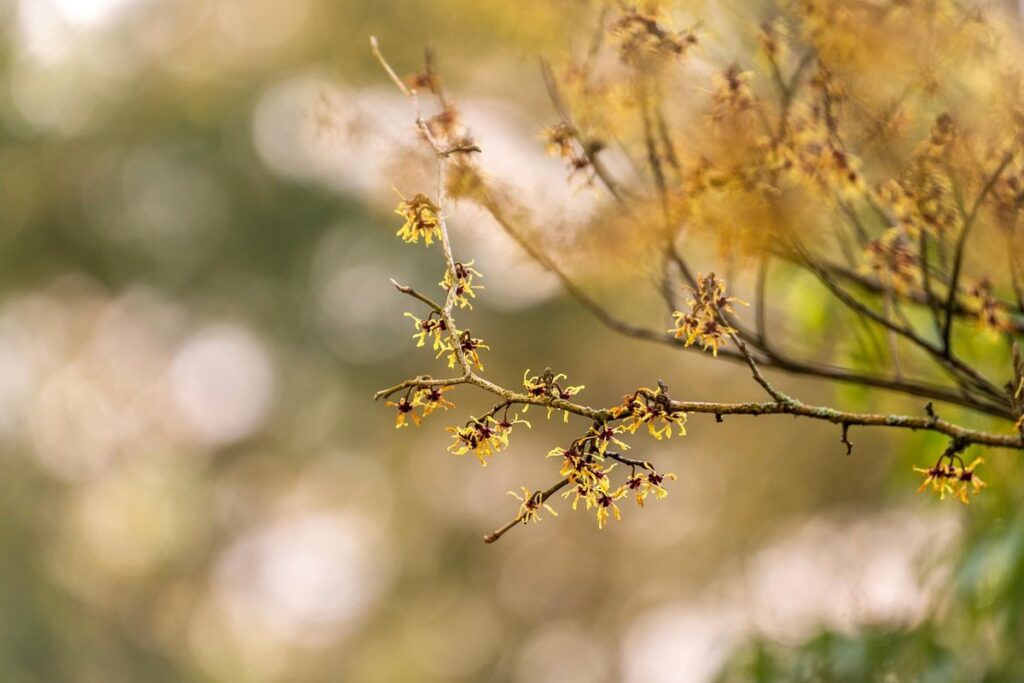
When selecting buds for harvest, look for those with a vibrant red or yellow color and a firm, plump texture. Avoid any buds that appear wilted or damaged, as these will not dry well and may compromise the quality of your final product.
Preparing Witch Hazel for Skincare and Medicinal Use
Now that you’ve harvested your witch hazel, it’s time to prepare it for use in skincare routines and homemade remedies. The process of preparing witch hazel involves distillation, infusion, or making tea. Distillation is a more complex process that requires specialized equipment, but it allows you to extract the essential oils from the plant. Infusion, on the other hand, is a simpler method where you steep the witch hazel leaves in a solvent like water or oil.
To infuse witch hazel, combine 1 cup of dried witch hazel leaves with 2 cups of water in a clean glass jar. Let it sit for 2-3 weeks, shaking the jar occasionally. Strain the liquid and discard the solids. You can use this infused witch hazel as a toner or add it to your skincare routine.
Making tea from witch hazel is another option. Combine 1 teaspoon of dried witch hazel leaves with 1 cup of boiling water. Let it steep for 5-7 minutes, then strain and discard the solids. This tea can be used topically or taken internally as a tincture.
In skincare routines, witch hazel can be used to reduce inflammation, soothe acne, and balance the skin’s pH. It can also be added to homemade remedies like face masks and scrubs for its antibacterial properties.
Frequently Asked Questions
Can I grow witch hazel indoors, or is it strictly an outdoor plant?
You can grow witch hazel indoors in a container with the right conditions, such as bright indirect light, cooler temperatures (around 40°F to 50°F), and well-draining potting mix. However, be aware that indoor plants may require more frequent pruning to maintain shape and size.
How do I protect my witch hazel plant from common pests like aphids, whiteflies, and spider mites?
To prevent infestations, ensure good air circulation around your plant, inspect it regularly for signs of pests, and use neem oil or insecticidal soap as a preventative measure. For severe infestations, consider using Integrated Pest Management (IPM) strategies that combine physical barriers, biological controls, and chemical treatments.
Can I propagate witch hazel through seeds, and how long does this process take?
Witch hazel can be propagated through seed, but it’s not the recommended method as it may result in variable plant quality and growth habits. Root cuttings or layering are generally faster and more reliable methods for propagation, taking around 1-3 months to produce new plants.
How often should I water my witch hazel plant during its first growing season?
Water your witch hazel plant regularly during the first year after planting, keeping the soil consistently moist but not waterlogged. However, be cautious not to overwater, as this can lead to root rot and other problems. Aim for about 1-2 inches of water per week, either from rainfall or irrigation.
Can I use witch hazel in its raw form for skincare and medicinal purposes, or must it be processed first?
Witch hazel can be used in its raw form for some applications, but it’s generally recommended to distill or process the plant material before using it for skincare or medicinal purposes. This will help remove impurities and concentrate the active compounds, making it safer and more effective for use on the skin or as a remedy for various ailments.