If you’re looking to get into permaculture or herbalism, cultivating your own witch hazel might be the perfect project for you. Not only is this versatile plant easy to grow from seed, but it’s also packed with uses that’ll make you wonder how you ever lived without it. From skincare and wound care to medicine and natural cleaning products, witch hazel is a true multitasker. But where do you start? In this article, we’ll take you through the entire process of cultivating witch hazel, from planting those first seeds to harvesting your very own twigs for use in your favorite recipes. Whether you’re a seasoned gardener or just starting out, our step-by-step guide will have you growing and using witch hazel like a pro in no time.
Understanding Witch Hazel Basics
Witch hazel is a versatile and low-maintenance plant that’s perfect for gardeners of all skill levels. In this next part, we’ll break down the essential details you need to know about growing witch hazel successfully.
Historical Significance of Witch Hazel
Witch hazel has been a stalwart companion to humanity for centuries, its uses spanning traditional medicine, skincare, and even spiritual practices. Its historical roots date back to the Native American civilizations of North America, where it was used to treat a variety of ailments from wounds to fevers.
In colonial times, European settlers adopted witch hazel’s use in traditional medicine, often combining it with other herbs for remedies. The bark of the witch hazel tree was harvested and distilled to create a liquid extract that could be applied topically or taken internally. This versatile plant earned its place in many household remedies, from soothing sunburns to reducing inflammation.
Today, we can appreciate the cultural significance of witch hazel as a testament to our ancestors’ resourcefulness and dedication to natural healing. When exploring the history of witch hazel, it’s essential to acknowledge its origins and traditional uses, rather than relying on modern interpretations or commercial marketing. By understanding the historical context, you’ll be able to appreciate the true value of this remarkable plant.
Witch Hazel Plant Identification
Witch hazel plants are easily recognizable by their unique botanical characteristics. When it comes to growth habits, witch hazel is a deciduous shrub that can grow anywhere from 2-12 feet tall, depending on the specific species. It typically has a broad, rounded crown and an open, spreading habit.
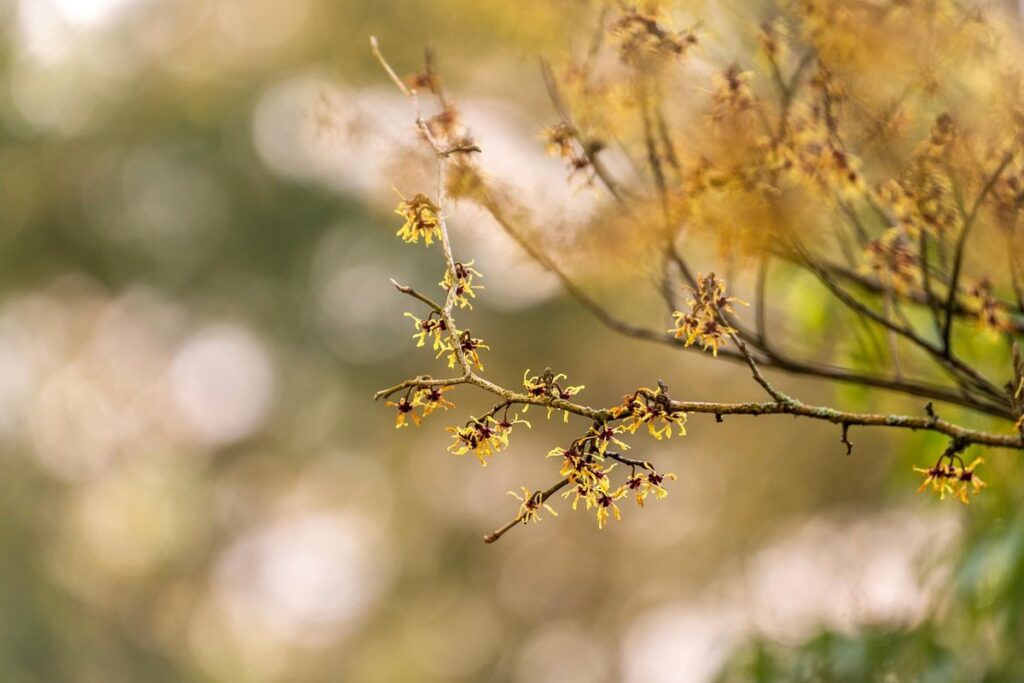
The leaves of the witch hazel plant are its most distinctive feature. They are typically 3-6 inches long and 1-2 inches wide, with a pointed tip and a wavy or lobed margin. The leaves are usually a bright green color on top and pale green underneath. When it comes to flowers, witch hazel is known for its fragrant, spidery blooms that appear in late fall or early winter. These flowers are typically yellow or orange in color.
If you’re trying to identify a specific species of witch hazel, look at the bark. Different species have unique patterns and textures on their trunks. For example, Hamamelis virginiana has a smooth, grayish-brown bark that becomes more rugged with age.
Common Uses of Witch Hazel
Witch hazel is a versatile plant with a multitude of uses that can be applied to various areas of our lives. In skincare, witch hazel is often used as a toner due to its astringent properties, which help balance the skin’s pH and reduce the appearance of pores. It’s also an effective treatment for acne-prone skin, as it helps to dry out blemishes and prevent scarring.
For medicinal purposes, witch hazel has been traditionally used to treat wounds and minor cuts. Its antiseptic properties make it a great natural disinfectant, reducing the risk of infection and promoting faster healing times. Witch hazel can also be used to soothe insect bites and stings, providing temporary relief from itching and inflammation.
In household applications, witch hazel can be used as a natural cleaning agent due to its antiseptic properties. It’s effective against a range of bacteria and viruses, making it an excellent ingredient for homemade cleaning solutions. You can add a few drops of tea tree oil to the mixture for enhanced antibacterial effects.
When using witch hazel in any capacity, remember to always dilute it with water as undiluted witch hazal can be quite harsh on skin and surfaces.
Propagation and Planting Methods
Witch hazel cultivation involves more than just watering and pruning. In this next part, we’ll walk you through various methods of propagating and planting witch hazel successfully.
Seed Germination and Stratification
Sowing witch hazel seeds can be a bit tricky, but with the right techniques, you can improve germination rates and get a head start on growing this beautiful plant. One of the key steps is seed stratification, which involves simulating winter conditions to break dormancy. To do this, you’ll need to collect fresh seeds from your witch hazel plant or purchase them from a reputable supplier.
Place the seeds in a damp paper towel or cloth and store them in an airtight container in the refrigerator at around 35-45°F (2-7°C). This will mimic the winter chill required for germination. Check on the seeds every few weeks to ensure they’re still moist but not waterlogged. After 30-60 days, you can remove the seeds from stratification and sow them about ¼ inch deep in a seed tray or small pots filled with a well-draining mix.
Keep the soil consistently moist but not soggy, and provide indirect light. It’s essential to be patient, as germination can take anywhere from 1-3 months. Once the seedlings have two sets of leaves, you can transplant them into individual pots or directly into the garden. By following these steps, you’ll give your witch hazel seeds the best chance at successful germination and growth.
Cuttings and Grafting for Fast Growth
When it comes to propagating witch hazel quickly and efficiently, cuttings and grafting are two effective methods. To take a cutting, select a healthy stem with at least two nodes, cut it from the parent plant using sterile pruning tools, and remove lower leaves. This encourages new growth and prevents waterlogged roots.
Next, prepare your rooting hormone by following the manufacturer’s instructions or making your own using willow bark and water. Dip the cut end of the cutting into the hormone, making sure to coat the nodes. Plant the cutting in a well-draining mix, firming the soil gently around it, and keep the area consistently moist but not waterlogged.
Grafting involves attaching a piece of stem (scion) from one witch hazel plant onto the root system of another. This is often done during the dormant season when plants are less stressed. Make clean cuts on both the scion and the rootstock, apply a grafting sealant to promote healing, and secure the join with twine or tape until roots develop. With patience and care, your new witch hazel plant will thrive in no time.
Planting Conditions and Soil Requirements
When it comes to planting witch hazel, understanding its ideal climate and soil requirements is crucial for successful cultivation. Witch hazel thrives in temperate climates with moderate temperatures, preferring zones 4-8. It can tolerate a range of conditions but performs best in areas with mild winters and cool summers.
In terms of soil pH, witch hazel prefers slightly acidic to neutral soils with a pH between 5.5 and 7.0. A well-draining loam or sandy loam is ideal, as it allows for proper water absorption without retaining excess moisture. When planting in areas with alkaline soils, consider amending the soil with organic matter like compost to lower the pH.
Nutrient requirements are relatively low, but regular fertilization will promote healthy growth and flowering. Use a balanced fertilizer during the growing season (spring-fall) and avoid over-fertilizing, which can lead to weak growth. A moderate amount of sunlight and adequate moisture also contribute to witch hazel’s overall health and performance.
Keep in mind that these requirements may vary depending on your specific region and climate. Be sure to observe your local conditions and adjust accordingly for optimal results.
Cultivation and Maintenance Techniques
To successfully grow and care for witch hazel, you’ll want to learn how to properly plant, water, prune, and fertilize your shrubs. This section covers essential cultivation and maintenance techniques.
Irrigation and Fertilization Strategies
When it comes to cultivating witch hazel, irrigation and fertilization strategies play a crucial role in promoting healthy growth. Proper watering techniques can help prevent pests and diseases from taking hold, while also encouraging robust plant development.
First, let’s talk about the importance of consistent moisture levels. Witch hazel prefers well-draining soil that is consistently moist but not waterlogged. Aim to provide about 1-2 inches of water per week during the growing season (spring-fall) through a combination of rainfall and supplemental irrigation. Avoid overwatering, as this can lead to root rot and other issues.
As for fertilization, witch hazel benefits from regular feeding with a balanced fertilizer that’s high in nitrogen, phosphorus, and potassium (NPK). You can use a 10-10-10 NPK ratio or something similar. Apply the fertilizer during the growing season (spring-fall) at a rate of about 1 tablespoon per gallon of water.
Some additional tips to keep in mind: avoid fertilizing during periods of drought, as this can cause damage to the plant’s roots; and don’t overdo it with fertilizers – witch hazel prefers moderate nutrient levels rather than excess.
Pruning and Training Methods
Pruning and training are essential for maintaining witch hazel’s shape, promoting new growth, and encouraging fruiting. To achieve a beautiful and healthy plant, you need to prune it regularly.
The best time to prune witch hazel is immediately after flowering in the spring. Remove any dead or damaged branches, cutting them back to about 1-2 inches from the base of the stem. This will help promote new growth and encourage fruiting. Prune no more than one-third of the plant at a time, as excessive pruning can stress the plant.
For training purposes, you can use a technique called “tip renewal.” Cut off the tip of a branch, leaving about 6-8 inches of stem behind. This will encourage lateral growth and produce more flowers. You can also prune witch hazel to maintain a desired shape or size. Remove any crossing branches or suckers that are growing inwards towards the center of the plant.
It’s essential to note that over-pruning can reduce fruiting, so be careful not to remove too much foliage. Prune regularly to keep your witch hazel looking its best and encourage healthy growth.
Pest and Disease Management
As you tend to your witch hazel plants, it’s essential to be aware of common pests and diseases that can affect their health. Among the most prevalent issues are aphids, spider mites, and scale insects, which can cause damage to leaves and stems if left unchecked. These pests often thrive in dry conditions, making regular watering a crucial aspect of management.
To prevent infestations, ensure your plants receive adequate moisture but avoid overwatering, which can lead to root rot and other problems. Regularly inspect your witch hazels for signs of pests, such as white powdery patches or sticky substance on leaves, and treat promptly if you spot any issues.
Root rot is another common problem that can arise from fungal diseases like Phytophthora and Armillaria. This usually occurs when the soil is consistently waterlogged, so make sure your pots have good drainage holes to prevent excess moisture accumulation. Regularly repot your witch hazels in fresh potting mix to reduce the risk of disease buildup.
If you do encounter pests or diseases, address them immediately using integrated pest management (IPM) strategies that involve a combination of physical barriers, cultural controls, and organic pesticides whenever possible.
Harvesting and Processing Techniques
As a witch hazel cultivator, you’re likely eager to learn how to extract its valuable compounds. Let’s dive into the harvesting and processing techniques that’ll help you unlock this plant’s full potential.
Timing and Preparation for Harvest
When it comes to harvesting witch hazel, timing is everything. The best time to harvest twigs, leaves, or other plant parts depends on the specific use you have in mind. For skincare products, you’ll want to harvest during the spring or early summer when the plant is in full bloom and the twigs are still flexible. This ensures that the extract will be rich in tannins and flavonoids, which provide astringent and antioxidant properties.
For traditional medicine, on the other hand, you can harvest throughout the year, but it’s best to wait until after the leaves have dropped in autumn or winter. The bark, twigs, and roots of witch hazel are said to possess anti-inflammatory and antiseptic properties, making them valuable for wound care and skin conditions.
To prepare witch hazel for use, simply dry the harvested plant parts in a warm, dark place, such as a cupboard or drawer. You can also freeze-dry or dehydrate them using specialized equipment. Once dried, you can crush or grind the plant material into a fine powder, which can be added to your skincare recipes or herbal remedies. Always store witch hazel extracts in airtight containers to preserve their potency and shelf life.
Drying and Storage Procedures
When it comes to drying witch hazel harvests, the method you choose can significantly impact the quality and longevity of your final product. Air-drying is a popular choice for its simplicity and effectiveness, but it requires careful attention to detail. To air-dry witch hazel, tie the harvested leaves in small bunches and hang them upside down in a warm, dry, dark place with good air circulation.
Oven-drying is another option that can produce faster results, but be cautious not to overheat your witch hazel, as this can cause damage or discoloration. Set your oven to its lowest temperature setting (usually around 150-200°F) and place the witch hazel on a wire rack set over a baking sheet.
Once your witch hazel is dry, it’s essential to store it properly to preserve its quality. Store dried witch hazel in airtight containers, such as glass jars or paper bags, away from direct sunlight and moisture. Label each container with the date of harvest and storage instructions to ensure you use the oldest material first.
In addition to proper drying and storage, consider packaging your dried witch hazel in smaller portions (e.g., 1-2 oz) for easier use and longer shelf life. This will also make it more convenient to share or trade with others in the witch hazel community.
Processing and Preparing Witch Hazel Products
Now that you’ve harvested your witch hazel, let’s dive into processing and preparing it for use. This step is crucial in preserving its potency and effectiveness as a natural remedy.
Infused Oils and Salves
When it comes to utilizing the benefits of witch hazel in your craft, infusing oils and creating salves are fantastic ways to harness its medicinal properties. To get started, you’ll need some dried witch hazel twigs or leaves, as these will be used to infuse the carrier oil of your choice.
For infusion, simply combine 1/4 cup of dried twigs or leaves with a clean glass jar and cover them with a neutral-tasting oil like grapeseed or sweet almond oil. Allow this mixture to steep for 2-3 weeks in a cool, dark place, shaking the jar every few days. This will allow the witch hazel’s active compounds to be drawn into the oil.
Once your infusion is complete, strain it through a cheesecloth and discard the solids. You can now use your infused oil as desired – in skin care products, massage oils, or even as a natural remedy for wounds and scrapes. If you’d like to create a salve instead, simply blend 1-2 tablespoons of infused oil with 2-3 tablespoons of beeswax, and heat until the wax is fully incorporated. This will give you a solid, ointment-like consistency that’s perfect for topical applications.
Tinctures and Extracts
Making tinctures and extracts from witch hazel involves extracting the active compounds from the plant material using a solvent. The most common solvents used for this process are ethanol and glycerin. Steeping methods vary depending on the desired concentration of bioactive compounds, but generally involve soaking the dried or fresh plant material in the solvent.
For a basic tincture, you can start by combining 1 part witch hazel with 2-3 parts solvent (such as vodka or Everclear) in a clean glass jar. Store it in a cool, dark place and shake daily for 4-6 weeks to allow the solubilization process.
To filter your tincture, use a coffee filter or cheesecloth to remove any plant material residue. Discard the solids and reserve the liquid extract.
For more concentrated extracts, you can use glycerin as a solvent, which is often used in skincare products due to its moisturizing properties. The ratio of witch hazel to glycerin can vary from 1:2 to 1:5 depending on your desired strength.
It’s essential to stabilize the extract by adding preservatives or antioxidants to prevent spoilage and ensure shelf stability.
Conclusion: Cultivating Witch Hazel Successfully
As you’ve learned how to plant, care for, and harvest witch hazel, it’s time to summarize key takeaways to ensure your success in growing this versatile shrub. Let’s recap what we’ve covered so far.
Recap of Key Takeaways
Cultivating witch hazel successfully requires attention to several key aspects. In this article, we’ve covered the essential points to help you grow and utilize witch hazel effectively.
First and foremost, it’s crucial to understand that witch hazel is a temperamental plant, requiring specific conditions to thrive. It prefers well-draining soil and full sun to partial shade, making it ideal for gardens with these characteristics. If you’re planning to cultivate witch hazel in your garden, ensure you choose a location that receives at least 4-6 hours of direct sunlight daily.
Another critical aspect is watering. Witch hazel requires consistent moisture, especially during its first year of growth. Water it regularly, but make sure not to overwater, as this can lead to root rot and other issues. A good rule of thumb is to water your witch hazel plant when the top 1-2 inches of soil feel dry to the touch.
Pest and disease management are also vital considerations for successful witch hazel cultivation. Regularly inspect your plants for signs of infestation or infection, and take prompt action if you notice any issues. For example, aphids can be controlled using neem oil or insecticidal soap, while fungal diseases may require the application of fungicides.
In addition to these practical considerations, it’s also essential to understand the uses and benefits of witch hazel. This versatile plant has been used for centuries in herbal medicine, skin care, and even as a natural dye. By cultivating witch hazel successfully, you’ll be able to harvest its leaves, bark, and roots for use in various applications.
By following these key takeaways, you’ll be well on your way to growing healthy, thriving witch hazel plants that will provide you with a wealth of benefits and uses. Remember to stay attentive to your plant’s needs, and don’t hesitate to seek advice from experienced growers or herbalists if you have any questions or concerns.
Frequently Asked Questions
Can I grow witch hazel indoors, or is it strictly a outdoor plant?
Witch hazel can be grown indoors, but it requires a lot of light to thrive. If you don’t have a sunny spot with direct sunlight for at least 4 hours a day, consider using grow lights to supplement the natural light.
How long does it take for witch hazel seeds to germinate, and what are some common issues I might encounter?
Witch hazel seeds typically take 1-3 months to germinate. Some common issues include poor soil quality, inadequate moisture, or insufficient warmth (witch hazel prefers temperatures between 65°F to 75°F). Check the seed package for specific instructions on optimal conditions.
Can I use witch hazel in place of other herbs with similar properties, such as aloe vera or chamomile?
Yes, but keep in mind that witch hazel has its own unique characteristics and uses. While it can be used in skincare and wound care applications like aloe vera, its antimicrobial and anti-inflammatory properties make it particularly effective against certain types of infections.
How often should I prune my witch hazel plants to maintain their shape and promote healthy growth?
Prune your witch hazel plants regularly to encourage branching and prevent them from becoming leggy. Aim for 2-3 main pruning sessions per year, removing any dead or damaged branches and cutting back new growth to about half its length.
What are some creative ways I can use witch hazel products in my daily life beyond the obvious skincare applications?
Infuse witch hazel into oils or salves for pain relief, use it as a natural insect repellent, or add it to homemade cleaning solutions for its antimicrobial properties. Experiment with different ratios and combinations to find your favorite uses!