Growing your own vegetables during the cold winter months can be a challenge, but with the right techniques and planning, you can enjoy a bountiful harvest even in the depths of winter. Many gardeners assume that vegetable gardening is only for spring and summer, but there are plenty of delicious options that thrive in the cooler temperatures. Not only will growing winter vegetables save you money on grocery bills, but it’ll also give you the satisfaction of harvesting your own produce right from your backyard.
In this expert guide, we’ll cover everything you need to know about growing delicious winter vegetables, from seed starting and selecting the best varieties for your region to garden protection techniques that will keep your crops safe from harsh weather conditions. We’ll also share valuable harvesting tips so you can enjoy your fresh veggies at their peak flavor and texture. Whether you’re a seasoned gardener or just starting out, this guide is designed to help you succeed in growing tasty winter vegetables.
Understanding Winter Gardening
Winter gardening can seem daunting, but understanding the basics of how plants grow in cold weather is key to a successful harvest. Let’s dive into the essentials that’ll get you started.
Choosing the Right Crops
When it comes to choosing the right crops for winter gardening, selecting varieties that thrive in cooler temperatures is crucial. These hardy veggies can tolerate frost and continue to produce well into the colder months.
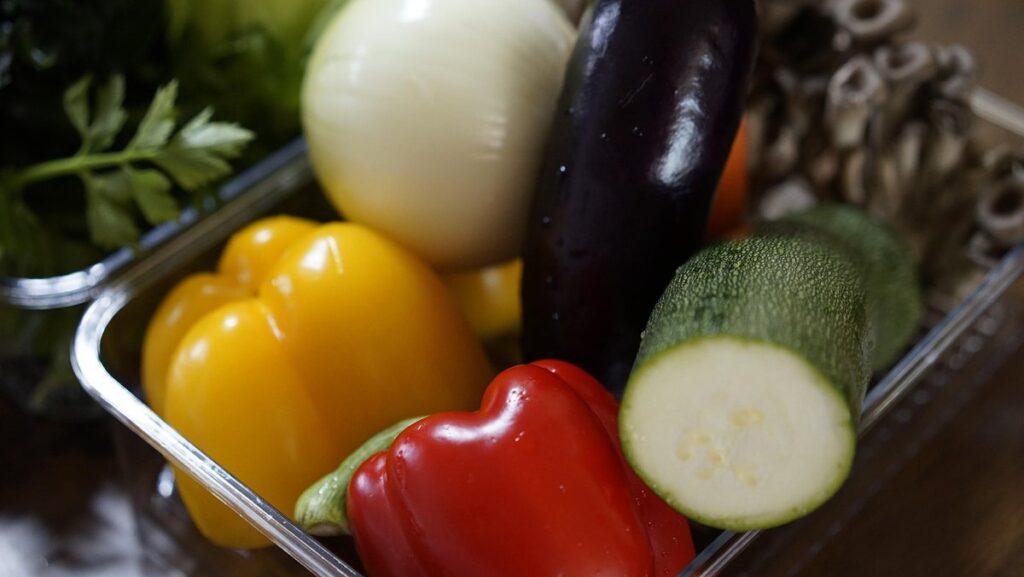
Some excellent examples of winter crops include broccoli, kale, and spinach. Broccoli, for instance, loves the cooler weather and will often bolt (go to seed) in warmer conditions. Kale is another great choice, as it’s incredibly resilient and can be harvested even after a light frost. Spinach is also an excellent option, but it requires some protection from extreme cold snaps.
Consider what type of climate you have when selecting winter crops. If you live in an area with mild winters, you may be able to get away with planting warmer-season crops like Brussels sprouts or carrots. However, if you experience harsher winters, focus on the hardiest varieties like cabbage, kale, and spinach.
When choosing specific varieties, look for keywords like “cold-hardy,” “frost-tolerant,” or “winter-harvest.” This will help ensure that your crops can withstand the chill of winter.
Preparing Your Garden for Winter
As we transition into the colder months, it’s essential to prepare your garden beds for winter growing. This will not only help protect your soil but also ensure a thriving and productive harvest when spring arrives.
To start, focus on soil conditioning. Test the pH level of your soil to determine if it needs any adjustments. Most vegetables prefer a slightly acidic to neutral soil pH (between 6.0 and 7.0). If your soil is too alkaline or acidic, you can add lime or sulfur to balance it out.
Composting is another crucial step in preparing your garden beds for winter. Break down organic matter like leaves, vegetable scraps, and grass clippings into a nutrient-rich compost that will act as a natural fertilizer come springtime. Aim to create at least 5-10% compost content in each bed. You can also consider adding a layer of mulch or straw on top to retain moisture and suppress weeds.
By investing time into soil conditioning and composting, you’ll be setting your garden up for success when the warmer months return.
Starting Seeds Indoors
To get a head start on the growing season, let’s begin by starting seeds indoors where they can receive the warmth and light they need to thrive. This will give them a healthy jumpstart before being transplanted outside.
Basic Seed Starting Techniques
When starting seeds indoors, it’s essential to get them off to a strong start. This is where basic seed starting techniques come into play. One of the most effective ways to give your seeds a head start is by using seed trays. These shallow containers are specifically designed for seedlings and allow you to plant multiple seeds in a single tray.
To use seed trays effectively, fill them with a good quality potting mix that’s designed for indoor seed starting. Plant your seeds at the correct depth, usually around 2-3 times the size of the seed itself. Water gently but thoroughly, making sure not to overwater. Next, consider investing in a propagation mat. These mats emit a gentle heat and moisture that can increase germination rates by up to 20%. They’re particularly useful for slower-growing seeds like lettuce or herbs.
Grow lights are also an excellent addition to your indoor seed starting setup. Aim to provide at least 12-14 hours of light per day, using either LED grow lights or fluorescent tubes. This will give your seedlings the energy they need to develop strong roots and stems.
Choosing the Right Containers
When it comes to starting seeds indoors for winter gardening, choosing the right containers is crucial for success. You’ll want to opt for containers that provide adequate drainage and can accommodate the needs of young seedlings.
Cell packs are a popular choice for indoor seed starting, as they’re inexpensive and easy to use. They usually come in 12-cell or 24-cell trays and can be reused multiple times by cleaning them thoroughly between uses. Peat pots, on the other hand, are made from natural materials like peat moss or coconut coir and are biodegradable. This makes them an excellent choice for direct planting into garden beds without having to transplant seedlings.
Biodegradable containers, such as those made from cornstarch or sugarcane, offer a more sustainable option. They’re also compostable at the end of their life cycle, reducing waste in your garden. When selecting a container, consider its size, material, and drainage capabilities to ensure it meets the needs of your seedlings.
It’s essential to choose containers that allow for good air circulation to prevent fungal diseases from taking hold. Be sure to clean and disinfect any reusable containers before reusing them to prevent the spread of pests or diseases.
Protecting Your Winter Garden
To keep your winter garden thriving, it’s essential to take extra precautions against harsh weather and pests that can damage your crops. Here are some valuable tips to help you protect your plants.
Building a Cold Frame or Greenhouse
Building a cold frame or greenhouse is an excellent way to extend your growing season and protect your winter garden from harsh weather conditions. These structures allow you to control the temperature and light levels inside, creating a microclimate that’s perfect for growing a variety of crops.
When building a cold frame, start by selecting a suitable location that receives plenty of sunlight. You can use reclaimed wood or purchase pre-made frames, depending on your budget and DIY skills. Make sure the base is level and secure to prevent the frame from shifting in strong winds. Add a transparent lid or polycarbonate panels to allow light in while keeping frost out.
For a greenhouse, consider using glass or polycarbonate panels for the walls and roof. Ensure proper ventilation by installing windows or vents to maintain good air circulation. You can also use automatic openers that detect temperature fluctuations to regulate airflow.
Both cold frames and greenhouses require insulation to retain heat during winter nights. Add a layer of bubble wrap, straw, or foam board around the frame to keep it cozy. With regular maintenance and monitoring, your new greenhouse will provide a haven for your winter garden, extending the growing season by several months.
Using Row Covers and Other Protection Methods
When it comes to protecting your winter garden from harsh weather conditions, there are alternative methods beyond the traditional cold frames and greenhouses. One effective option is using row covers, lightweight, porous fabrics that allow sunlight and water to reach your plants while keeping out frost and pests.
You can choose from a variety of breathable materials like burlap, fine mesh, or even old bed sheets. Simply drape them over your plants, securing with stakes or weights as needed. For added protection, layer multiple covers for extra insulation. This method is particularly useful for smaller beds or individual plants that need extra TLC.
To ensure optimal performance, opt for row covers made from durable, UV-resistant materials that won’t degrade under sunlight exposure. When using burlap, be mindful of the weight it adds to your plants and avoid covering too tightly, as this can lead to moisture buildup and root damage.
Maintaining Your Winter Garden
Now that you’ve planted your winter veg, let’s talk about keeping them thriving throughout the colder months. We’ll cover essential tips for maintaining a healthy and productive winter garden.
Watering and Irrigation Strategies
When it comes to maintaining your winter garden, effective watering and irrigation strategies are crucial for keeping your plants healthy and thriving. As a general rule of thumb, most vegetables need around 1-2 inches of water per week, either from rain or irrigation. However, overwatering can be just as detrimental as underwatering, so it’s essential to get it right.
One effective way to water your winter garden is by using drip irrigation systems. These systems deliver water directly to the roots of the plants, reducing evaporation and runoff. This not only conserves water but also helps prevent fungal diseases that thrive in moist conditions. For example, a study conducted by the University of California found that drip irrigation can reduce water consumption by up to 50% compared to traditional sprinkler systems.
To avoid overwatering, make sure to check the soil moisture regularly by inserting your finger into the soil or using a moisture meter. Water only when the top inch of soil feels dry to the touch. Additionally, consider implementing a “soak and drain” method, where you water deeply but infrequently to encourage deep root growth. By adopting these strategies, you’ll be well on your way to maintaining a healthy and productive winter garden.
Controlling Pests and Diseases
Winter gardens are susceptible to various pests and diseases that can quickly spread and damage your crops. One of the most common pests affecting winter gardens is slugs and snails, which feed on plant leaves and stems at night. To prevent these pests, use copper tape around plant pots or apply crushed eggshells near plants, as they don’t like to cross over them.
Another common pest is aphids, tiny insects that can multiply quickly and spread diseases. Use neem oil or insecticidal soap to control their population, or introduce natural predators such as ladybugs or lacewings into your garden.
Diseases like powdery mildew and downy mildew are also prevalent in winter gardens. To prevent these diseases, ensure good air circulation around plants by keeping them at a suitable distance from each other. Remove any infected leaves to prevent the disease from spreading further.
It’s essential to monitor your garden regularly for signs of pests or diseases and take prompt action if you notice any issues. Keep a record of what works best for your specific climate and soil conditions, so you can adapt your approach accordingly.
Tips for Harvesting Winter Vegetables
Harvesting winter vegetables can be a bit tricky, but don’t worry, we’ve got you covered. In this next part, we’ll share our top tips to ensure your hard work doesn’t go to waste.
Knowing When to Harvest
Knowing when to harvest your winter vegetables can be just as important as knowing what to grow. After all, you want to enjoy the fruits of your labor at their peak freshness and flavor.
One way to determine if your winter vegetables are ready is to check for visual signs. For example, Brussels sprouts will turn from a bright green color to a darker, more olive tone when they’re ripe. Similarly, carrots will be firm and smooth, while parsnips will develop a sweet, earthy aroma. You can also check the texture of the vegetables by gently squeezing them – if they’re too soft or mushy, they’re likely overripe.
But don’t rely solely on visual cues – taste is also a great way to determine ripeness. Try snipping off a small piece of broccoli or kale and tasting it. If it’s tender and flavorful, it’s ready to eat. On the other hand, if it’s bitter or fibrous, give it more time.
Timing is everything when it comes to harvesting winter vegetables. Some varieties, like spinach and chard, can be harvested continuously as long as you pick them before they go to seed. Others, like root vegetables like carrots and beets, are best harvested all at once when the tops begin to yellow and die back.
Preserving Your Harvest
Now that you’ve harvested your winter veggies, it’s time to think about preserving them for future meals. There are several methods to choose from, each with its own advantages and requirements.
Freezing is a great way to preserve winter vegetables, especially leafy greens like kale and spinach. Simply blanch the veggies in boiling water or steam for 2-3 minutes, then shock them in an ice bath to stop the cooking process. Package them in airtight containers or freezer bags and store them in the freezer. Frozen veggies are perfect for soups, stews, and smoothies.
Canning is another popular method for preserving winter vegetables. This involves packing hot, sterilized veggies into jars and sealing them with a vacuum sealer or lid. Canned goods can be stored at room temperature for up to 12 months. Make sure to follow safe canning practices to avoid spoilage and foodborne illness.
Dehydrating is also an effective way to preserve winter vegetables, such as carrots, beets, and sweet potatoes. Simply slice or chop the veggies thinly and dry them in a dehydrator or your oven on the lowest heat setting. Store dried goods in airtight containers for up to 6 months.
Advanced Techniques for Winter Gardening
Now that you’ve got a solid foundation, let’s dive into some advanced techniques to help you take your winter gardening game to the next level, whether it’s cold frames or hoop houses.
Hydroponics and Aeroponics
If you’re looking to grow winter vegetables in a controlled environment, consider using hydroponic or aeroponic systems. These soilless cultivation methods allow for precise control over nutrient delivery and water levels, making them ideal for indoor growing.
Hydroponics involves suspending plant roots in a solution of nutrients, while aeroponics uses a fine mist to deliver nutrients to the roots. Both methods conserve water and reduce land use compared to traditional farming. When using hydroponic or aeroponic systems for winter gardening, choose varieties that thrive in cooler temperatures, such as kale, spinach, and lettuce.
Some popular hydroponic kits include the AeroGarden and the Hydrofarm NFT System. These systems often come with pre-mixed nutrients and a controlled watering schedule. To get started, select a system that fits your space and budget, then follow the manufacturer’s instructions for setting up and maintaining the system. By using hydroponics or aeroponics, you can enjoy fresh winter vegetables year-round in your indoor garden.
Using LED Grow Lights
Using LED grow lights to supplement natural light during the winter months can be a game-changer for your winter garden. On one hand, these energy-efficient lights offer numerous benefits. For instance, they provide precise spectrum control, which allows you to tailor the light output to your specific crop’s needs. This results in improved yields and better color development. Additionally, LED grow lights are generally more affordable than other types of supplemental lighting options.
However, it’s essential to consider some potential drawbacks. One of the main concerns is heat buildup, as LEDs can be quite warm to the touch. To mitigate this issue, ensure your grow space has adequate ventilation or use a reflective material to bounce light rather than direct it at plants.
When choosing an LED grow light, consider the PAR (photosynthetic active radiation) value and color temperature. A higher PAR value indicates more intense light output, while a color temperature of around 5,000-7,000K is ideal for most vegetables.
Frequently Asked Questions
Can I grow winter vegetables if my region experiences extremely cold winters?
Yes, there are many hardy vegetable varieties that can tolerate extreme cold temperatures. These include broccoli, kale, spinach, and Brussels sprouts. When selecting crops for your area, choose ones specifically bred for cold climates or look for varieties with a high “hardiness zone” rating.
How do I protect my winter garden from harsh winds?
Harsh winds can damage plants and reduce yields. To protect your winter garden, use row covers or other protection methods like windbreaks or snow fences to block the wind. You can also plant crops that are naturally more resistant to wind, such as tall kale or Brussels sprouts.
Can I start seeds indoors for my winter garden?
Yes, starting seeds indoors is a great way to get a head start on your winter garden. Use seed starting techniques and containers designed for indoor growing. Make sure the area where you’ll be starting seeds has sufficient light, usually around 12-14 hours of supplemental lighting per day.
How do I maintain my winter garden during periods of heavy snow?
During periods of heavy snow, it’s essential to clear snow from your garden to prevent damage and ensure proper growth. Use a soft-bristled brush or a snow rake to gently remove snow without damaging plants. Be cautious not to over-clear the area, as this can expose soil to extreme cold temperatures.
What are some common pests that target winter vegetables, and how do I control them?
Common pests that target winter vegetables include slugs, snails, and aphids. To control these pests, use organic methods such as hand-picking, traps, or introducing beneficial insects like ladybugs or lacewings. You can also use row covers to prevent infestations. Regularly inspect your crops and take action promptly if you notice any signs of pest activity.