Repotting your cactus is one of those tasks that can seem intimidating, especially if you’re new to plant parenthood. But don’t worry, with a few simple steps and some expert advice, you’ll be a pro in no time! Whether you’re looking to give your cactus a bit more room to grow or wanting to prevent root rot from taking over, repotting is an essential part of keeping your prickly friend happy and healthy. In this article, we’ll cover the ins and outs of choosing the right pot for your cactus, preparing it for its new home, and aftercare tips to ensure vibrant blooms. Say goodbye to worrying about root rot and hello to a thriving, beautiful cactus that will bring joy to any space!
Choosing the Right Pot
When selecting a new pot for your cactus, it’s essential to consider factors such as drainage and material durability. Choose wisely to ensure your plant thrives.
Selecting a Suitable Pot Size
When it comes to repotting your cactus, selecting a pot that’s the right size is crucial for its health and growth. A pot that’s too small can cause waterlogged soil and root bound conditions, while one that’s too large can lead to poor drainage and increased risk of overwatering.
To determine the ideal pot size for your cactus, take into account its current root mass. Gently remove it from its old pot, and use a fork or your fingers to carefully tease out the roots. Measure the spread of the roots by laying them flat on a surface – this will give you an idea of how much room they’ll need in their new home.
As a general rule of thumb, choose a pot that’s only 1-2 sizes larger than the current one. This will provide enough space for the roots to grow without becoming waterlogged or developing root bound conditions.
Considering Cactus Pot Materials
When it comes to choosing the right pot for your cactus, the material of the pot is just as important as its size and design. Different materials offer unique benefits and drawbacks that can affect the health and appearance of your plant.
Terracotta pots are a popular choice among cactus enthusiasts due to their breathability and ability to dry out quickly. This helps prevent root rot and other water-related problems common with cacti. However, terracotta pots can be prone to cracking and may require more frequent watering as they absorb moisture from the soil.
Ceramic pots offer a more durable alternative to terracotta, but their thickness can sometimes hinder drainage. This is particularly problematic for cacti that prefer well-draining soil. On the other hand, ceramic pots are often more aesthetically pleasing and less prone to cracking than terracotta.
Plastic pots are a cost-effective option with excellent durability and moisture retention. However, they may retain too much water and cause root rot if not properly drained. Ultimately, the choice of pot material depends on your specific cactus species, climate, and personal preferences.
It’s essential to consider these factors when selecting a pot for your cactus. Be sure to research the needs of your plant and choose a pot that balances its requirements with your own preferences.
Preparing Your Cactus for Repotting
Before you start repotting your cactus, make sure it’s ready by checking its roots and pot size to avoid shocking the plant. This crucial step ensures a smooth transition into its new home.
Inspecting Your Cactus’s Roots
Inspecting Your Cactus’s Roots is an essential step before repotting. To determine if your cactus needs a new pot, look for signs of root growth. If you notice water pooling around the base of the plant or roots growing out of the drainage holes, it’s likely time to repot.
This can also be indicated by a visible mass of white or light-colored roots protruding from the soil surface. These are clear signals that your cactus has outgrown its container and requires a larger space to accommodate its expanding root system.
When inspecting your cactus’s roots, gently remove any dead or damaged roots with sterile scissors or pruning shears. Cut as close to the base of the plant as possible to prevent spreading disease or infection. For particularly stubborn or entangled roots, use a soft-bristled brush or a toothbrush to carefully tease them apart.
Remember that some cacti species naturally develop aerial roots, so don’t panic if you notice these on your plant. However, if you’re unsure whether your cactus needs repotting or not, it’s always best to err on the side of caution and give its roots a thorough examination.
Watering and Fertilizing Before Repotting
Before you start repotting your cactus, it’s crucial to take care of two essential aspects: watering and fertilizing. Stopping fertilizer application a few weeks before repotting is vital to avoid burning the roots with excessive nutrients. Think of it like giving your cactus a mini-fast – it allows the plant to focus on establishing new connections in its pot rather than processing an overabundance of nutrients.
As for watering, it’s time to create the perfect balance between moisture and dryness. Your soil should be damp but not waterlogged, with a slight give when you press your finger into it. Check the moisture level by inserting a toothpick or skewer into the soil; if it’s dry, it’s okay to water a little more, but avoid soaking the plant.
Keep an eye on your cactus’ behavior as well – if it starts to wrinkle or become soft, it might be too wet. Adjust your watering schedule accordingly to prevent root rot and ensure your cactus has enough room to thrive in its new pot.
Repotting Your Cactus
Now that you’ve chosen a new pot for your cactus, it’s time to learn how to properly repot and give it the best chance at thriving in its new home. In this section, we’ll walk through the step-by-step process of repotting your cactus safely and successfully.
Handling and Removing the Cactus from the Old Pot
When handling your cactus during repotting, it’s essential to exercise care and caution. Start by gently grasping the sides of the pot, making sure not to touch the plant itself. This will prevent accidental damage or shock to the roots.
To remove the cactus from its old pot, slide a blunt instrument like a chopstick or spoon between the pot and the soil to loosen it. Once loose, carefully lift the cactus out of the pot, taking care not to disturb the roots.
If the cactus is stuck due to the pot’s size or material, don’t force it out as this can cause damage to the plant. Instead, use a gentle rocking motion to coax the cactus free. This may take some patience and persistence but will prevent any unnecessary harm to your plant.
To further minimize stress on the roots, consider handling the cactus over a piece of newspaper or a tray to catch any loose soil. This makes cleanup easier and helps keep your work area clean and tidy.
Adding Fresh Soil and Fertilizer (If Needed)
When adding fresh soil and fertilizer to the new pot, it’s essential to get it right. Over-fertilizing can be detrimental to your cactus, causing damage and even death. Start by lightly mixing a balanced, water-soluble fertilizer into the fresh soil according to the manufacturer’s instructions.
For most cacti species, you’ll want to mix about 1-2 teaspoons of fertilizer per gallon of water. However, if your cactus is particularly sensitive or demanding, consult with a local nursery or experienced cactus breeder for guidance on the best fertilizer ratio for your specific plant. As you fill in the gaps between the roots and fresh soil, be gentle to avoid compacting the soil.
Some popular cacti species like Prickly Pear (Opuntia spp.) and Christmas Cactus (Schlumbergera bridgesii) tend to thrive with a more diluted fertilizer solution (about 1/4 strength). Conversely, larger or more mature cacti may require less frequent but more substantial doses of fertilizer. Keep in mind that it’s always better to err on the side of caution and start with a smaller amount, gradually increasing as needed based on your cactus’s response.
Aftercare: Watering and Lighting
Now that you’ve repotted your cactus, it’s time to focus on its new environment. Proper watering and lighting are crucial for your plant to thrive in its new pot.
Adjusting Your Cactus’s Watering Schedule
After repotting your cactus, it’s essential to adjust its watering schedule to prevent over-watering and ensure optimal health. When choosing a new potting mix, consider the type of soil used. A well-draining cactus mix is perfect for most species, but if you’re growing in a humid climate or using an indoor potting mix, you may need to make adjustments.
In general, it’s best to water your repotted cactus less frequently than usual, as the roots are still adjusting to their new environment. Start by checking the soil moisture with your finger, making sure not to get water on the plant’s body. If the top 1-2 inches of soil feels dry, it’s time to water.
Avoid common mistakes like watering too much or too little. Over-watering can lead to root rot and kill your cactus, while under-watering can cause stress and slow growth. Monitor your plant’s response to its new environment and adjust the watering schedule as needed. Be patient and remember that repotted cacti may take longer to recover than those not recently repotted.
Providing Optimal Lighting for Your Repotted Cactus
Providing optimal lighting for your repotted cactus is crucial for its health and growth. After repotting, your cactus may require brighter light conditions to compensate for the root disturbance and promote healthy recovery. If possible, move your cactus to a south-facing window or a sunroom where it can receive direct sunlight for at least 4-6 hours a day.
However, if you’re unable to relocate your cactus, consider using grow lights as a substitute. LED grow lights are energy-efficient and emit minimal heat, making them an ideal choice for indoor cacti. Place the grow light 12-18 inches above the plant, adjusting its intensity based on the manufacturer’s recommendations.
Monitor your cactus’ response to the new lighting conditions, watching for signs of stress or overexposure such as wrinkled or discolored skin. Adjust the lighting accordingly to prevent damage and ensure a smooth recovery. With proper lighting, your repotted cactus will thrive in its new environment, developing strong roots and vibrant growth.
Common Mistakes to Avoid When Repotting
When repotting a cactus, it’s easy to make mistakes that can harm your plant, so let’s take a closer look at some common errors to avoid in this process.
Over-Handling and Stressing Your Cactus
When repotting your cactus, it’s easy to get caught up in the excitement of giving it more room to grow. However, over-handling and stressing your cactus can be just as detrimental as under-watering or over-watering. Over-handling occurs when you excessively handle your cactus during repotting, causing unnecessary stress on the plant.
This excessive handling can cause physical damage to the roots and stem of your cactus, leading to a weakened immune system and making it more susceptible to pests and diseases. To minimize this risk, handle your cactus as little as possible when repotting. When you must handle it, make sure to support its weight and avoid touching the delicate spines or sensitive areas.
Another common mistake people make is shocking their cacti during the repotting process. This occurs when you suddenly change the environment of your cactus, such as moving it from a smaller pot to a larger one with fresh soil, without acclimating it first. To avoid shocking your cactus:
* Water it thoroughly before repotting to make the transition less jarring
* Acclimate your cactus to its new environment by placing it in a shaded area for 7-10 days before transferring it to its permanent location
* Avoid sudden changes in temperature or humidity
By taking these precautions, you can minimize the stress on your cactus and ensure a smooth repotting process. Remember, patience is key when working with delicate plants like cacti. By handling them gently and acclimating them to their new environment, you’ll give your cactus the best chance at thriving in its new pot.
Troubleshooting Common Problems
If you’re experiencing issues with your cactus after repotting, don’t worry – we’ve got some common problems and solutions right here. Let’s tackle those pesky issues together!
Dealing with Root Rot and Overwatering
When repotting your cactus, one of the most common problems you may encounter is root rot and overwatering. This can be a devastating issue for these delicate plants, causing them to become soggy, soft, and eventually succumb to fungal infections.
Root rot occurs when water sits in the soil for too long, causing the roots to break down and decay. Overwatering is often the culprit behind this problem. To prevent root rot after repotting your cactus, make sure to give it a thorough soaking before allowing excess water to drain from the pot. This will ensure that the roots absorb as much moisture as possible.
Here are some key signs of overwatering: soft and mushy stems, yellow or brown spots on the skin, and an unpleasant sour smell emanating from the soil. If you notice any of these symptoms, stop watering immediately and repot your cactus in a well-draining mix to prevent further damage.
In severe cases of root rot, you may need to prune affected roots to prevent the spread of infection. Be gentle when handling the roots, as cacti can be quite delicate.
Encouraging New Growth and Healthy Roots
Encouraging new growth and healthy roots after repotting is crucial for the long-term health of your cactus. To achieve this, it’s essential to adopt a thoughtful approach to pruning, fertilizing, and providing optimal conditions.
Pruning is a great way to encourage new growth in your cactus. By removing old or damaged segments, you’re allowing the plant to focus its energy on producing new, healthy tissue. When repotting, take this opportunity to carefully trim any dead or dying areas, cutting just above a node (the joint where a segment meets the main stem). This will not only promote new growth but also prevent the spread of disease.
Fertilizing your cactus is also vital for encouraging healthy roots and new growth. Use a balanced, water-soluble fertilizer specifically formulated for cacti and succulents during the growing season (spring-fall). Dilute the fertilizer to half the recommended strength, as cacti are sensitive to over-fertilization.
In addition to proper pruning and fertilizing, providing optimal conditions will also encourage new growth. Ensure your cactus is receiving sufficient light, watered sparingly but thoroughly, and kept in a well-ventilated area with moderate temperatures between 60-80°F (15-27°C). By combining these factors, you’ll be well on your way to promoting healthy roots and new growth in your repotted cactus.
Frequently Asked Questions
How soon can I expect to see new growth after repotting my cactus?
New growth typically occurs within a few weeks to a couple of months after repotting, depending on factors such as the cactus’s species, age, and growing conditions. Keep in mind that your cactus may initially focus its energy on establishing itself in its new pot rather than producing new growth.
What are some common signs of root rot, and how can I prevent it?
Common signs of root rot include soft or mushy roots, black or brown discoloration, and a sour or ammonia-like smell. To prevent root rot, ensure your cactus is potted in well-draining soil, avoid overwatering, and monitor for any changes in its health.
Can I repot my cactus at any time of year, or are there specific seasons to consider?
While you can repot your cactus at any time, it’s generally recommended to do so during the spring or summer months when the plant is actively growing. Avoid repotting during fall or winter when the plant is dormant.
How often should I fertilize my newly repotted cactus, and what type of fertilizer should I use?
Fertilize your cactus sparingly after repotting, about 1-2 times a month with a balanced, water-soluble fertilizer. As your cactus becomes more established, you can gradually increase the frequency of fertilization.
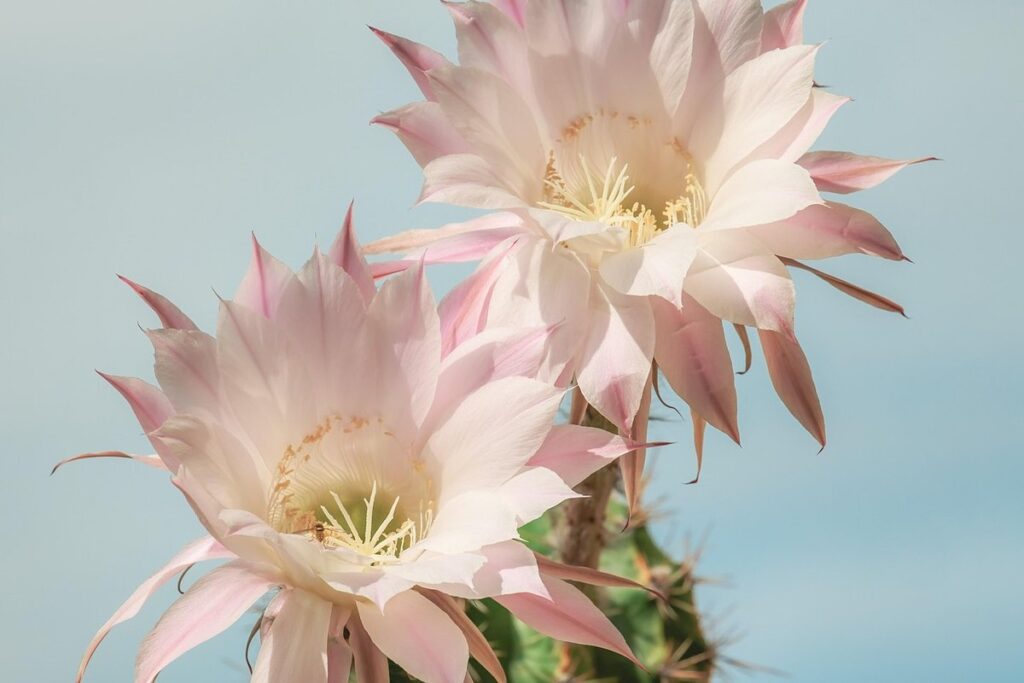
What if my cactus is still in bloom when I need to repot it? Will this affect its flowering schedule?
Repotting your cactus while it’s in bloom may temporarily disrupt its flowering cycle. However, with proper care and conditions, your cactus should eventually return to its regular blooming schedule. Be patient and provide optimal growing conditions for the best results.