As you gaze at your beautiful gladiolus flowers, you’re probably wondering what to do next. While their vibrant blooms are sure to brighten up any garden or arrangement, it’s essential to know how to care for them after they’ve finished flowering. Not only will this help promote healthy growth and encourage long-lasting blooms, but it’ll also give you the chance to replant and divide your bulbs for future seasons. In this article, we’ll guide you through the simple steps of removing deadheads, dividing and replanting gladiolus bulbs, storing them over winter, and even growing from seed. By following our expert advice, you’ll be able to enjoy your stunning gladiolus flowers year after year, and learn how to cultivate a thriving garden full of these magnificent blooms.
Removing Deadheads
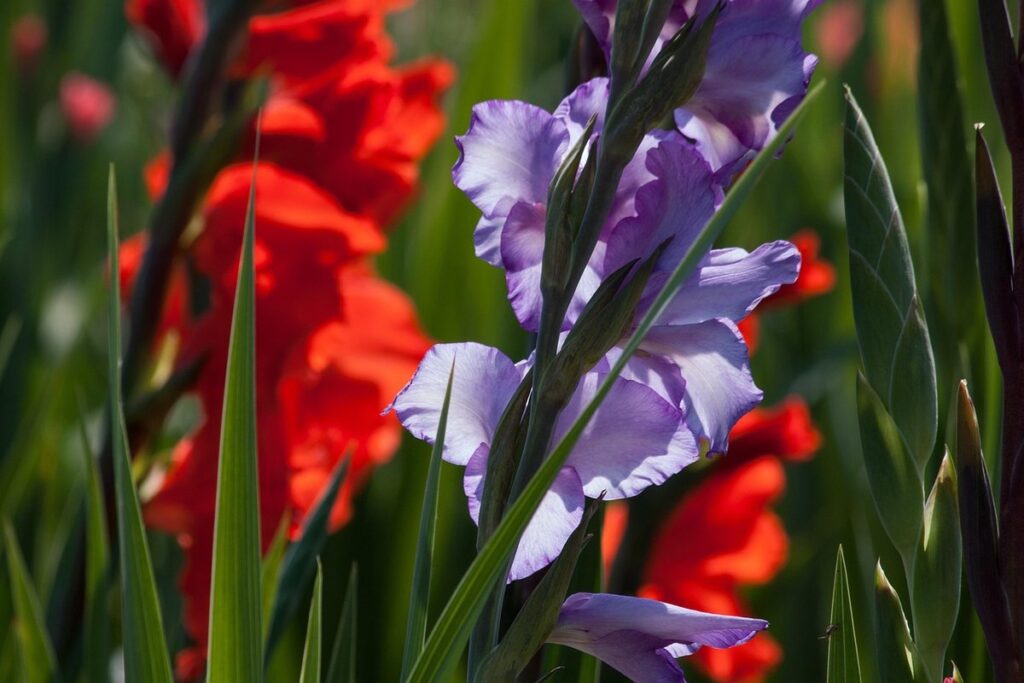
Now that the flowers have bloomed and faded, it’s time to cut back the dead gladiolus stalks to encourage new growth. We’ll walk you through this simple process together in just a minute!
Why Remove Dead Flowers?
Removing dead flowers from gladiolus plants may seem like a trivial task, but it’s an essential step in maintaining their health and promoting future blooms. When you leave dead flowers on the plant, they can begin to seed, which can lead to the production of new offspring that may not be true to the original plant’s characteristics.
This is especially important for gladiolus varieties that have been specifically bred for their unique traits or colors, as unwanted seeds can spread and dilute these desirable qualities. By removing dead flowers, you’re also preventing the plant from putting energy into seed production, which means it will focus its resources on developing healthy new growth.
Regularly remove spent blooms to encourage your gladiolus plants to direct their energy towards producing strong stems, robust foliage, and abundant future flowers. This simple practice can make a significant difference in the overall health and productivity of your gladiolus plants, ultimately ensuring they continue to thrive for years to come.
How to Cut Back Gladiolus Stems
Cutting back gladiolus stems after flowering is an essential step to encourage repeat blooming and promote plant health. To do this effectively, you’ll need a few simple tools: pruning shears or loppers, gloves, and a bucket or container for disposing of the dead flowers.
Start by removing any dead or dying blooms, cutting them back to about 1-2 inches from the top of the stem using your pruning shears. This will help direct energy towards new growth rather than supporting non-productive flowers. Next, cut back the flower spike itself to within an inch or two of the base of the plant.
As you cut, take care not to damage any remaining foliage or harm nearby plants. Work in a well-ventilated area and consider wearing gloves to protect your hands from thorns and sap. Remove any weak or damaged stems, cutting them back to about one-third of their original length.
Once you’ve finished pruning, dispose of the dead flowers and inspect the plant for any signs of disease or pests. With proper care and maintenance, your gladiolus should be ready to produce new blooms in a few weeks’ time.
Dividing and Replanting
Now that your gladiolus have finished blooming, it’s time to give them some TLC so they’ll bloom again next year. In this section, we’ll cover how to divide and replant your glads for maximum results.
When to Divide and Replant Gladiolus
When it comes to dividing and replanting gladiolus bulbs, timing is everything. The ideal time for division depends on where you live and the climate in your area. Generally, it’s best to divide gladiolus bulbs after they have finished blooming, but before the foliage has a chance to die back completely.
This might seem counterintuitive, as you’d think that allowing the foliage to die back would be the best time for division. However, dividing too early can actually harm the bulb and reduce its chances of producing blooms in future years. By waiting until the foliage has begun to yellow and fade, but is still green, you’ll be able to gently dig up the bulbs and separate them without causing damage.
In areas with mild winters, it’s often possible to divide gladiolus bulbs in the fall or early winter, while in colder climates, it’s better to wait until spring. Regardless of when you choose to divide your gladiolus bulbs, be sure to replant them immediately and water well to give them a head start on their next growing season.
Preparing the Soil for Division
When dividing and replanting gladiolus, it’s essential to prepare the soil correctly to ensure healthy growth and blooming. Gladiolus tend to deplete the soil of nutrients as they grow, so adding some organic matter can help replenish these resources.
Start by removing any dead or damaged leaves from the rhizomes, as these can harbor disease and pests that might affect the rest of the plant. Next, carefully dig up the entire clump, taking care not to damage the delicate rhizomes. Break apart the clumps into individual sections, making sure each section has at least one “eye” or growing point.
Now it’s time to prepare the soil for replanting. Add a 2-inch layer of compost or well-rotted manure to the planting area, mixing it in thoroughly with the existing soil. You can also use a balanced fertilizer at this stage, following the manufacturer’s instructions for application rates. Finally, make sure the soil is moist but not waterlogged before replanting the gladiolus sections.
Storing Bulbs for Next Year’s Bloom
Now that you’ve enjoyed your gladiolus’ beautiful blooms, let’s talk about how to store their bulbs safely over winter so they’ll come back next year. Proper storage is key to successful rebloom.
How to Cure Gladiolus Bulbs
Curing gladiolus bulbs after flowering is an essential step to promote healthy growth and prevent rot. When a gladiolus stem finishes blooming, the bulb should still be firm to the touch. If it’s soft or mushy, remove any dead flowers and leaves, making sure not to damage the bulb.
To cure the bulb, stop watering it immediately after flowering. This allows the bulb to dry out slightly, which helps prevent rot from setting in. You can speed up the curing process by placing the bulb in a warm, dry location with good air circulation. It’s essential to keep the bulb away from direct sunlight and moisture.
After 3-4 weeks of drying out, you can trim back the foliage to within an inch of the neck of the bulb. This will help conserve energy for next year’s bloom. Then, store the bulb in a cool, dark place with good air circulation until spring, when new growth should begin. Proper curing is crucial to ensure your gladiolus bulbs remain healthy and produce beautiful blooms year after year.
It’s worth noting that some gardeners recommend dusting the cured bulb with a fungicide or sulfur powder to prevent pests and diseases. This can be a useful extra precaution, especially if you live in an area prone to fungal growth.
Proper Storage Conditions
To store gladiolus bulbs properly over the winter months, you’ll need to provide them with a dry and cool environment. Start by selecting a clean, ventilated area such as a garage, shed, or unheated basement. Avoid storing bulbs near heating vents or radiators, as this can cause moisture buildup.
Gather some essential materials: paper bags, cardboard boxes, or mesh bags specifically designed for bulb storage. These will help keep the bulbs dry and prevent moisture from accumulating.
Next, trim the stems to about an inch above the base of the bulb. This helps prevent rotting and encourages new growth come springtime. Now, gently brush off any excess dirt from the bulbs using a soft-bristled brush or a clean cloth. Then, place the bulbs in their designated storage containers, making sure they’re not touching each other.
Finally, seal the bags or boxes to maintain humidity levels. This will help prevent moisture from entering and causing damage. Be patient – with proper care, your gladiolus bulbs should be ready to bloom again next year.
Using Gladiolus in Cut Flower Arrangements
When it comes to bringing new life to your gladiolus, consider cutting their stems to use in vibrant cut flower arrangements that will brighten up any room.
Tips for Choosing Fresh Gladiolus Stems
When selecting fresh gladiolus stems for cut flower arrangements, it’s essential to choose blooms that are healthy and of high quality. This will ensure that your arrangement lasts longer and looks its best.
Start by inspecting the stem itself. Look for firm, unblemished skin with no signs of decay or wilting. A healthy stem should have a slightly woody base, indicating maturity and strength. Avoid stems with cracks or soft spots, as these can lead to premature spoilage.
Next, examine the blooms themselves. Opt for flowers that are tightly closed and show minimal fading. Vibrant colors indicate freshness, while muted tones may suggest age. Gently grasp the stem and bend it – if it snaps easily, it’s likely too mature for cutting.
When choosing gladiolus stems, select those with a full, plump bud count. This will ensure that your arrangement has plenty of blooms to enjoy over time. Finally, consider the variety itself: some gladiolus types are bred specifically for cut flower arrangements and tend to hold their shape better than others.
Creating Long-Lasting Gladiolus Arrangements
To create long-lasting gladiolus arrangements, you’ll want to focus on selecting healthy stems and preparing them properly. Start by choosing stems with firm, tightly closed buds, as these will last longer than open flowers. Trim the stems at an angle using a sharp knife or pruning tool, removing any leaves that would sit below the waterline in your vase.
Next, prepare your vases by filling them with fresh, lukewarm water and adding a floral preservative (if available). This mixture typically includes ingredients like sugar, acid, and anti-bacterial agents to extend the life of your cut flowers. For gladiolus, you can also add 1-2 tablespoons of white vinegar per quart of water for added protection against bacterial growth.
When arranging your stems, place them in a way that creates balance and visual interest. Gladiolus blooms come in various sizes and shapes, so consider grouping similar-sized flowers together or alternating between larger and smaller blooms. Finish by adding any greenery or filler flowers to fill out the arrangement and complete the look.
Growing Gladiolus from Seed
Growing gladiolus from seed can be a bit more challenging than other methods, but with the right guidance and care, you’ll be enjoying beautiful blooms for years to come. Let’s explore the process step by step.
Why Grow Gladiolus from Seed?
Growing gladiolus from seed offers several benefits that can be appealing to gardeners looking for ways to propagate new varieties and save money on bulb costs. One of the main advantages is that it allows you to create new, unique hybrids by crossing different gladiolus varieties. This process enables you to produce offspring with desirable traits such as improved flower color, size, or shape.
Another benefit is cost-effectiveness. Purchasing gladiolus bulbs can be expensive, especially if you’re looking for specific types or colors. By growing from seed, you can save money and still have access to a wide range of varieties. This approach also provides an opportunity to share seeds with friends and family members, making it a great way to expand your garden without breaking the bank.
To grow gladiolus from seed, start by sowing them in the fall or early spring when the weather is cooler. Keep the soil consistently moist during this period, and then reduce watering once the plants are established. With proper care, you can enjoy these beautiful flowers for years to come and potentially discover new hybrids that will become your favorite additions to the garden.
Sowing and Caring for Gladiolus Seeds
Sowing and caring for gladiolus seeds can be a bit more involved than other types of flower seeds. First, you’ll need to obtain the seeds from a reputable supplier or collect them from mature plants after they’ve finished blooming. To start, fill small pots or seed trays with a good quality seed compost that’s specifically designed for direct sowing.
Make sure the soil is moist but not waterlogged, and then sow 3-4 seeds per pot about 1/4 inch deep. Keep the soil consistently moist during this period, as gladiolus seeds can be slow to germinate. It can take anywhere from 30 to 60 days for them to sprout.
Once you notice seedlings emerging, reduce watering and allow the compost to dry out slightly between waterings. Transplant them into individual pots when they have 2-3 sets of leaves. Provide plenty of light and maintain a temperature range of around 65-70°F (18-21°C) for optimal growth. With proper care, your gladiolus seedlings should be ready to plant out in their final positions within 6-8 weeks.
Conclusion and Tips for Success
Now that you’ve enjoyed your gladiolus blooms, let’s discuss what to do next to keep these beautiful plants thriving. Here are some essential tips for their care and propagation.
Recap of Key Takeaways
Now that you’ve learned the best ways to care for gladiolus after flowering, let’s recap the key takeaways and reminders. Proper care will not only extend the life of your plants but also ensure they continue to thrive.
After removing the flower spikes, it’s essential to allow the foliage to die back naturally. This process can take several weeks to a few months, depending on the variety and growing conditions. Resist the temptation to cut back the leaves prematurely, as this can weaken the bulb and make it more susceptible to disease.
Once the foliage has died back, you can dig up the bulbs and store them in a cool, dry place for winter. Make sure they’re completely dry before storing, as moisture can cause rot and mold. You can also let the bulbs remain in the ground, but this will depend on your climate and region.
To ensure successful replanting next year, make sure to label each bulb with its location in the garden. This is especially important if you have multiple varieties or colors of gladiolus.
Some final reminders: deadheading after flowering can encourage more blooms, while cutting back the foliage too early can cause stress and lead to disease. Be patient and allow the plants to follow their natural cycle. With proper care and attention, your gladiolus will continue to bloom year after year, providing beauty and elegance to your garden.
In summary, by following these simple steps, you’ll be able to extend the life of your gladiolus and enjoy their stunning blooms for years to come.
Frequently Asked Questions
How do I know when to replant gladiolus bulbs after division?
When dividing and replanting gladiolus bulbs, it’s essential to wait until the new growth appears, usually around late winter or early spring. This ensures that you’re replanting during the optimal time for growth and blooming.
Can I store gladiolus bulbs in a garage or basement?
Yes, you can store gladiolus bulbs in a cool, dry place like a garage or basement. However, ensure the storage area is not prone to moisture buildup, which can lead to rotting. Store the bulbs in paper bags or breathable containers, and keep them away from direct sunlight.
What’s the ideal depth for replanting gladiolus bulbs?
When replanting gladiolus bulbs, plant them 3-4 times deeper than they were originally, with the basal plate (where the bulb was attached to its stem) facing upwards. This will help prevent moisture from accumulating and encourage healthy growth.
How often should I check on stored gladiolus bulbs for signs of rot?
Regularly inspect your stored gladiolus bulbs every 1-2 months during the winter, looking out for signs of rot or mold. If you notice any issues, remove the affected bulbs immediately to prevent further damage and disease.
Can I grow gladiolus from seed indoors under artificial lighting?
Yes, you can grow gladiolus from seed indoors using artificial lighting. However, ensure that the light source is at least 12-14 hours a day and provides sufficient intensity (around 40-50 watts) to simulate natural conditions.