Bringinging your beloved outdoor plants indoors can be a wonderful way to add some natural beauty to your home, but let’s face it – it’s also an invitation for unwanted pests to crash the party. Pests like aphids, whiteflies, and spider mites can quickly take over your indoor space if you’re not prepared. But don’t worry, we’ve got a comprehensive guide to help you bring your outdoor plants indoors without inviting bugs into your home. In this article, we’ll walk you through preparation, cleaning, and long-term care tips specifically designed to keep pests at bay. From inspecting for hidden bugs to creating a healthy indoor environment, we’ll cover it all. By the end of this guide, you’ll be confident in your ability to bring your outdoor plants indoors without sacrificing a bug-free home.
Preparing Your Plant and Space
Before bringing your outdoor plant inside, it’s essential to prepare both the plant itself and its new indoor space. This will help ensure a smooth transition for your plant and reduce the likelihood of unwanted pests entering your home.
Choosing the Right Time to Bring in Your Plant
When it comes to bringing an outdoor plant inside without bugs, timing is everything. You see, most insects are attracted to certain conditions, and by choosing the right time to bring your plant indoors, you can minimize the risk of unwanted visitors.
Consider the temperature outside – if it’s scorching hot or freezing cold, it’s best to wait until the temperatures moderate before bringing your plant inside. This will help prevent any shock to the plant, which can make it more susceptible to pests.
Also, think about the humidity levels in your home and outdoors. If you live in a dry climate, it may be beneficial to bring your plant indoors when the outdoor humidity is high, as this can help reduce the risk of bugs seeking refuge in your home.
Most importantly, consider the natural growing season of your plant. For example, if you’re bringing an indoor/outdoor tropical plant like a fiddle leaf fig or palm tree inside during its dormant season, it may be less likely to attract pests.
By taking these factors into account and choosing the right time to bring your outdoor plant indoors, you can create a bug-free environment for both your plant and yourself.
Inspecting Your Plant for Pests
Inspecting for pests is a crucial step before bringing your plant indoors. Take a close look at your plant’s leaves and stems for any signs of infestation. Check for tiny dots, eggs, or actual insects on the underside of leaves, as these can be indicative of aphids, whiteflies, or spider mites. Look out for sticky honeydew droplets on the leaves, which are often a sign of an aphid infestation.
If you do spot any pests, treat them immediately to prevent further damage and minimize the risk of them spreading indoors. Mix up a solution of mild dish soap and water, and spray it directly onto the affected areas. For more severe infestations or for spider mites, use neem oil or insecticidal soap as directed.
When inspecting your plant, also check for eggs or larvae on nearby surfaces, such as pots or trays, which can help you identify the source of the pest problem and prevent re-infestation when bringing the plant indoors. Regularly inspecting your plant will give you a head start in maintaining a healthy indoor environment and keeping pests under control.
Preparing a Safe Space for Your Plant
When bringing an outdoor plant inside without bugs, it’s essential to prepare a safe and suitable space for it. This involves considering several key factors that will determine the health and well-being of your plant. Lighting is one of these critical elements. Most houseplants prefer bright, indirect light, but this can vary depending on the species. For example, some plants like Chinese Evergreen and Pothos thrive in low-light conditions, while others like Snake Plant and Dracaena require more direct sunlight.
Temperature control is another crucial aspect to consider. Most indoor plants prefer daytime temperatures between 65-75°F (18-24°C) and nighttime temperatures around 55-65°F (13-18°C). If your home has a consistently cooler or warmer temperature, it may be necessary to use heating or cooling systems to create an optimal environment.
Humidity control is also vital. Indoor spaces tend to be drier than outdoor environments, which can cause stress to plants. To maintain humidity levels suitable for your plant, you can place the pot on a tray filled with water and pebbles or use a humidifier nearby. Regularly monitoring these factors will help ensure your indoor space is safe and conducive to your plant’s growth.
Cleaning and Disinfecting Your Plant
Before putting your plant in a cozy indoor spot, make sure to clean and disinfect it thoroughly to prevent any unwanted critters from hitchhiking inside. This step is crucial for a bug-free indoor space.
Removing Excess Soil and Debris
When bringing an outdoor plant inside, it’s essential to remove excess soil and debris from the roots and pot to prevent pests and diseases from being transferred indoors. This process may seem tedious, but it’s a crucial step in ensuring the health and well-being of your indoor plants.
Start by gently removing as much loose soil as possible from the top of the plant using a soft-bristled brush or your fingers. You can also use a gentle stream of water to help dislodge any stubborn soil particles. Next, carefully lift the plant out of its pot and gently wash away any remaining debris with lukewarm water.
It’s especially important to clean around the roots, as this is where pests and diseases often take hold. Use your fingers or a soft-bristled brush to remove any dirt or debris that may be clinging to the roots. Finally, inspect the plant for any signs of pests or disease, such as white powdery patches or sticky honeydew droplets.
By taking the time to thoroughly clean and disinfect your plant, you’ll be able to bring it inside with confidence, knowing that you’ve taken all necessary precautions to prevent unwanted guests from joining you indoors.
Treating the Plant with a Pest-Repellent Solution
When you bring an outdoor plant inside, it’s essential to treat it with a pest-repellent solution to protect it from indoor pests. One popular option is neem oil, which can be used as a foliar spray or soil drench. Mix the recommended concentration of neem oil with water and spray it evenly on all surfaces of the plant, making sure to get the undersides of leaves as well.
Another effective option is insecticidal soap, which can be applied directly to the leaves and stems of the plant. It’s also a good idea to treat the soil with a pest-repellent solution, such as insecticidal soap or neem oil, to prevent any pests that may have been present in the soil from causing problems.
Before applying any pest-repellent solution, make sure to read and follow the label instructions carefully. It’s also essential to choose a product that is safe for your specific plant type and not too harsh, as this can cause damage or other adverse effects.
When using neem oil or insecticidal soap, it’s recommended to repeat the treatment every 7-10 days to ensure continued protection against pests.
Disinfecting Your Plant’s Pot and Surroundings
When bringing an outdoor plant inside, it’s crucial to disinfect its pot and surrounding area to prevent the spread of diseases and pests. This step is often overlooked, but it’s essential for maintaining a healthy indoor garden. Many common houseplants are susceptible to fungal diseases that thrive in moist environments, such as powdery mildew or root rot.
To disinfect your plant’s pot, start by removing any dead or dying leaves or debris from the soil and potting mix. Then, soak the pot in a solution of 1 part bleach to 9 parts water for at least 30 minutes. This will help kill any bacteria or fungi present on the surface of the pot.
Next, focus on disinfecting the surrounding area where you’ll be placing your plant. Use a gentle disinfectant spray or wipe down surfaces with a mixture of equal parts water and white vinegar. Be sure to pay attention to any nearby plants, furniture, or decorations that may come into contact with your new indoor addition.
Remember to always rinse the pot thoroughly after soaking it in bleach solution before replanting your indoor beauty. By taking these simple steps, you’ll be creating a healthy environment for your plant to thrive and reducing the risk of introducing unwanted pests or diseases into your home.
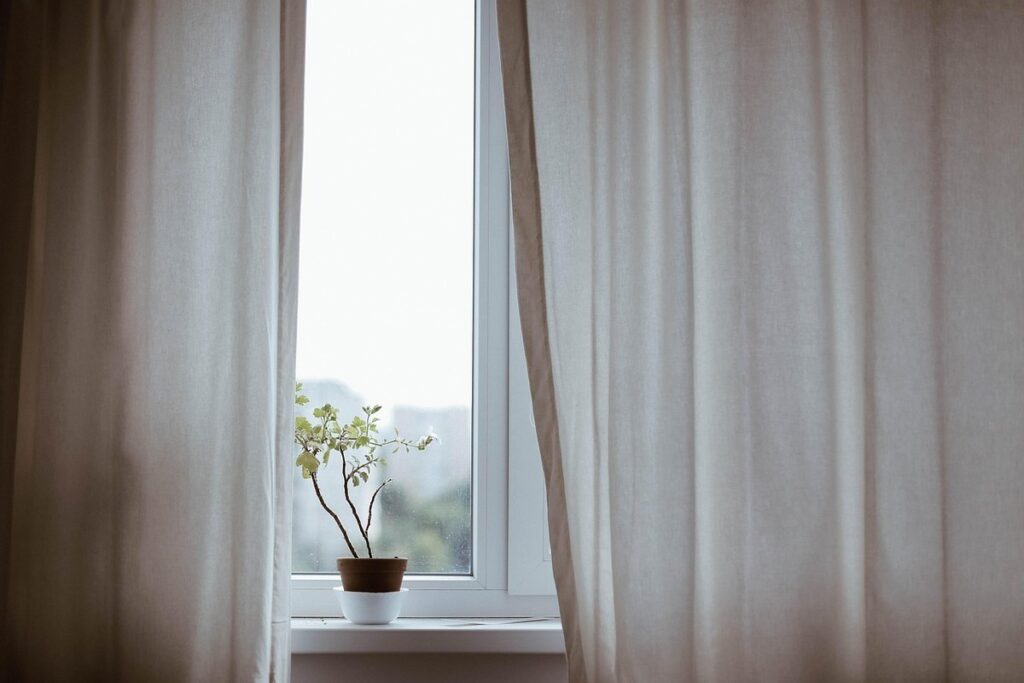
Bringing Your Plant Indoors Safely
When bringing outdoor plants inside, it’s essential to inspect them carefully for pests before introducing them to your indoor space. Let’s walk through a simple process to ensure you bring in healthy plants and avoid unwanted critters.
Acclimating Your Plant to Indoor Conditions
When bringing an outdoor plant indoors, it’s essential to acclimate it to the new environment gradually. This process helps prevent shock and reduces the risk of pest infestations. Start by placing the plant in a shaded area or near a north-facing window for 7-10 days before moving it to its permanent spot.
Monitor your plant’s response to indoor conditions, especially temperature fluctuations. Most houseplants prefer daytime temperatures between 65°F to 75°F (18°C to 24°C) and nighttime temperatures around 55°F to 65°F (13°C to 18°C). If you live in an area with extremely cold or hot temperatures, consider using a humidifier or heater to maintain a stable environment.
Humidity is another critical factor. Indoor plants prefer a humidity level between 40% to 60%, which is typically lower than outdoor conditions. To adjust your plant’s acclimation pace, keep it away from direct sunlight and air conditioning vents. As you observe its response, move the plant gradually towards its new location, ensuring it receives the right amount of light and temperature.
Monitoring Your Plant for Signs of Stress
When you bring an outdoor plant indoors, it’s not uncommon for it to experience some stress as it adjusts to its new environment. This can manifest in various ways, and being aware of these signs is crucial to helping your plant recover quickly.
One of the most common indicators of stress is yellowing leaves. If you notice that your plant’s leaves are turning yellow or developing brown edges, it may be due to a sudden change in humidity levels indoors. To address this, make sure to adjust your watering schedule accordingly and provide sufficient humidity through misting or using a humidifier nearby.
Another sign of stress is droopy stems. This can be caused by low light conditions or temperature fluctuations. Move your plant to a brighter location or consider using grow lights to supplement its natural light needs. Be cautious not to place it near heating vents or drafty windows, as this can cause undue stress on your plant.
Keep an eye out for pests as well, which can sometimes be mistaken for signs of stress. Regularly inspect your plant’s leaves and stems for any signs of infestation, such as white powdery patches or actual insects.
Preventing Pests from Returning to Your Indoor Plant
To prevent pests from returning to your indoor plant, it’s essential to remain vigilant and take proactive steps. Regular inspections are crucial in detecting potential pest issues before they become a full-blown problem. Set aside time each week to carefully examine your plant’s leaves, stems, and soil for any signs of pests such as spider mites, mealybugs, or scale.
Another effective strategy is using pest-repellent products. These can be applied directly to the plant or used in the surrounding environment to deter pests from returning. Look for products containing neem oil or insecticidal soap, which are known for their ability to repel and kill common indoor pests.
When bringing your outdoor plant indoors, keep it isolated for a few weeks before introducing it to other plants to prevent cross-infestation. This will also give you an opportunity to inspect the plant more thoroughly and identify any potential issues early on.
Common Issues When Bringing Outdoor Plants Indoors
When bringing outdoor plants indoors, you may encounter some common issues that can prevent your plant from thriving, such as pest infestations and root shock. Let’s take a closer look at these potential problems.
Dealing with Root Rot and Overwatering
When bringing outdoor plants indoors, it’s not uncommon for them to experience shock, and one of the most common issues that arises is root rot. This occurs when the roots of the plant become waterlogged due to excessive moisture, causing the roots to rot and eventually kill the plant. To prevent root rot, make sure to thoroughly inspect your plant before bringing it inside and trim any dead or damaged roots.
Overwatering is another issue that can occur when plants are moved indoors, as the indoor environment tends to be more humid than outdoors. This can cause the soil to become waterlogged, leading to root rot. To combat this, ensure you’re not watering your plant too frequently. Instead, check the moisture level of the soil by sticking your finger into it up to the first knuckle; if the soil feels dry, it’s time to water.
Monitor your plant’s response to its new environment and adjust its care accordingly. If you notice signs of root rot, such as yellowing leaves or a soft stem, take action promptly by repotting the plant in well-draining potting mix and reducing watering frequency.
Managing Indoor Pests Like Spider Mites or Mealybugs
Managing indoor pests like spider mites or mealybugs can be a challenge when bringing outdoor plants indoors. These pesky critters can infest your plants and cause damage, but there are ways to prevent and treat them.
Spider mites are tiny, spider-like insects that feed on plant sap, causing yellowing leaves and stippling. To get rid of them, you’ll need to act quickly. Start by isolating the affected plant to prevent the infestation from spreading to other plants. Then, use a gentle insecticidal soap or neem oil to treat the plant. Spray the entire plant, making sure to cover all surfaces.
Mealybugs, on the other hand, are small, white insects that secrete a sticky substance called honeydew. To prevent mealybugs from taking over your indoor plants, inspect them regularly and quarantine any new plants before introducing them to your collection. You can also use a systemic insecticide or neem oil to control infestations.
To prevent pests like spider mites and mealybugs from becoming a problem in the first place, make sure your indoor space is clean and free of debris. Keep humidity levels under 50%, as high humidity can attract pests. Use good air circulation by opening windows or using fans to improve airflow. Regularly inspect your plants for signs of infestation and treat them promptly if you notice any problems.
Tips for Long-Term Success with Your Indoor Plant
Now that your outdoor plant is safely indoors, let’s focus on making sure it thrives long-term by avoiding common mistakes and learning a few expert tips. Here are some key considerations for success.
Maintaining Optimal Lighting Conditions
When bringing an outdoor plant inside, it’s essential to replicate the optimal lighting conditions that it was accustomed to outside. This means providing the right balance of light intensity, duration, and spectrum for your indoor plant to thrive.
Light intensity refers to the amount of light that reaches your plant. If you’re moving a high-light-requiring plant like a succulent or cactus indoors, it needs bright, direct sunlight for at least 4-6 hours a day. Place it near a south-facing window or use grow lights to provide sufficient light. On the other hand, if your plant prefers low light, such as Chinese Evergreen or Pothos, it can tolerate indirect light and may even suffer from excessive light.
The duration of light exposure is also crucial. Most houseplants prefer 12-14 hours of daylight and then rest in darkness for 10-12 hours. This circadian rhythm helps regulate their growth and development. Be mindful of the timing of your indoor plant’s natural daylight cycle to replicate this rhythm as closely as possible.
Lastly, consider the spectrum of light your plant requires. Some plants prefer full-spectrum lighting that includes all colors, while others may require more blue or red light. Research the specific needs of your indoor plant and adjust its lighting accordingly.
Keeping Your Plant Hydrated and Fertilized
When bringing an outdoor plant inside, it’s essential to consider its new environment and adjust its care routine accordingly. One of the most critical aspects is ensuring your indoor plant stays hydrated and fertilized.
Firstly, observe how your plant responds to indoor conditions, which can be quite different from outdoors. Some plants might require more water or nutrients due to lower light levels, while others might need less moisture in a warmer environment. Monitor its leaves for signs of overwatering (yellowing or droopy) or underwatering (crispy edges). Adjust your watering schedule based on these observations.
Fertilize your indoor plant with a balanced, water-soluble fertilizer during the growing season (spring and summer). Dilute the recommended strength to avoid burning the roots. You can also repot your plant in fresh potting mix every 2-3 years to replenish nutrients.
Lastly, be mindful of the type of fertilizer suitable for your specific plant species. Some plants, like African Violets or Begonias, require a high-pH fertilizer, while others might need acidic or alkaline conditions. Research the optimal care routine for your indoor plant to ensure it receives the right balance of nutrients and water.
Monitoring Your Plant’s Health and Adjusting as Needed
Monitoring your plant’s health is crucial to its long-term success indoors. As you bring an outdoor plant inside, it’s essential to keep a close eye on its adjustment period. Changes in temperature, humidity, and light exposure can be overwhelming for plants. Regularly inspect your plant for signs of stress, such as yellowing leaves, droopy stems, or the development of pests.
Start by checking the plant’s soil moisture daily. Overwatering is common when bringing outdoor plants indoors, so make sure not to drown your plant. Stick a finger into the soil up to the first knuckle, and if it feels dry, it’s time for watering. Also, keep an eye on your plant’s leaf color. If leaves turn yellow or develop brown spots, adjust your fertilization schedule accordingly.
Adjusting the care routine as needed is key to your plant’s survival indoors. Be prepared to make changes to its light, temperature, and humidity preferences based on how it responds to its new environment. With a little observation and patience, you’ll be able to create an ideal indoor space for your outdoor plant to thrive.
Frequently Asked Questions
What should I do if I notice pests on my plant after bringing it indoors?
If you notice pests like aphids, whiteflies, or spider mites on your plant after bringing it indoors, don’t panic! Immediately inspect the affected areas and treat them with a pest-repellent solution. Isolate the infested plant to prevent the pests from spreading to other indoor plants. Regularly monitor your plant for signs of stress and take prompt action to address any issues.
Can I bring multiple outdoor plants inside at once, or should I introduce them separately?
It’s generally recommended to bring in one plant at a time to prevent potential pest introductions and ensure a smooth transition for each plant. This will also allow you to monitor their adaptation to the indoor environment and make adjustments as needed. By introducing multiple plants over a period of time, you’ll minimize the risk of pests spreading and reduce stress on your plants.
How do I prevent pests from returning to my indoor plant after treating it?
Preventing pest re-infestation requires ongoing effort and vigilance. Regularly inspect your plant for signs of pests, maintain optimal lighting conditions, keep your plant hydrated and fertilized, and ensure good air circulation around the plant. Consider using natural pest-repellents like neem oil or insecticidal soap to prevent future infestations.
Can I use chemical pesticides on my indoor plants if I notice pests?
While chemical pesticides can be effective in eliminating pests, they may not be the best solution for indoor plants due to potential harm to humans and pets. Consider using natural pest-repellents like neem oil or insecticidal soap instead of chemical pesticides to minimize risks and promote a healthy indoor environment.
How long does it typically take for an outdoor plant to adjust to indoor conditions?
The time it takes for an outdoor plant to adapt to indoor conditions can vary depending on factors like temperature, humidity, and light exposure. Generally, most plants require 1-4 weeks to acclimate to the new environment. Monitor your plant’s response and make adjustments as needed to ensure a smooth transition.