Avocado lovers, are you ready to unlock the secrets of your favorite fruit? Did you know that the pit or seed of an avocado holds the potential for growth into a brand new tree? Not only is it a fun and rewarding experience, but sprouting an avocado seed also has numerous benefits for the environment and our health. By learning how to sprout an avocado seed, you’ll not only be reducing waste and growing your own food, but you’ll also gain access to a new, nutrient-rich addition to your kitchen.
In this article, we’ll guide you through the step-by-step process of sprouting an avocado seed, from choosing the right variety to optimizing growth. You’ll learn about the benefits of sprouting your own avocado seeds and how it can be a fun and rewarding experience for the whole family.
Benefits and Basics of Avocado Seed Sprouting
Now that you’ve successfully sprouted your avocado seed, let’s dive into the benefits of growing it into a tree and what to expect along the way. This section covers the basics of caring for a young sapling.
What is Avocado Seed Sprouting?
Avocado seed sprouting has gained significant attention in recent years due to its numerous benefits and potential for growing edible plants from what was once considered waste. The process of sprouting avocado seeds involves allowing them to germinate and grow into a sapling, which can then be transplanted into soil.
This method has been around for centuries, with some evidence suggesting that the Aztecs used avocado seed sprouts as a food source. However, it wasn’t until recent years that this technique gained popularity due to its potential to reduce waste and provide a sustainable source of nutrition. The process is relatively simple: first, dry out the avocado seeds by leaving them in a warm, dry place for a few days; next, plant the seed about 1-2 inches deep in a pot filled with soil, making sure not to overwater.
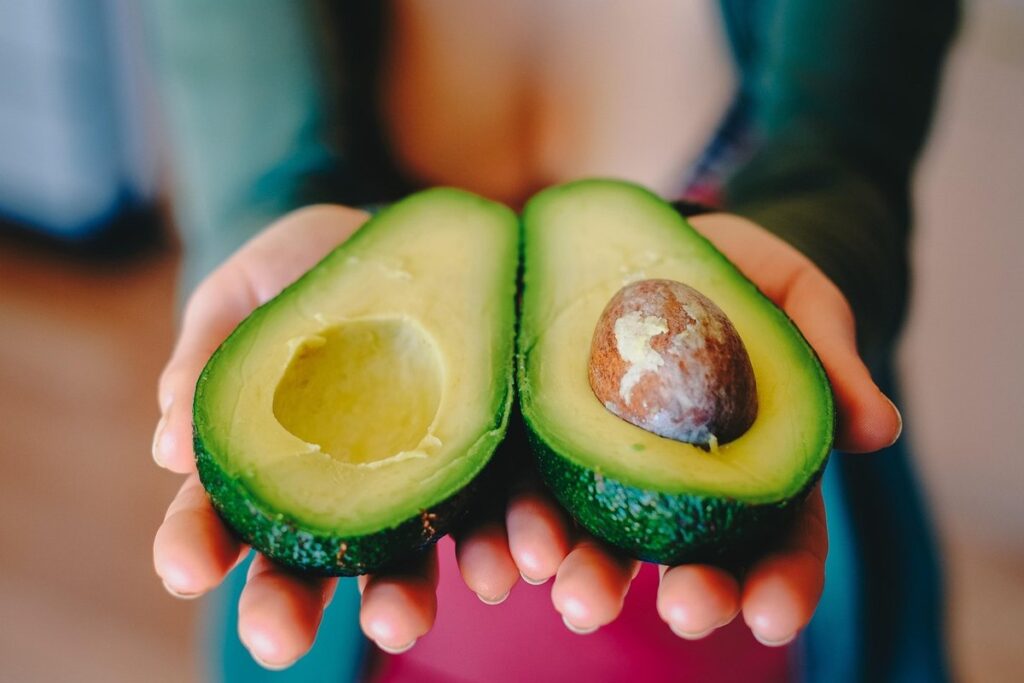
One of the main advantages of avocado seed sprouting is that it allows individuals to grow their own nutrient-rich plants without relying on external sources. Avocado seeds are rich in antioxidants and can provide a good source of fiber, vitamins, and minerals when sprouted and consumed. As the popularity of this method continues to grow, it’s likely that we’ll see more people incorporating avocado seed sprouting into their daily lives.
Choosing the Right Avocado for Sprouting
When it comes to choosing the right avocado for sprouting, not all varieties are created equal. Some types of avocados are better suited for sprouting than others due to factors like seed size and quality.
For example, Hass avocados are a popular choice for sprouting because they have relatively large seeds that tend to be more viable. Fuerte and Bacon avocados are also good options, as their seeds are often slightly larger and easier to work with. On the other hand, some varieties like Reed and Shepard may be more challenging due to smaller seed sizes.
When selecting avocado seeds for sprouting, look for those with a slight indent on one end, indicating that they have been properly formed and have a higher likelihood of germinating successfully. Avoid seeds with cracks or soft spots, as these can indicate damage or poor quality. It’s also essential to choose fresh, plump avocados from which to extract the seed, as older, softer seeds may not sprout well.
Ultimately, the success of your avocado seed sprouting project will depend on various factors, including the type of avocado, seed size and quality, and growing conditions. By choosing the right variety and paying attention to these details, you’ll be well on your way to successfully growing healthy, delicious sprouts from your own home.
Safety Considerations for Home Sprouting
When it comes to sprouting avocado seeds at home, there are some potential risks to be aware of. Over-watering is one of the most common mistakes that can lead to mold, mildew, and root rot. To avoid this, make sure to check the moisture level of your seed’s soil regularly and only water when necessary.
Another risk is contamination from bacteria or pests. To minimize this risk, use a clean and sterile environment for sprouting, wash your hands thoroughly before handling the seeds, and ensure that all equipment and tools are sanitized. You can also consider using a probiotic spray to promote healthy growth and reduce the risk of disease.
To further reduce the risks associated with home sprouting, it’s essential to maintain good hygiene practices. Use a clean glass jar or container for your seed, change the water frequently, and ensure that the environment is well-ventilated. By following these simple tips, you can enjoy a safe and successful avocado seed sprouting experience.
In addition, be mindful of any allergies or sensitivities you may have when handling seeds or working with soil. If you’re unsure about any aspect of the process, consider doing some research or consulting with an expert to ensure that your environment is safe and healthy for you and your loved ones.
Preparing the Avocado Seed for Sprouting
To successfully sprout your avocado seed, you’ll need to prepare it properly by removing any remaining fruit from the seed and drying it completely. This step is crucial for healthy growth.
Cleaning and Sterilizing the Seed
When it comes to sprouting an avocado seed, one crucial step that often gets overlooked is cleaning and sterilizing the seed. This process may seem tedious, but trust us, it’s essential for the health and success of your seedling.
Before you start scrubbing away, let’s talk about why this step is so important. Avocado seeds can harbor bacteria, fungi, or even pests like spider mites or mealybugs that can inhibit germination or even kill your seedling. To prevent these issues, it’s vital to give your seed a good cleaning and disinfecting.
To clean your avocado seed, start by gently scrubbing it with a soft-bristled toothbrush under running water. Remove any visible dirt, oil, or residue that may be clinging to the seed. Next, soak the seed in a solution of 1 part bleach to 10 parts water for about an hour. This will help kill any lingering bacteria or fungi. Alternatively, you can use hydrogen peroxide as a disinfectant – simply mix equal parts hydrogen peroxide and water, and soak the seed for 30 minutes. After either treatment, rinse your seed thoroughly with clean water to remove any remaining bleach or hydrogen peroxide residue.
Remember, the cleaner and healthier your avocado seed is, the better its chances of successfully sprouting into a thriving plant!
Activating the Seed with Water and Light
Activating the seed with water and light is a crucial step in preparing it for sprouting. To start, fill a cup or container with lukewarm water, making sure to submerge the entire avocado seed. Let it soak for 24 hours, changing the water once after 12 hours. This process helps soften the hard outer shell, allowing the seed to absorb moisture more efficiently.
After soaking, place the seed in a sunny spot, ideally near an east- or west-facing window with direct sunlight. If you’re using grow lights, position them about 6 inches above the seed. The goal is to provide gentle warmth and light, promoting germination. Keep in mind that avocado seeds can take anywhere from 3 to 12 days to sprout, depending on conditions.
During this initial stage, observe the seed closely for signs of growth, such as a tiny white root emerging or the first set of leaves unfolding. It’s essential to maintain a humid environment by covering the container with a clear plastic bag or cloche. Check on the seed daily, making sure it’s not developing mold due to excess moisture.
Remember that temperature plays a significant role in germination; aim for daytime temperatures between 65°F and 75°F (18°C and 24°C) and slightly cooler nights. Avoid placing the seed near heating vents or drafty areas, as this can hinder the sprouting process.
Creating a Suitable Environment for Germination
Creating a suitable environment for germination is crucial to encourage the avocado seed to sprout. To start with, choose a container that’s at least 6-8 inches deep to accommodate the root growth of the seedling. Fill it with a well-draining seed starting mix or a mixture of peat moss and perlite. Moisten the soil gently but make sure not to overwater, as this can lead to fungal diseases.
Place the avocado seed in the container, with the pointed end facing upwards. Cover it with a thin layer of the seed starting mix, about 1-2 inches deep. Water the soil carefully, ensuring that it’s moist but not waterlogged. Keep the environment warm, with temperatures between 65-75°F (18-24°C). Avoid direct sunlight, as it can cause the seed to dry out.
Maintain high humidity by covering the container with a clear plastic bag or a cloche. This will help retain moisture and provide a stable temperature. Check on the seed daily, making sure that the soil is consistently moist but not waterlogged. With proper care, the avocado seed should germinate within 3-12 weeks, depending on factors like temperature and humidity.
Sprouting and Caring for Your Avocado Sapling
Now that your avocado seed has sprouted, it’s time to focus on giving your new sapling the care it needs to thrive. Let’s dive into the essential steps for nurturing your young tree.
Monitoring Progress and Maintaining Humidity
As you continue to care for your avocado sapling, it’s essential to monitor its progress and maintain optimal humidity levels. This will help prevent common issues from arising during the sprouting process.
To monitor your sapling’s progress, check on it daily by looking for new growth, such as leaves or stems emerging from the soil. Make sure to water it when the top inch of soil feels dry to the touch. You can also observe changes in color or texture, like a slight softening of the skin or a visible increase in leaf size.
Maintaining optimal humidity levels is crucial during the sprouting process. Avocado saplings prefer a humid environment, typically between 50-70% relative humidity. To maintain this level, you can place the pot on a tray filled with water and pebbles or use a humidifier near the plant. This will help prevent the leaves from becoming scorched or dropping.
Some common issues that may arise during the sprouting process include fungal infections, root rot, or nutrient deficiencies. Regularly inspect your sapling for signs of these problems and take corrective action promptly to ensure its health and well-being.
Transplanting the Sapling into a Larger Container
When you first sprout an avocado sapling, it’s essential to give it room to grow. This means transplanting it into a larger container to provide the necessary space for its roots to expand. The ideal time to transplant is when the sapling has 2-3 sets of leaves and has outgrown its current pot.
Choose a well-draining potting mix specifically designed for indoor plants, as avocado saplings prefer slightly acidic soil with good water retention. A 6-8 inch deep container will give your sapling ample room to grow without becoming too top-heavy. To minimize transplant shock, gently remove the sapling from its current pot, taking care not to damage any of the roots.
Trim back any leggy or overgrown branches using clean pruning shears to encourage bushy growth and prevent the sapling from becoming leggy. This will also help you maintain a more manageable size while promoting healthy development. Once your sapling is settled in its new home, keep an eye out for signs of stress, adjusting watering schedules as needed to ensure your young tree thrives.
Common Challenges and Troubleshooting
As you nurture your avocado sapling, you may encounter some common challenges that can be frustrating. One of the most frequent issues is overwatering, which can lead to root rot and kill the young tree. To avoid this, make sure to check the soil moisture regularly by sticking your finger into the soil up to the first knuckle. If it feels dry, it’s time for watering.
Another challenge is pests and diseases. Keep an eye out for aphids, whiteflies, and spider mites, which can be controlled with neem oil or insecticidal soap. Fungal diseases like root rot and leaf spot can be treated with fungicides, but prevention is key – maintain good air circulation around the tree and avoid getting water on the leaves.
Transplant shock is also a common issue when moving your sapling from a pot to the ground. This can cause stress and even lead to dieback. To mitigate this, choose a spot with similar conditions to where it was previously grown, and gently firm the soil around the roots after transplanting.
Remember that every avocado sapling is unique, so be patient and observe its specific needs. With proper care and attention, your tree should thrive, and you’ll be enjoying fresh avocados in no time!
Advanced Techniques for Optimizing Avocado Tree Growth
Now that you’ve successfully sprouted your avocado seed, let’s dive into advanced techniques to optimize its growth and ensure a healthy, thriving tree. We’ll explore expert methods for achieving maximum yields.
Using Grow Lights and Temperature Control
When it comes to optimizing avocado tree growth, using grow lights and temperature control can make all the difference. These advanced techniques allow you to create a tailored environment for your tree’s specific needs, promoting healthy development and maximizing yields.
Grow lights are particularly useful for indoor growers who don’t have direct sunlight available. By providing supplemental lighting, you can simulate the intense light conditions that avocado trees require during their growth phase. Look for LED grow lights specifically designed for plant growth, as they emit a broad spectrum of light that promotes photosynthesis. Place them 12-18 inches above your tree, and adjust the distance based on the light’s intensity.
Temperature control is also crucial for avocado tree growth. These trees thrive in temperatures between 65-75°F (18-24°C), with optimal growth occurring between 68-72°F (20-22°C). Avoid placing your tree near heating or cooling vents, fireplaces, or drafty windows, as sudden temperature fluctuations can cause stress and stunted growth.
By implementing these advanced techniques, you’ll be able to create a customized environment that meets the unique needs of your avocado tree. Experiment with different lighting schedules and temperature settings to find what works best for your specific tree, and watch it thrive under your care.
Fertilization and Pruning Strategies
When it comes to optimizing avocado tree growth, fertilization and pruning strategies play a crucial role. A balanced diet of essential nutrients is vital for healthy growth and fruit production. Organic fertilizers, such as compost tea and fish emulsion, are excellent choices as they provide a slow release of nutrients while maintaining soil health.
On the other hand, synthetic fertilizers can be overused and lead to nutrient deficiencies in the long run. For example, excessive nitrogen application can promote leaf growth at the expense of fruiting. To avoid this, use a balanced fertilizer that contains equal amounts of nitrogen, phosphorus, and potassium (NPK).
Pruning is also essential for maintaining a healthy avocado tree structure. Remove any dead or diseased branches to prevent the spread of disease. Prune the canopy to allow sunlight penetration, promoting even growth and fruiting. Avoid over-pruning, as this can stress the tree, leading to reduced yields.
Common pruning mistakes include topping the central leader, which can lead to weak branching and a reduction in fruit production. Instead, prune select branches, maintaining an open center structure that allows for air circulation and sunlight penetration.
Conclusion: Successfully Growing Your Avocado Tree from Seed
Congratulations on successfully sprouting your avocado tree from seed! You’ve taken the first crucial step towards nurturing a healthy and thriving plant. Now that you have a sapling, it’s essential to provide it with optimal growing conditions. Make sure to place your seedling in a spot with bright, indirect light and maintain a consistent temperature between 65-75°F (18-24°C). Water carefully, avoiding overwatering which can lead to root rot. Fertilize sparingly during the first year, using a balanced fertilizer. Prune your tree regularly to encourage bushy growth and prevent legginess. With proper care, your avocado sapling will grow into a robust tree that will reward you with delicious fruit in as little as 3-5 years. Keep observing and adjusting your care routine accordingly to ensure the best results.
Frequently Asked Questions
Can I grow multiple avocado saplings from a single seed?
While it’s technically possible to grow multiple saplings from a single seed, the success rate is lower due to the increased competition for resources during germination. It’s recommended to start with a fresh seed or multiple seeds to ensure optimal growth and reduce the risk of disease transmission.
How long does it take for an avocado sapling to produce fruit?
The time it takes for an avocado sapling to produce fruit can range from 3-10 years, depending on factors like climate, soil quality, and pruning practices. It’s essential to provide your sapling with proper care, including regular fertilization, pest management, and adequate sunlight.
Can I use a grow light to speed up the germination process?
Yes, using a grow light can accelerate the germination process by providing optimal light conditions for the seed. However, be cautious not to overheat the soil, as this can cause root damage or kill the delicate seedling. Monitor temperature and adjust lighting accordingly.
How do I prevent pests from damaging my avocado sapling?
Regularly inspect your sapling for signs of pests like aphids, whiteflies, or spider mites. Use organic pest control methods whenever possible, such as neem oil or insecticidal soap, to maintain a balanced ecosystem and minimize harm to the environment.
Can I transplant my avocado sapling outdoors year-round, regardless of climate?
No, it’s essential to acclimate your sapling gradually to outdoor conditions before exposing it to harsh weather. Avoid transplanting during extreme temperatures (below 40°F or above 80°F) or when soil moisture is low. Start with a protected location and gradually move the sapling outdoors as it becomes more resilient.