Growing your own luffa plants can be a rewarding experience, not only for their unique beauty but also for their numerous practical uses. If you’re new to gardening or looking to expand your skills, learning how to grow and care for luffas is an excellent place to start. These versatile plants thrive in warm climates with well-drained soil, making them perfect for gardeners living in regions with mild winters. But beyond their ease of cultivation, luffa plants offer a wealth of benefits, from pest control and habitat creation to edible gourds that can be used in a variety of dishes. In this comprehensive guide, we’ll cover the ins and outs of growing, caring for, and harvesting luffa plants, including tips on soil preparation, climate considerations, and creative uses for these amazing plants in your garden ecosystem.
Understanding Luffa Plants
To grow luffa plants successfully, it’s essential to understand their unique needs and characteristics. This section will cover the basics of luffa plant growth habits and requirements.
What is a Luffa Plant?
Luffa plants have been a staple in many cultures for centuries, originating from the tropical and subtropical regions of Asia and Africa. These versatile plants are members of the Cucurbitaceae family, which also includes cucumbers, melons, and squash.
If you’re new to growing luffa, it’s essential to understand what these plants are all about. Luffa plants are vining annuals that thrive in warm weather conditions, typically reaching heights of 15-20 feet. They have large, coarse leaves with a hairy texture and produce an abundance of yellow flowers.
The most distinctive feature of luffa plants is their ability to grow into a robust, fibrous gourd that can be used as a natural exfoliant or even made into rope and cloth. Harvesting luffa pods at the right time is crucial; they should be picked when they are still green and tender, as they will eventually turn brown and dry out.
In many Asian cultures, luffa plants have been used for centuries not only for their practical uses but also for medicinal purposes. With proper care and attention, you can successfully grow your own luffa plant in your garden or backyard.
Benefits of Growing Luffa Plants
Growing luffa plants is not just a hobby for gardeners; it offers numerous benefits that can be utilized in various aspects of life. The fruit and other parts of the plant have multiple uses, making it an excellent addition to any garden.
The most obvious benefit of growing luffa plants is their unique fruit, which is a type of vegetable often used in Asian cuisine. The luffa fruit is rich in fiber, vitamins, and minerals, making it a nutritious addition to salads, stir-fries, and soups. It’s also a good source of antioxidants, which help protect against cell damage and inflammation.
Beyond its edible benefits, the luffa plant’s other parts have practical uses. The fibers from the fruit can be used for scrubbing pots, pans, and even washing clothes! The seeds contain an oil that has been used in traditional medicine for centuries to treat various health issues. Additionally, the luffa plant’s roots can act as a natural dye, giving fabrics a range of earthy tones.
To get the most out of your luffa plants, it’s essential to harvest them at the right time. The fruit should be picked when it turns yellow and the skin starts to wrinkle. This ensures the highest quality and usability of the plant parts. By doing so, you’ll be able to enjoy its numerous benefits while also reducing waste.
Growing luffa plants is a rewarding experience that not only provides fresh produce but also offers a sustainable way to use natural resources. With its multiple uses and practical applications, it’s no wonder why many gardeners choose to grow this versatile plant.
Soil and Climate Requirements
To grow a healthy luffa plant, it’s essential to provide the right soil conditions and climate environment, which we’ll dive into next. This includes choosing the perfect spot for your plant.
Ideal Soil Conditions
When growing luffa plants, it’s essential to have ideal soil conditions that provide optimal nutrients and support for healthy growth. Luffas prefer well-draining soil with a pH range between 6.0 and 7.0. Avoid using heavy clay or sandy soils as they can be too dense or dry for the plant.
In terms of specific soil types, luffa plants thrive in loamy soils that are rich in organic matter. You can create your own loam by mixing compost with sand or peat moss. A mix of 20% compost, 40% topsoil, and 40% perlite will provide the perfect blend for growing luffas.
To ensure good drainage, add a layer of organic mulch like straw or wood chips around the base of your plant. This will not only retain moisture but also suppress weeds that can compete with your luffa plants for nutrients.
Remember to test your soil pH regularly and adjust it accordingly to provide your luffa plants with optimal growing conditions.
Climate Considerations
When growing luffa plants, it’s essential to consider the ideal temperature and humidity ranges that will foster optimal growth. Luffas thrive in warm temperatures between 65°F (18°C) and 90°F (32°C), with an average temperature of around 75°F (24°C). They can tolerate a slight drop in temperature at night but may become dormant if it consistently dips below 55°F (13°C).
In terms of humidity, luffas prefer a relatively high level, typically between 50% and 70%. This is why they often thrive in tropical or subtropical climates. However, with proper care, you can also grow them in temperate regions by providing supplemental moisture.
To replicate these conditions in your garden, ensure that the soil isn’t too dry during the day and that there’s sufficient air circulation to prevent fungal diseases from taking hold. A simple way to achieve this is by installing a misting system or using a humidifier nearby. Keep in mind that luffas are sensitive to extreme temperature fluctuations, so it’s crucial to provide some protection for young plants during intense heatwaves or sudden cold snaps.
Planting and Caring for Luffa Plants
To successfully grow luffa plants, you’ll need to understand how to properly plant them and provide the right care throughout their life cycle, which we’ll cover next. This section will walk you through both of these essential steps in detail.
Preparing the Seedling
Before you can start enjoying the benefits of growing luffa plants, you need to prepare their seeds for planting. This process is crucial as it sets the stage for healthy growth and development.
To begin with, luffa seeds are typically slow to germinate, taking anywhere from 7-14 days to sprout under ideal conditions. As a result, it’s essential to sow them indoors or in a greenhouse where you can control the environment.
If you’re starting your seeds indoors, fill seed trays or small pots with a well-draining seed starting mix. Plant the seeds about ¼ inch deep and 1-2 inches apart, depending on the variety. Keep the soil consistently moist but not waterlogged. Provide adequate light by placing the seedlings near a sunny window or under grow lights.
Alternatively, you can directly sow luffa seeds in the garden when the soil has warmed up to at least 65°F (18°C). Sow them about 1 inch deep and 3-4 feet apart in rows that are spaced 5-6 feet apart. Water the soil gently but thoroughly after sowing.
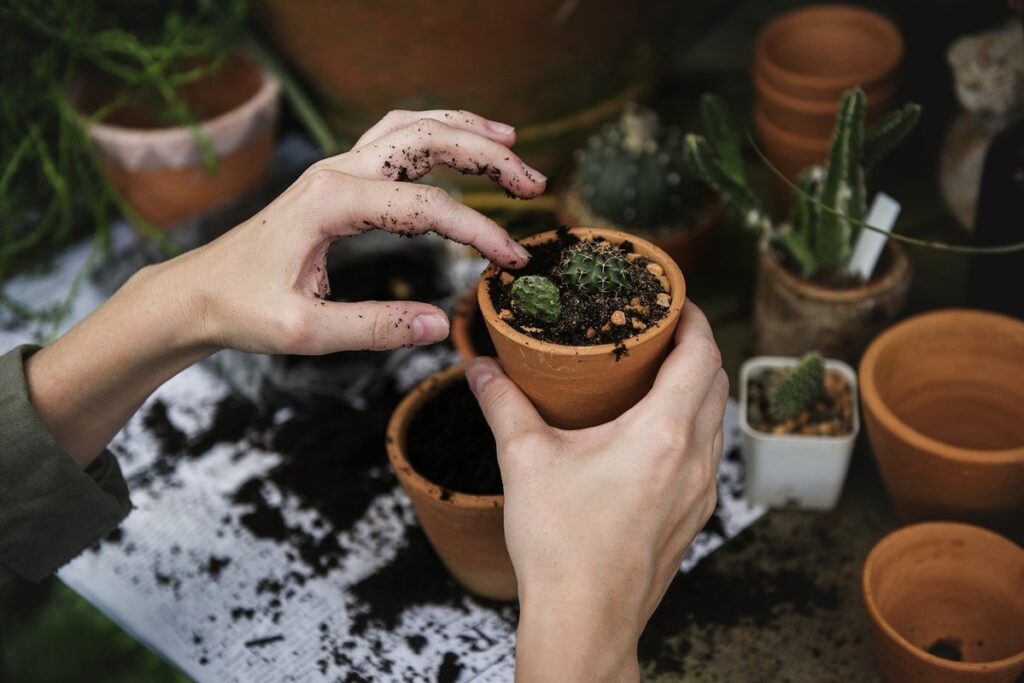
Transplanting Seedlings
When it’s time to transplant your luffa seedlings, you’ll want to do so carefully to avoid damaging their delicate roots. Wait until the seedling has at least two sets of leaves and its stem is around 4-6 inches tall. This typically takes around 7-10 days after sowing.
To prepare for transplanting, choose a container that’s one to two sizes larger than the current pot. Make sure it has good drainage holes in the bottom to prevent waterlogged soil. Fill the new container with a well-draining potting mix and gently remove the seedling from its old pot. Use your fingers or a blunt instrument to carefully loosen any compacted roots.
Plant the luffa seedling into its new home at the same depth as it was previously, firming in the soil around its base. Water thoroughly after transplanting to settle the soil. If you’re transplanting directly into the ground, choose a spot with full sun and well-draining soil. Space your seedlings about 12-18 inches apart to allow for proper growth.
Keep an eye on your transplanted seedling in the first few days after transplanting, as it may experience some shock from its new surroundings. Provide plenty of water and ensure it’s receiving enough light to support healthy growth.
Watering and Fertilization
When it comes to watering and fertilizing your luffa plants, providing adequate moisture and nutrients is crucial for healthy growth. Overwatering can lead to root rot, while underwatering can cause stress to the plant. Aim to water your luffa plants when the top 1-2 inches of soil feels dry to the touch.
As a general rule, luffa plants require about 1 inch of water per week, either from rain or irrigation. You can also check the moisture levels by inserting your finger into the soil up to the first knuckle. If the soil feels moist, wait another day before watering again.
In terms of fertilization, use a balanced fertilizer (10-10-10 NPK) and follow the recommended application rates on the package. For optimal results, fertilize your luffa plants once a month during the growing season (spring-fall). Make sure to dilute the fertilizer according to the instructions to avoid burning the roots.
Some gardeners also swear by adding compost or well-rotted manure to their soil for added fertility and water-holding capacity. You can mix 2-3 inches of compost into the top 6 inches of soil before planting, or add a 1-inch layer on top of the soil after watering.
Common Luffa Plant Problems and Solutions
Growing luffas can be a wonderful experience, but every gardener faces issues at some point. In this section, we’ll tackle common problems and provide practical solutions to keep your luffa plants thriving.
Pests and Diseases
When growing luffa plants, it’s essential to be aware of common pests and diseases that can affect their health. One of the most prevalent issues is aphids, which can be identified by their small, soft bodies and pear-shaped eggs on the stems and leaves. To prevent infestations, ensure your luffa plants receive adequate air circulation and maintain a clean growing area.
Whiteflies are another common pest that feeds on plant sap, causing damage to leaves and stems. They can be identified by their tiny wings and can transmit diseases such as yellowing leaves and stunted growth. Use neem oil or insecticidal soap to control whitefly populations.
Root rot is a fungal disease caused by overwatering, which can lead to the death of your luffa plant. To prevent root rot, ensure the pot has good drainage holes and avoid watering too frequently. Regularly inspect your plants for signs of discoloration or softening stems.
If you do notice any issues with pests or diseases, act quickly to treat them. For example, remove infested areas and dispose of them properly to prevent the problem from spreading.
Nutrient Deficiencies
Identifying nutrient deficiencies in luffa plants is crucial for their optimal growth and fruit production. A lack of essential nutrients can hinder the plant’s ability to thrive, leading to reduced yields and poor quality fruits. To diagnose a nutrient deficiency, inspect your plant regularly and look out for symptoms such as yellowing or browning leaves, stunted growth, and poor fruit formation.
Common nutrient deficiencies in luffa plants include nitrogen (N), phosphorus (P), potassium (K), magnesium (Mg), and iron (Fe) deficiencies. Nitrogen deficiency can be identified by yellowing of older leaves while the younger ones remain green. Phosphorus deficiency often results in purple or reddish tint on the leaves, stunted growth, and poor flowering.
To correct nutrient deficiencies, use a balanced fertilizer that provides N-P-K at a ratio of 10-10-10. Apply the fertilizer once a month during the growing season. You can also add magnesium sulfate to combat Mg deficiency, which often results in yellowing leaves with green veins. Iron deficiency is typically addressed by adding chelated iron supplements to the soil.
Harvesting and Processing Luffa Fruits
Now that you’ve grown your luffa plant, it’s time to reap the rewards. Learn how to harvest luffa fruits at the right stage of maturity and process them for use in a variety of ways.
Timing the Harvest
When it comes to harvesting luffa fruits, timing is everything. Picking them at the right moment will ensure optimal quality and texture, making them perfect for eating fresh or using in recipes. Typically, luffa fruits are ready to harvest 6-8 months after sowing.
To determine if your luffa fruit is ripe, gently twist it from the vine. A ripe fruit will come off easily, while an unripe one will not budge. Check the color as well – a fully matured luffa gourd is usually a pale yellow or cream color with green stripes. Avoid harvesting when the skin is still thick and hard, as this can indicate that the fruit is not yet ripe.
Timing your harvest correctly also depends on how you plan to use the fruits. For example, if you want to eat them fresh, pick them when they’re fully matured but still firm. If you’re looking to dry or preserve them, wait until the skin has started to wrinkle and crack, indicating that the fruit is overripe.
In most cases, a good rule of thumb is to harvest luffa fruits in the morning, after the dew has evaporated but before the heat of the day sets in. This ensures that the fruit is at its peak ripeness and will last longer once picked.
Processing Techniques
When it comes to processing luffa fruits, there are several methods you can use to preserve their unique flavor and nutritional benefits. One of the most common techniques is drying, which involves removing excess moisture from the fruit through air or machine-based dehydration. This method is ideal for preserving luffa fruits for long periods as it helps prevent spoilage and maintains its texture.
Another popular method is cooking, which can be done in a variety of ways including steaming, boiling, or sautéing. Cooking luffa fruits softens their texture and brings out their natural sweetness, making them a great addition to soups, salads, and smoothies. For example, you can steam luffa slices for 5-7 minutes until tender, then season with herbs and spices for a delicious side dish.
Preserving luffa fruits through pickling or jam-making is also a popular method. This involves soaking the fruit in a brine solution or cooking it down into a sweet preserve that can be stored in jars for later use. To make a simple luffa jam, combine cooked and pureed luffa with sugar and lemon juice, then heat until thickened.
Using Luffa Plants in Your Garden Ecosystem
When growing luffa plants, incorporating them into your garden ecosystem can be a game-changer for your entire garden’s health and biodiversity. This section explores how to do so effectively.
Companion Planting
When it comes to creating a thriving and diverse garden ecosystem, companion planting is an essential technique to explore. Luffa plants are not only beneficial for their unique characteristics but also make excellent companion plants that can benefit other species in the garden.
One of the primary benefits of using luffa as a companion plant is its ability to repel pests that can harm nearby vegetables and fruits. For instance, luffa’s strong scent deters aphids, whiteflies, and squash bugs from infesting neighboring plants. In addition, its sprawling habit shades the soil, reducing moisture loss and retaining nutrients for other plants.
Consider pairing luffa with companion crops like tomatoes, peppers, or cucumbers that share similar growing requirements. Luffa’s taproot also breaks up compacted soil, allowing for better air circulation and water penetration – a boon to nearby roots systems.
Uses for Other Parts of the Plant
While many gardeners focus on growing luffa for its fruit, there’s more to this versatile plant than just its sponge-like gourds. In fact, every part of the luffa plant has a use, and learning how to utilize them can be a great way to reduce waste and get more out of your gardening efforts.
Luffa leaves, for example, are edible and can be used in salads or as a cooked green. They have a slightly bitter flavor and a soft texture, similar to okra. To use luffa leaves in cooking, simply harvest them when they’re young and tender, wash them clean, and chop them up before adding them to your favorite recipe.
Luffa stems can also be used, not only as stakes or supports for other plants but also as a natural fiber source. You can dry the stems and then use the fibers to create twine, rope, or even paper. This is a great way to repurpose waste material and reduce your reliance on non-renewable resources.
Finally, luffa seeds can be saved and replanted for future harvests, ensuring a continuous supply of this versatile plant. You can also use them to make medicine, as they’re known to have anti-inflammatory properties.
Frequently Asked Questions
Can I grow luffa plants in containers if I don’t have a lot of space?
Yes, you can grow luffa plants in containers as long as they are at least 12-18 inches deep to accommodate the extensive root system. Make sure the container has good drainage holes and use a well-draining potting mix to prevent waterlogged soil.
How do I know when my luffa plant is mature enough for harvesting?
Luffa plants are typically ready for harvest about 100-120 days after sowing, when the gourds have turned yellow and become soft. Check for maturity by gently tugging on the stem; if it comes off easily, the gourd is ripe.
What should I do with luffa plants that don’t produce fruit?
If your luffa plant is not producing fruit, check for nutrient deficiencies and adjust your fertilization schedule accordingly. Also, ensure that your plant is receiving enough light and water. You can also try pruning the plant to encourage bushy growth and more fruiting.
Can I use luffa plants as a natural pest control in my garden?
Yes, luffa plants are known to repel pests like aphids and whiteflies due to their strong scent. Planting luffa alongside other beneficial plants can create a natural pest control system for your garden ecosystem.
How do I preserve luffa gourds after harvesting to use throughout the year?
To preserve luffa gourds, dry them thoroughly in a warm, well-ventilated area or using a food dehydrator. Then, store them in airtight containers to keep them fresh for up to six months. You can also pickle or freeze the gourds for long-term storage and use them in various recipes throughout the year.